Art of 3D printer in the middle of printing a Hackaday Jolly Wrencher logo

OpenSCAD In Living Color

I modified a printer a few years ago to handle multiple filaments, but I will admit it was more or less a stunt. It worked, but it felt like you had to draw mystic symbols on the floor of the lab and dance around the printer, chanting incantations for it to go right. But I recently broke down and bought a color printer. No, probably not the one you think, but one that is pretty similar to the other color machines out there.

Of course, it is easy to grab ready-made models in various colors. It is also easy enough to go into a slicer and “paint” colors, but that’s not always desirable. In particular, I like to design in OpenSCAD, and adding a manual intervention step into an otherwise automatic compile process is inconvenient.

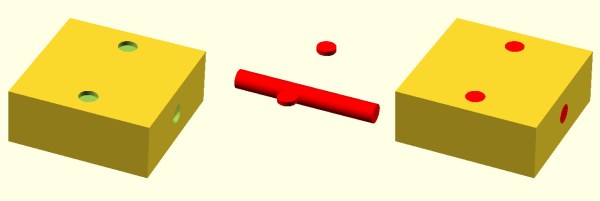
The other approach is to create a separate STL file for each filament color you will print with. Obviously, if your printer can only print four colors, then you will have four or fewer STLs. You import them, assign each one a color, and then, if you like, you can save the whole project as a 3MF or other file that knows how to handle the colors. That process is quick and painless, so the question now becomes how to get OpenSCAD to put out multiple STLs, one for each color.

But… color()

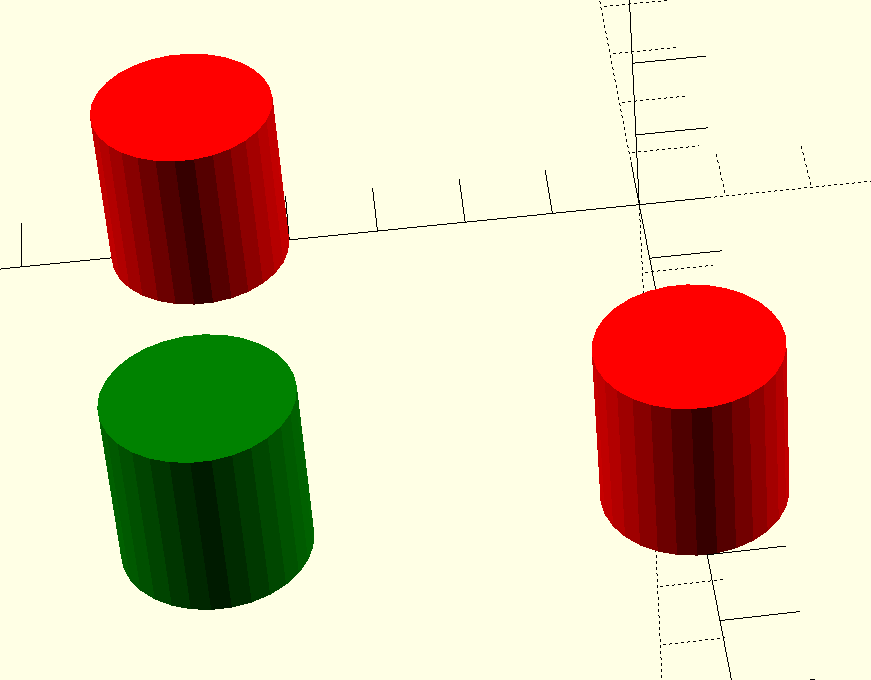
OpenSCAD has a color function, but that just shows you colors on the screen, and doesn’t actually do anything to your printed models. You can fill your screen with color, but the STL file you export will be the same. OpenSCAD is also parametric, so it isn’t that hard to just generate several OpenSCAD files for each part of the assembly. But you do have to make sure everything is referenced to the same origin, which can be tricky.

OpenSCAD Development Version Test

It turns out, the development version of OpenSCAD has experimental support for exporting 3MF files, which would allow me to sidestep the four STLs entirely. However, to make it work, you not only have to run the development version, but you also have to enable lazy unions in the preferences. You might try it, but you might also want to wait until the feature is more stable.

Besides, even with the development version, at least as I tried it, every object in the design will still need its color set in the slicer. The OpenSCAD export makes them separate objects, but doesn’t seem to communicate their color in a way that the slicer expects it. If you have a large number of multi-color parts, that will be a problem. It appears that if you do go this way, you might consider only setting the color on the very top-most objects unless things change as the feature gets more robust.

A Better Way

What I really wanted to do is create one OpenSCAD file that shows the colors I am using on the screen. Then, when I’m ready to generate STL files, I should be able to just pick one color for each color I am using.

Continue reading “OpenSCAD In Living Color”

Variable Width 3D Printing The Hard Way

The problem: you want to produce varying line thicknesses when 3D printing. The solution, if you are the Liqtra company, appears to be to put seven print heads together and enable one for thin lines, all of them for thick lines, and something in between for everything else. The technical details are scant, but from the video below and some pictures, you can get a general idea.

There are some obvious benefits and drawbacks. You’d expect that for the right kind of part, this would be fast since you are essentially laying down seven tracks at once. The downside is your track width varies in pretty course steps, assuming you have to use the maximum width of each nozzle to prevent gaps. New slicing software is a must, too.

The demos and pictures show multiple filament colors because it photographs well, but you’d assume in practice that you would use seven spools of the same material. The good thing is that you could print with a single nozzle where that’s important. We assume all the nozzles are the same size, and that will control the practical layer height, but that’s a small price to pay.

The company claims a much faster print, but as we mentioned, this will depend on the specific printed part. They also claim inter-layer strength increases as well, although we found that surprising. This is probably overkill for home users, but we imagine this would be an interesting technology for people trying to run production quantities through a printer.

We don’t remember seeing this approach with a homebrew printer, although having multiple extruders into one or multiple nozzles isn’t unusual anymore. It seems like you could experiment with this kind of technology pretty readily. Of course, there’s more than one way to speed up production.

Continue reading “Variable Width 3D Printing The Hard Way”

Multiextrusion 3D Printing And OpenSCAD

In a recent posting called Liar’s 3D Printing, I showed you how you can print with multiple filament colors even if your printer only has one extruder and hot end. It isn’t easy, though, and a lot of models you’ll find on sites like Thingiverse are way too complicated to give good results. An object with 800 layers, each with two colors is going to take a lot of filament changes and only the most patient among us will tolerate that.

What that means is you are likely to want to make your own models. The question is, how? The answer is, of course, lots of different ways. I’m going to cover how I did the two models I showed last time using OpenSCAD (seen below). The software is actually really well suited for this hack, making it easy for me to create a framework of several models to represent the different colors.

About OpenSCAD

I’m not going to say much about OpenSCAD. It is less a CAD package and more a programming language that lets you create shapes. We’ve covered it before although it changes from time to time so you might be better off reading the official manual.

The general idea, though, is you use modules to create primitives. You can rotate them and translate them (that is, move them). You can also join them (union) and take the difference of them (difference). That last is especially important. For example, look at the callsign plate above. Forget the text for now. See the two holes? Here’s the OpenSCAD that creates that shape:

 difference() {
 cube([basew,basel,basez]);
 // cut holes
 translate([4,basel/2,0]) cylinder(r=2,h=basez+2);
 translate([basew-4,basel/2,0]) cylinder(r=2,h= basez+2);
 }

The cube “call” creates the base. The cylinders are the holes and the difference “call” is what makes them holes instead of solid cylinders (the first thing is the solid and everything after is taken away). One key point: instead of numbers, the whole thing uses (mostly) variables. That means if you change the size of something, everything will adjust accordingly if you wrote the script well. Let’s look at applying these techniques for multiple colors.

Continue reading “Multiextrusion 3D Printing And OpenSCAD”