Fire Breathing Jack-O-Lantern Of Death

[Rick] is at it again, this week he has conjured up an even more dangerous Halloween hack. Thankfully [Rick] has included a warning of just how dangerous this hack can be, especially if children are around. Don’t do this hack unless you know what you’re doing and you can do it safely.

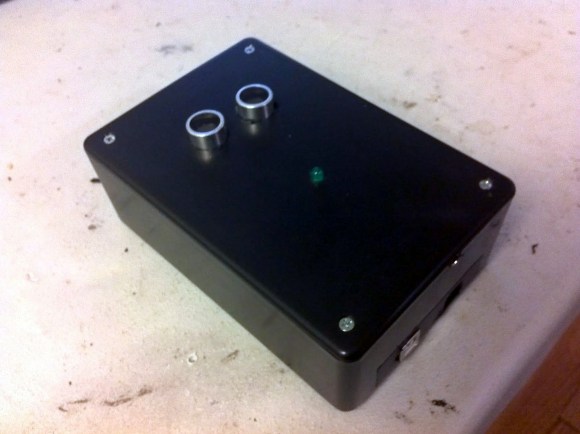
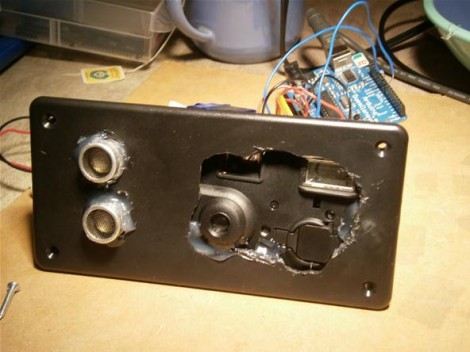
For [Rick]’s number four hack of the month he gives us the Fire Breathing Jack-O-Lantern of death! This isn’t a new idea but it is a very unique and simple implementation. We always love seeing the ingenuity of hackers to repurpose existing commercial products. In this case, [Rick] uses an automated air freshener which dispenses a flammable spray for the pumpkins breath if you dare get too close, but not so close as to get burned. The trigger distance is controlled by an Arduino and a Parallax Ping))) sensor so as to fire only when people are farther than 3 feet but closer than 5 feet. You can get a copy of the Arduino sketch from his blog posting.

A small candle is used to ignite the flammable spray, which shoots out 5 to 10 inches from the pumpkin’s mouth when triggered by the ultrasonic sensor. It couldn’t be simpler. The most challenging part was getting the large air freshener dispenser in the pumpkin with the flames coming out the mouth. A little extra whacking at the pumpkin fixed the fit, but planning for a larger pumpkin would be advised.

Theoretically the Arduino shouldn’t trigger and throw flames if people are too close, but when kids are running around they may come right into the target area unexpectedly. If this hack is used in the right place it would make for a great Halloween display item and could be used safely.

After the break you can watch [Rick’s] flame breathing Jack-o-Lantern build tutorial.

Continue reading “Fire Breathing Jack-O-Lantern Of Death”

No-touch Music Player

no-touch-mp3-player

This little box not only plays tunes, but it lets you control several aspects of playback without touching a thing. [Thomas Clauser] calls it the LighTouch and we like it because it uses inaudible sound to control audible sound.

We think the pair of cylinders sticking up through the top of this project enclosure will be recognized by most readers as the business end of an ultrasonic rangefinder. This is the only control interface which [Thomas] chose to use. Although he didn’t write very extensively about the specific control scheme he implemented, the video embedded in his post shows some of the gestures that cause the Arduino inside to change its behavior. For instance, a swipe of the hand at higher level starts playback, swiping at a lower level pauses it. When adjusting the volume the box responds to how close his hand is to that sensor. With this control in place, the music side of these things is simply handled by a music shield he is using.

LayerOne Badge Hacking Twofer

Here’s a pair of LayerOne Badge hacks that actually included the RC as intended by the badge designers.

First up, we have the autonomous RC car built by [Arko]. He calls it Stanley Jr. as an homage to the Stanford DARPA Grand Challenge vehicle. It uses an Arduino shield to add a servo with an ultrasonic rangefinder on it. The lets the vehicle drive a bit, stop and scan the horizon, then drive some more. The hope is the rangefinder will keep it from running into anything. There’s a quick test run embedded after the break.

On the right is the badge hack which [Zjpahle] finished up after the contest was already over. He also chose to go with an Arduino shield, this time it’s an IMU board. But he added a standalone Arduino board to the vehicle which drives some EL wire (ground effects) and adds IR sensors to the front of the car. The IR sensors are for obstacle avoidance, and the IMU lets him tilt his badge for direction control.

We looked at the winner of the badge hacking competition on Wednesday. That hack didn’t involve the car, but used the badge as a Morse Code beacon.

Continue reading “LayerOne Badge Hacking Twofer”

Quick And Easy Wildlife Camera

This wildlife camera is really easy to put together. You should keep it in mind if you’re ever tying to figure out what’s eating the heads off of all of your tulips. [Revoltlab] put it together, and although there’s one fatal flaw in this particular system, the concept is quite sound.

The build uses a camera, paired with an ultrasonic range finder. When something passes within the pre-set distance for the sensor, a servo motor clicks the shutter button on the camera. It’s all driven by an Arduino and powered from a 9V battery.

If you watch the video after the break you’ll discover the flaw we mentioned. This is a disposable film camera and requires winding between pictures. That hasn’t been implemented yet. But we’ve got an old digital camera with a broken LCD screen which would be perfect for the job. We’d have to do a bit more work to turn the camera on before taking the picture though.

There are a couple of possible upgrades to the idea. [Revoltlab] mentions removing the IR filter from the camera and adding an infrared flash for night-vision shots. But we would also recommend ditching the servo motor for a simple remote shutter solution as a way to avoid scaring the wildlife with the motor noise.

Continue reading “Quick And Easy Wildlife Camera”

Ultrasonic Combo Lock

[John Boxall] took a different route for a single-input combination lock. This unit uses a Ping ultrasonic range finder to input a four digit code. It’s a hardware upgrade, but uses the same basic concept as his button-based combo lock. That design used an Arduino to measure how long you hold down a single button, with a one second pause between inputs, to enter the code. This one also uses timing to establish when each digit is read, but that digit is grabbed as the distance between your hand and the sensor.

There are things we like and dislike about the redesign. This is obviously much more expensive than other button-based locks like this garage door opener we built. If we were to run with [John’s] design, we might spring for the Ping sensor (because it’s a pretty cool input) and replace he character LCD with an LED or two. The other drawback that we see here is that it may be easy for someone to steal your code by watching from afar. Still, we love the project and think you will too after seeing the demo clip below.

Continue reading “Ultrasonic Combo Lock”

Monitoring Water Levels With A Parallax Ping Sensor

arduino_parallax_ping_water_level_sensor

When you need a mechanism to detect the water level within a container or tank, you have several different options. Most people opt for a simple float or probe that sits in the water, while others use optics to sense when the water is reaching an undesired level.

This device built by [Danilo Abbasciano] uses a Parallax Ping sensor instead. If the sensor is placed at the top of a well, cistern, or other water container, it can accurately calculate the height and volume of the fluid inside. This is done by using the Ping’s readings in conjunction with a few values already known to the user, namely the dimensions of the container.

In his implementation, the readings are relayed to a simple LCD panel for easy viewing, and a small piezo speaker is used to sound an alarm when the water level reaches a predefined threshold. This sort of measuring device can be quite useful in situations where a contact-based sensor would be subject to chemicals and corrosion, or where contamination is a concern.

Cypherbot Uses Older UC And Retro-controller

[PJ Allen] has been working on a little robot which he calls Cypherbot. The control circuitry is quite familiar; a Board of Education which features the Basic Stamp 2 microcontroller. This is an older and slower microprocessor, but it works quite well for this application since there’s no need for speed or heavy number crunching. The wheels of the bot are made out of plastic lids (we’re thinking peanut butter jars) with rubber bands for traction that are each driven by a servo motor. The third wheel is tiny and swivels as needed.

The front of the bot has a PING ultrasonic sensor mounted on a servo motor which lets the bot scan back and forth for a wider obstacle avoidance angle. In addition to the autonomous mode there’s an Xbee remote control. [PJ] picked up an Atari keyboard and is using that as the user input. Check out the little guy driving around the house in the video after the break.

Continue reading “Cypherbot Uses Older UC And Retro-controller”