CardFlix: NFC Cards For Kid-Friendly Streaming Magic

For most of us, the days of having to insert a disc to play our media are increasingly behind us. But if you’d like to provide your kids with the experience, you could use CardFlix.

For the electronics, [Udi] used the readily available ESP8266 D1 Mini module connected via I2C to a PN532 NFC reader. To trigger the different movies, there are over 50 cards, each with not only its unique NFC tag but also small posters that [Udi] printed showing the show and then laminated, ensuring they will survive plenty of use. The D1 Mini and NFC reader are housed in a 3D printed case, which ends up being almost smaller than the 5V DC adapter powering it, allowing it to be mounted above an outlet out of the way. The deck of movie cards is also housed in a pair of printed boxes: the larger one for the whole collection and a small one for the most often used shows. Should you want to print your own, all the design files are provided in the write-up.

The D1 Mini was programmed using ESPHome. This firmware allows it to easily connect back to Home Assistant, which does most of the heavy lifting for this project. When a card is scanned, Home Assistant can tell which TV the scanner was near, allowing this system to be used in more than one location. It also knows which card was scanned so it can play the right movie. Home Assistant also handles ensuring the TV in question is powered on, as well as figuring out what service should be called for that particular movie to be shown.

Be sure to check out some of the other projects we’ve featured that use ESPHome to automate tasks.

Continue reading “CardFlix: NFC Cards For Kid-Friendly Streaming Magic”

RevK_NFC-Reader_v2-Photo

NFC Who’s At The Door

RevK_NFC_v1-Prototype-Photo
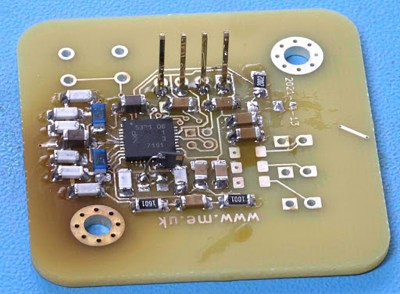
An early prototype that worked on the first try, except for one LED

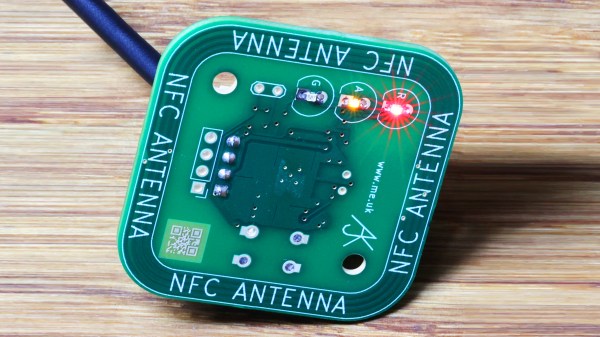
[RevK] wanted to learn about NFC readers, and we agree that the best way to do so is to dive in and build one yourself.

There are readers available from multiple sources, but [RevK] found them either compact but with no prototyping space or plenty of prototyping space and a large footprint. High-speed UART (HSU) was selected over I2C for communication with an ESP32 as testing showed it was just as fast and more reliable over long distances at the cost of only one additional wire.

After a few versions, the resulting PN532 based NFC reader has just enough GPIO for a doorbell and tamper switch and three status LEDs, with board files and a 3D-printed case design included in the open source project on GitHub. When looking into the project, we appreciated learning about tamper switches that can include closed or open contact status when an NFC is read, most often used in the packaging of high-value and collectible products. If you have worked with this tamper feature of NFCs, let us know about it.

Thanks for the tip, [Simon]

NFC Ring Lock Box

NFC Ring Lock Box

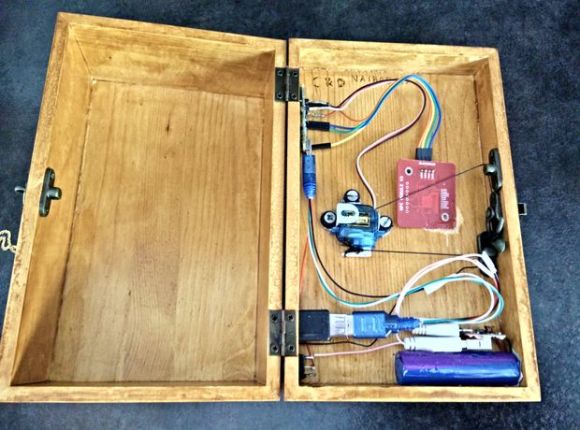
[Nairod785] wanted to build a lock box that would lock from the inside. He started with an inexpensive, plain wooden box. This kept the cost down but would also allow him to easily decorate the box later on using a wood burning tool.

To keep the box locked, he installed a simple latch on the inside. The latch is connected to a servo with string. When the servo rotates in one direction, it pulls the string and releases the latch. When the servo is rotated in the opposite direction, the latch closes and locks the box once again.

If you are going to have a locked box, then you are also going to need a key to open it. [Nairod785] used a ring with a built-in NFC tag, similar to the ring featured back in March. Inside of the box is a PN532 NFC module. The walls of the box were a little too thick for the reader to detect the ring, so [Nairod785] had to scratch the wall thickness down a bit. The NFC module is connected to an Arduino Nano. Communications are handled with I2C.

The NFC ring actually has two different NFC tags in it; one on each side. [Nairod785] had to program both of the tag ID’s into the Arduino to ensure that the ring would work no matter the orientation.

The system is powered by a small rechargeable 5V battery. [Nairod785] wired up a USB plug flush with the box wall so he can easily charge up the battery while the box is locked. It also allows him to reprogram the Arduino if he feels so inclined. There is also a power switch on the side to conserve energy.