Reverse-osmosis (RO) systems are one way to ensure that you get very clean drinking water. The Waterdrop G3P600 variety that [Tomasz Wasilczyk] recently purchased is definitely among the fanciest and ‘smartest’, with the faucet having its own 7-segment display and gaggle of LEDs connected to the actual RO unit with a four-pin connector. This naturally meant that whatever protocol runs on this cable had to be reverse-engineered for science.
The main practical benefit here is to make the system smarter — such as plugging it into a home automation system with ESPHome support, as well as make it play nice with refrigerator lines.
What automation and monitoring options exist here thus depend on what data gets sent between the RO unit and the faucet. Fortunately this turned out to be quite extensive, ranging from filter health, the water quality and pump status as well as air temperature and faucet state.
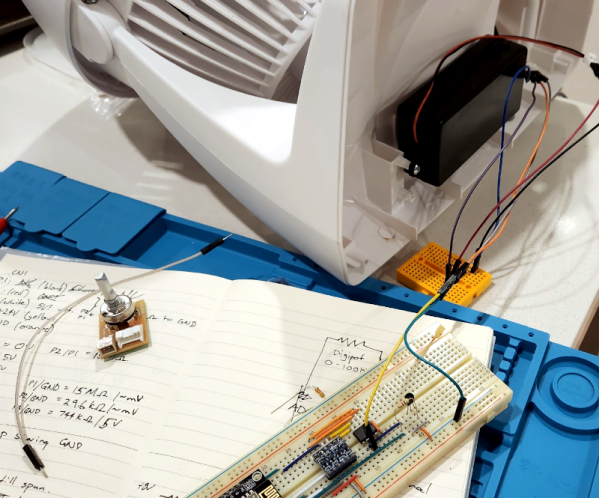
Unsurprisingly the four-pin connector turned out to be a basic serial link, with 5 V, ground and a 9,600 baud connection. From this it was easy enough to deduce the protocol, and by looking at what lit up on the faucet, a custom PCB wasn’t far behind.
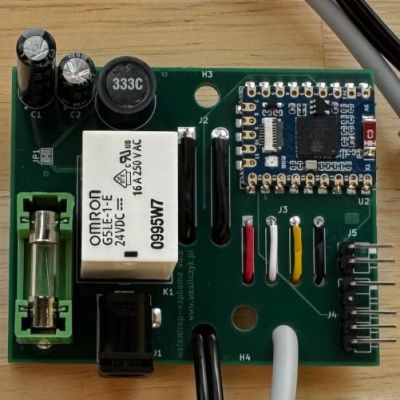
After one blown-up fuse later due to getting 24 V instead of 12 V on the RO unit when tapping off power, the unit popped to life and was able to be connected to Home Assistant, from where the entire functionality and what triggered what could be mapped out. Of course, there’s still more to be discovered and reverse-engineered in the unit, but this seems like a good place to start.