Exposing Some Fake Electronics With Too-good-to-be-true Prices

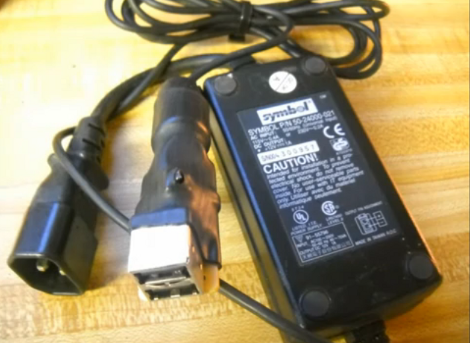
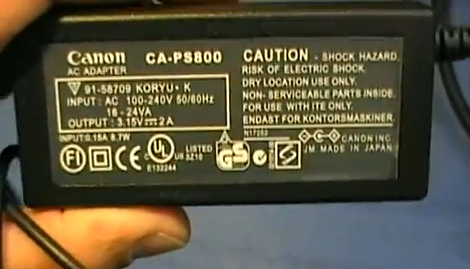
[Giorgos Lazaridis] needed an AC adaptor for his Canon PowerShot camera. He hit eBay and was excited to find this branded adaptor for just five bucks! It works and, even though it would sometimes reboot his camera if the cord was twisted around in the jack, he was satisfied that it did what it was supposed to.

That is, until one day he observed some very peculiar behavior while taking pictures of a PIC circuit he was prototyping. When holding the camera and putting his other hand near the breadboard one of the status LEDs in his circuit began flashing sporadically. If he was using the camera with batteries instead of the adapter this didn’t happen.

His first instinct was to hook up the adapter to his oscilloscope and see what is happening on the power bus. The signal is incredibly noisy. Shockingly so. [Giorgos] cracked open the case to see what is going on with the power supply circuit inside. You simply must view the video after the break to see the horror-show he found. The board is poorly soldered, components are not properly seated in their footprints, and our favorite is when [Giorgos] points out a squiggly trace which takes the place of the smoothing inductors.

Have you documented your own fake electronic hardware finds? We’d love to hear about them. Continue reading “Exposing Some Fake Electronics With Too-good-to-be-true Prices”

High Efficiency Solar Charger Circuit Tops Off Those Lead-acid Batteries

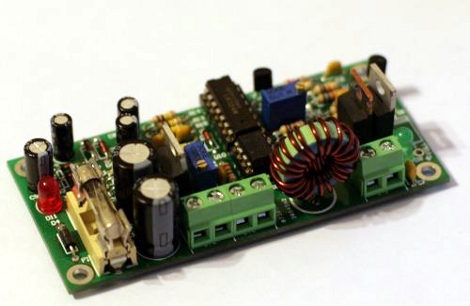
Make your next project solar-powered with this charging circuit. It’s completely through-hole, and there are no microcontrollers that need to be flashed. If you can source parts and are handy with a soldering iron building this will be a breeze.

Both the maximum system voltage and the low voltage drop out are configurable. After assembly, you just need to attach a regulated power supply to the load terminals. Tune the power supply to the max voltage and turn a potentiometer until an LED comes on, then repeat the process for the drop out voltage. Board artwork for the two-sided PCB and a schematic are available from the page linked at the top. If you’re not into etching your own circuit boards you can buy one for around $10.

[Thanks Murray]

Juice Bridge Powers Your Breadboard In A Snap

juice_bridge_breadboard_power_bridge

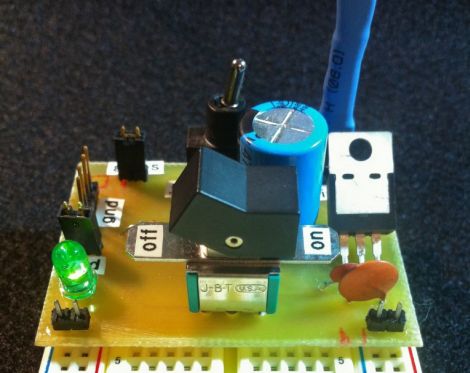
[Quinn Dunki] got tired of messing around with wires when connecting things to her benchtop power supply, so she built herself useful little power bridge that plugs directly into any standard breadboard.

The board is small and simple, but quite useful all the same. It was built to power both sides of the breadboard, and it can be easily switched between an unregulated power supply and a regulated 5v supply. An ammeter can be attached to the board via a pair of pins she set aside, allowing her to easily measure the current draw of the entire circuit.

We think her “Juice Bridge” would be very useful to anyone who frequently prototypes on breadboards. In fact, it would be a fantastic beginner project since it involves etching and developing PCBs as well as some simple soldering, while resulting in a handy takeaway tool at the same time.

If you want to build one of your own, [Quinn] has the schematics and Eagle PCB files available for download on her site.

DIY Digital Bench Power Supply

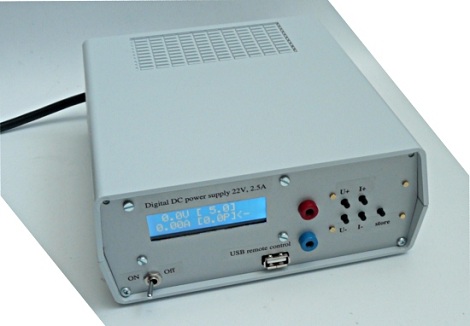
[Guido Socher] built himself a great little bench power supply that’s able to put out 30 Volts at 2 Amps.

Instead of taking the easy way out by putting a few taps on an ATX power supply, this project was built around a generic 24 Volt laptop power brick. An ATmega8 generates a PWM signal that is sent though a low-pass filter, allowing everything to be very precisely controlled. This DC signal is then sent through a BD245 power transistor to bring everything up to the desired output. [Guido Socher] included a USB port for computer control of everything, and the final project is something we’d be happy to have on our bench.

We’ve seen a few computer power supplies converted into a bench power source, but we’re impressed with [Guido Socher]’s build log. It’s not often we see a hack that goes over the theory of operation, and the end product is very nice (and functional) too.

Simple Bench Power

When dealing with electronics you need 1 key thing, electricity. For quite a while now if I needed 5 volts I would just grab my homebrew arduino, but that is not always handy and its tethered to the pc and it does not have 3v. If I wanted 3 volts, now I am digging around looking for my UBW32 which does have 3v3 but now I have a 50$ microncontroller with very small regulators (so therefore only small loads) dangling around just for power, and its a mess.

So I need just a board that takes some DC from a wall wart and regulates it to usable voltages, and I set about to make it. This regulator board puts out +5, +3.3, variable and negative variable voltages, is pretty easy to make, and make a nice addition to the bench. (until I can get a real bench supply someday)

Now I know this is not ground breaking hackery, but I hope it helps someone out there, join us after the break to see what’s going on.

Continue reading “Simple Bench Power”

Variable Super Capacitor Battery Provides Power On The Go

super_cap_battery

Instructable user [EngineeringShock] got sick of buying batteries for his devices all the time and has instead opted to build himself a super capacitor bank that can be used to power common household items.

His “forever” rechargeable capacitor bank is made of two large super capacitors rated at 400 farads apiece. It is charged through a LM317-based charging circuit that is adjustable to allow for slow or fast charging, the latter of which he admits, is slightly dangerous.

Since the super caps are only rated at 2.7 volts, they are wired through a DC-DC booster circuit that allows him to adjust the output voltage from 4.3 v to 34 v. The adjusted voltage is then passed through a digital display that allows him to see what the output voltage is at any time.

He says that the super cap bank can power his computer’s speakers for about two hours before requiring a recharge, which takes just a few short minutes, depending on how he is charging them.

While it’s not exactly cheap, the capacitor bank could be useful for those requiring quick portable power for relatively short periods of time. If we were to build one ourselves, we would likely fit all of the components into a small project box to protect the caps from accidental discharging, and top it off with a couple of solar cells to charge it for free during the day.

Keep reading to see a quick video demonstration of his super cap “battery” in action.

Continue reading “Variable Super Capacitor Battery Provides Power On The Go”

Portable Bench Supply Carries Around 10 Amp-hours Of Juice

[Punish3r] wanted to have power for prototyping on the go. What he came up with is this little thing above. Inside you’ll find common components that let the unit provide 10 amp hours of current with a 12V 500mA output.

The storage capacity is provided by a dozen Lithium batteries. These 3.7V cheapies are wired in parallel behind a protection board. For charging and discharging, a Sparkfun LiPo charger board was used, taking care of all the work necessary to top off the batteries using a wall-wort. The final piece in the puzzle is a boost converter that provides the regulated 12v connected to the red and black banana plug receivers on the bottom of the case.

This is very much a plug-and-play design… just make sure you hook the parts up correctly and you’re up and running. We would love to see a roll-your-own boost converter circuit that include a switch or dial that lets you select common PSU voltage levels. If you’re going to the trouble to make your own board you might as well incorporate the charging circuit at the same time.

[Thanks Paul]