PIR Jack-o-Lantern Sees Them Coming

Planning to make that carved a pumpkin last past Halloween night? Forget the tealight or LED candle—here’s an easy, no-solder project that will make it extra special. By default, this jack-o-lantern looks like it has a flickering flame, but get close enough to it and it goes crazy with color.

All you need is an LED matrix, a Rainbowduino to drive it, a PIR motion sensor to trigger the random colors, and a power source. [Alpha Charlie] kept the electronics from becoming pumpkin-flavored with some plastic bags. Since he used the PIR as the jack-o-lantern’s nose, there is a bit of plastic behind it to keep moisture from interfering.

[Alpha Charlie]’s build instructions are quite detailed, which makes this project even simpler if you’ve never used a PIR before. There are lots of ways you could build on this project to make it your own, like using trick-or-treater motion to trigger screams or spooky sounds, or add more sensors to make it more interactive. Watch it react after the break.

If you have nothing else at all to do between now and trick-or-treat time, you could bust out the soldering iron and recreate this 70-LED matrix jack-o-lantern. Blinkenlights too safe for your tastes? Fire-breather it is, then.

Continue reading “PIR Jack-o-Lantern Sees Them Coming”

Swimming Pool Dance Floor Enlightened With Leds

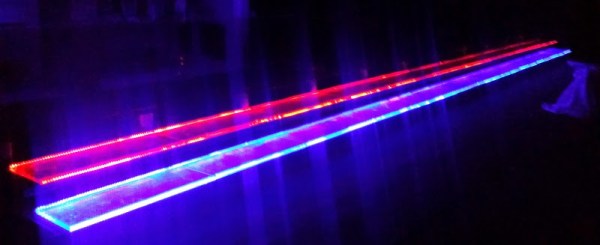
In a well documented blog entry, [Loren Bufanu] presents a project that lit up a glass dance floor covering a swimming pool with RGB strips. We mentioned a video of his project in a Hackaday links but didn’t have any background information. Now we do.

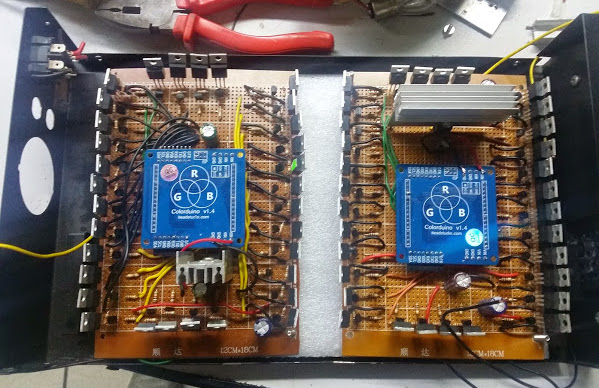
boards in boxThe project took around 450 meters of RGB strips controlled by two Rainbowduinos and driven by sixty-four power Mosfets, sixty-four bipolar transistors, and a few other components. Producing white light from the LEDs draws 8 amps from the power supply.

The Rainbowduino is an ATmega328 Arduino compatible board with two MY9221 controllers. Each  controller handles 12 channels of Adaptive Pulse Density Modulation. In other words, it makes the LEDs flash nicely. [Loren] used the Rainbowduino instead of some alternatives because multiple R’duinos can coordinate their activities over I2C.

The software part of the project did not work as well as the hardware. The light patterns were supposed to follow the music being played. A PC software package intended to drive the R’duinos produced just a muddy mess. Some kludges, including screen captures (!), driven by a batch file tamed the unruliness.

It’s been awhile, but a similar disco dance floor, built by [Chris Williamson] but not over a pool, previously caught our attention. [Chris] is a principle in Terror Tech that recently got a mention on Sparkfun.

The video after the break fortunately does not make a big splash, but is still electrifying.

Continue reading “Swimming Pool Dance Floor Enlightened With Leds”

Hackaday Links Column Banner

Hackaday Links: August 16, 2015

[Matt] created an animated gif of New Horizon’s Pluto flyby. The source images were taken from the the raw LORRI images, modified so the background star field could be seen, and assembled with OpenCV. Because Pluto and Charon orbit each other around a point above Pluto’s surface, simply putting Pluto in the center of each frame wouldn’t work. It’s the best visual explanation of this weird arrangement yet, all brought to you by the magic of OpenCV and Python.

On the subject of Kickstarter creators that don’t understand the conservation of energy, I present this.

We don’t know exactly what’s going on with this one, but here’s a swimming pool covered with RGB LEDs. It’s controlled by two Rainbowduinos, and looks like the coolest disco floor you’ve ever seen.

[Frank]’s 2011 Hundai Santa Fe wasn’t cool enough, so he added an F16 flight stick to his shift knob. The choice of joystick is paramount here: Saitek joysticks look too techy, Logitech ones are too expensive, and the Warthog H.O.T.A.S costs $400. Joysticks are extremely niche peripherals these days, it seems. He ended up strapping an old F16 joystick from the 90s on his shift knob, and it looks close enough to the real thing.

Two bodgers are stuffing the engine from a Toyota Celica into a 1980 Mini, and they’re trying to make it look stock. We’ve seen their project before, and now there’s a new episode. In this episode: the pedal box, the steering wheel, and figuring out how to make the car drive straight.

Particle System Busy Box Keeps Baby Occupied

Busybox

Any child born today has a bright future ahead of them—mostly consisting of watching glowing rectangles for 80 or 90 years. To give his progeny a jump-start on a lifetime of watching LEDs flicker, [Dan] created a busy box. It’s really just an Arduino, RGB LED matrix, and a programmed particle system, but if we’re fascinated by it, it will probably blow an infant’s mind.

The idea for this busy box originated with an earlier Hackaday post that used an 8×8 matrix of RGB LEDs to create a moving color cloud. [Dan] took this project as a jumping off point and created an infant’s busy box with four modes that are sure to be entertaining.

Inside the is a Rainboduino: an Arduino compatible board capable of driving an 8×8 RGB LED matrix. Also stuffed inside the busy box is a 9V battery, rocker switch for the power, and four arcade buttons that cycle through each mode. The first mode is some sort of ‘plasma cloud’ simulation, the next is a ‘painter’ light display. The final two modes spell out [Dan]’s spawn’s name, and all the numbers and letters of the alphabet.

Continue reading “Particle System Busy Box Keeps Baby Occupied”

LED Cube Is A Little Bit Of Kit, A Lot Of Point-to-point Soldering

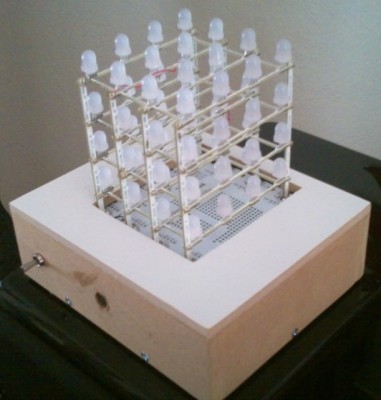
[Craig Lindley] recently finished building his own RGB LED cube project. It’s made up of four layers of 4×4 LED grids, but you may notice that the framework that supports the structure is not the usual ratsnet of wires we’ve come to expect. They’re actually long, thin circuit boards. [Craig] grabbed the Rainbow Cube kit sold by Seeed Studio for this project. But instead of pairing it with their Rainbowduino driver, he built his own to give him more options on how to control the blinky lights.

He’s using an Arduino Uno to control the display, choosing TLC5940 driver chips to safely provide the juice necessary to light up the grid. These drivers also offer 12-bit pulse-width modulation for easy color mixing. Driving the LEDs directly would have taken a large number of these expensive chips (over $4 a piece), but if multiplexed the design only calls for two of them.

Check out a video of the finished cube reacting to music thanks to the microphone and amplifier circuit [Craig] build into the driver board.

Continue reading “LED Cube Is A Little Bit Of Kit, A Lot Of Point-to-point Soldering”

Daft Punk Module – Just Add Table

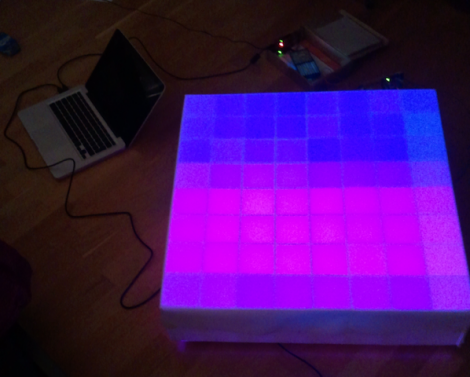
This is just an 8×8 LED matrix, but the size and execution make it look marvelous. [Michu] built this module using foam board dividers to separate the cells, a foam board back to host the 64 RGB LEDs, and a sheet of heavy frost diffusion gel that is a stage lighting product. The display is driven by a Rainbowduino with input from a processing sketch. The effects seen in the video after the break are quite pleasing, and are just begging to be installed in your next coffee table project.

Continue reading “Daft Punk Module – Just Add Table”