Linear LED clock displaying the time using different-colored triangles.

Linear LED Clock Looks Decidedly Vintage

We just love a good clock around here, and something about those triangles gives this linear LED clock a deliciously mid-century vibe. If you’ve read these pages for any length of time, you know that [andrei.erdei] loves clocks as much as we do, and is always coming up with interesting ways of displaying the passage of time.

Two upward-facing triangles sandwich one downward-facing triangle, and they are lighting up as follows: right, left, middle.This one is a remix of some other linear RGB clocks, but the result is distinctly [andrei.erdei]’s style. There’s nothing crazy going on under the hood here — it’s essentially a Wemos D1 mini running a strip of RGBs, and the microcontroller connects to a Wi-Fi router to get the time from a server. The magic is in the programming and the way the clock is read.

The brief but thorough demo video after the break does a much better job of explaining the display by showing various times of the day, but we’ll give it a shot. For one thing, it uses 24-hour time exclusively. There are four groups of triangles; yellow, red, green, and blue which correspond to tens and units of hours, and tens and units of minutes.

The triangles light up in groups of three in the order depicted in the animation. At midnight, none of the triangles are lit up. Again, it’s best explained in the video, looking at various times of day.  Plus you can see the neat-o startup animation.

Are you more into sound than blinkenlights? Then this customizable bird clock may be for you.

Continue reading “Linear LED Clock Looks Decidedly Vintage”

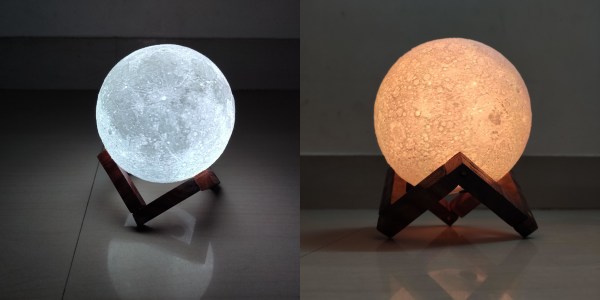
The Bright Side Of The Moon Lamp: It’s Any Colour You Like

One of the easiest ways to get into hardware hacking is by piecing together a few modules and shoehorning them into a really cool home. For example, why buy a commercial moon lamp when you can spend 30+ hours printing your own, and a few more hours hacking the guts together?

[Amit_Jain] was inspired by a project that combined a color map and bump map of the moon into a highly-detailed printable model. Displeased with the lack of features like portability and pretty colors, [Amit] took it to the next level by designing a threaded cap that unscrews to show the streamlined guts of an off-the-shelf RGB LED controller.

[Amit] freed the controller board from its plastic box and soldered the LED strip’s wires directly to it. For power, [Amit] taped the board to the battery from an old cell phone and stepped it up to 12 V with a boost converter. We think this looks quite nice and professional, especially with the stand. A brief demo is on the rise after the break.

If you’ve got the room for a much, much larger light-up moon, you should go for it.

Continue reading “The Bright Side Of The Moon Lamp: It’s Any Colour You Like”

Slack Off From Home With A Networked Jam Session

Those of you who were regular office dwellers before the pandemic: do you miss being with your coworkers at all? Maybe just a couple of them? There’s only so much fun you can have through a chat window or a videoconference. Even if you all happen to be musicians with instruments at the ready, your jam will likely be soured by latency issues.

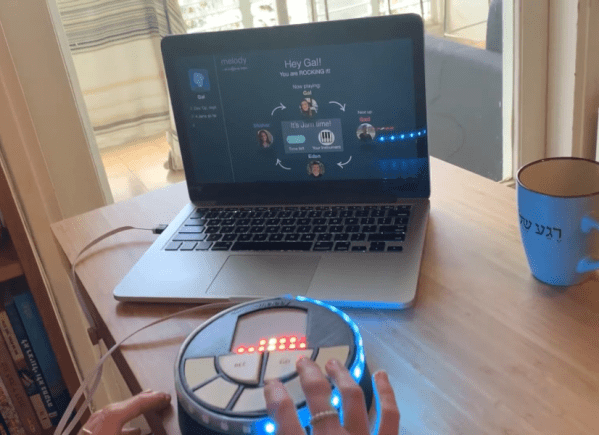
[Eden Bar-Tov] and some fellow students had a better idea for breaking up the work-from-home monotony — a collaborative sequencer built for 2020 and beyond. Instead of everyone mashing buttons at once and hoping for the best, the group takes turns building up a melody. Each person is assigned a random instrument at the beginning, and the first to go is responsible for laying down the beat.

Inside each music box is an ESP8266 that communicates with a NodeRed server over MQTT, sending each melody as a string of digits. Before each person’s turn begins, the LED matrix shows a three second countdown, and then scrolls the current state of the song. Your turn is over when the LED strip around the edge goes crazy.

Music can be frustrating if you don’t know what you’re doing, but this instrument is built with the non-musician in mind. There are only five possible notes to play, and they’re always from the same scale to avoid dissonance. Loops are always in 4/4, which makes things easy. Players don’t even have to worry about staying in time, because their contributions are automatically matched to the beat. Check it out after the break.

Tired of sitting indoors all day, but still want to make music? Build a modular synth into a bike and you’ve solved two problems.

Continue reading “Slack Off From Home With A Networked Jam Session”

Huge Seven Segment Display Made From Broken Glass

A staple of consumer devices for decades, seven segment displays are arguably one of the most recognizable electronic components out there. So it’s probably no surprise they’re cheap and easy to source for our own projects. But that doesn’t mean there isn’t room for personal interpretation.

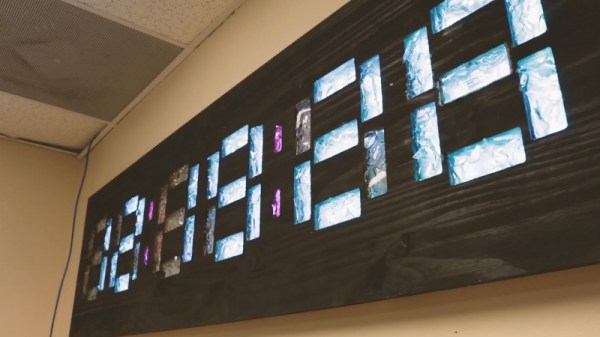
[MacCraiger] wanted to build a wall clock with the classic seven segment LED look, only his idea was to make it slightly larger than average. With RGB LED strips standing in for individual LEDs, scaling up the concept isn’t really a problem on a technical level; the tricky part is diffusing that many LEDs and achieving the orderly look of a real seven segment display.

All those segments perfectly cut out of a sheet of plywood come courtesy of a CNC router. Once the rectangles had been cut out, [MacCraiger] had to fill them with something that could soften up the light coming from the LEDs mounted behind them. He decided to break up a bunch of glass bottles into small chunks, lay them inside the segments, and then seal them in with a layer of clear epoxy. The final look is unique, almost as though the segments are blocks of ice.

At first glance the use of a Raspberry Pi Zero to control the LED strips might seem overkill, but as it turns out, [MacCraiger] has actually added in quite a bit of extra functionality. The purists might say it still could have been done with an ESP8266, but being able to toss some Python scripts on the Linux computer inside your clock certainly has its appeal.

The big feature is interoperability with Amazon’s Alexa. Once he tells the digital home assistant to set an alarm, the clock will switch over to a countdown display complete with digits that change color as the timer nears zero. He’s also written some code that slowly shifts the colors of the digits towards red as the month progresses, a great way to visualize at a glance how close you are to blowing past that end of the month deadline.

We’ve seen something of a run on custom multi-segment displays recently. Just last month we saw a clock that used some incredible 25-segment LED displays, complete with their own unique take on the on epoxy-filled diffusers.

Continue reading “Huge Seven Segment Display Made From Broken Glass”

An LED Effect For Every Occasion

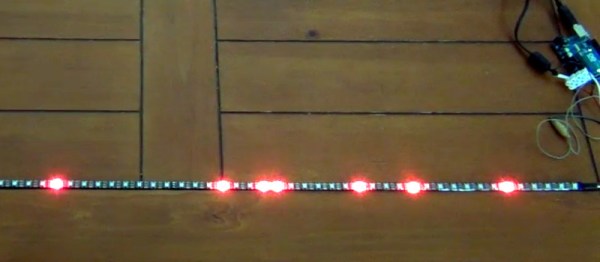
Quality software development examples can be hard to come by. Sure, it’s easy to pop over to Google and find a <code> block with all the right keywords, but having everything correctly explained can be hit or miss. And the more niche the subject, the thinner the forum posts get. Bucking the downward trend [HansLuijten] provides an astoundingly thorough set of LED strip patterns in his comprehensive post titled Arduino LED strip effects.

Don’t let the unassuming title lead you astray from the content, because what’s on offer goes beyond your average beginner tutorial on how to setup a strand of NeoPixels. [HansLuijten] is thorough to a fault; providing examples for everything from simple single color fades and classic Cylon eyes to effects that look like meteors falling from the sky. Seriously! Check out the videos on their webpage. Those chasing lights you see around theater signs? Check. Color twinkle and sparkle? Check. Color wipes and rainbow fades? Check, and check. Continue reading “An LED Effect For Every Occasion”

Enter The Space Tunnel

What’s better than 1 string of LED lights? 96. That’s how many. Each string of the 96 has 60 ws2812b LEDs, for a total of 5760 individually addressable RGB LEDs.  That’s not the cool part of [jaymeekae]’s Space Tunnel installation, the cool part is that they’re interactive.

Starting out with some PVC piping, dark cloth was used as a backdrop and the LED strips were attached to it. Several power supplies are used to supply the voltage necessary and each strip controlled by FadeCandy chips which connect to, in this case, a Windows PC via USB. Initially, computer power supplies were used, but they couldn’t supply the current necessary. [jaymeekae] used them for the first installation, but switched to better power supplies for further installations.

Once the lights were up and powered, [jaymeekae] started work on the interface to control them. Starting with a used bureau, [jaymeekae] cut out a section for the touchscreen, and installed the controlling computer in the bottom half. Processing is used to interface with the FadeCandy controllers and HTML is used for a user interface. Each mode runs a different Processing program for different effects, including audio visualization, a space tunnel mode (hence the name) and a cool drawing app where the user draws on the touchscreen and sees the results in the lights overhead.

Over several iterations, the Space Tunnel has evolved, with better power supplies and a better interface. It’s a great art installation and [jaymeekae] takes it to festivals, including one in Spain and one in the UK. There are some other LED string projects at Hack-a-Day, including this one with ping-pong balls, and this one that involves drinking a lot of beer first.

[via Reddit]

Continue reading “Enter The Space Tunnel”