Turning A Raspi Into AdBlock

pi

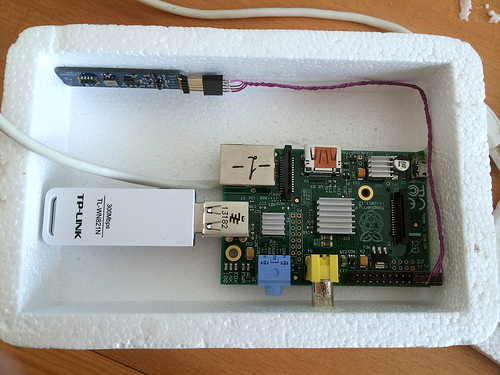
There’s nothing quite as annoying as seeing bandwidth wasted on unimpressive flash animations, irrelevant ads, and animated GIFs. The bad news is these ads are the sole source of income for a lot of your favorite websites – Hackaday included. The good news is you can turn these ads off with a Raspberry Pi, a WiFi adapter, and a little bit of fun in the terminal.

This build creates a wireless access point with a WiFi adapter plugged in to a Raspberry Pi. With an Ethernet cable plugged in, this effectively turns the Raspi into a wireless router.

To configure the software to block ads, it’s a simple matter of installing dnsmasq from the command line and making sure all the ads on your favorite webpages time out. This means a fairly big hit on the performance of your new DIY router, but with the installation of Pixelserv you can host a 1-pixel transparent GIF image that replaces all the ads and renders them invisible.

It’s a great project if you don’t like watching ads on your PS3, XBox, tablet, or other non-PC Internetting device. If people stealing your wireless connection is a problem, it shouldn’t be hard to make every image upside down or blurry for those rogue WiFi pirates.

Hackaday Links: September 8, 2013

hackaday-links-chain

“I’m sorry Dave, I’m afraid I can’t open the dorm room door.” Does your dorm room have a peephole? Take [pjensen’s] lead and turn it into a mini HAL 9000 using a red LED.

Mix a little work in with your hobby skills. [Vittore] needed to build a video looper to drive some TV screens for a Hotel contract job. He grabbed a Raspberry Pi and got to work. The final product (translated) even uses a shared folder on the hotel’s network as the source slides.

We’re not sure if anyone noticed last Monday (it was Labor Day in the U.S.).  We had a little fun with coffee themed posts. [Tom] wrote in to remind us about the HTCPCP: Hyper Text Coffee Pot Control Protocol. If you don’t have time to read it all, he suggests you don’t miss his favorite, error code 418.

Maybe funny reading isn’t your thing right now, but we have some more helpful stuff to offer. Check out [John Chandler’s] Commandments for using PIC microcontrollers from a few years back.

[Andy] has some old smart phones which he is using in his projects. His beef with the touchscreens is that there’s no tactile feedback. Since these are going to be dedicated displays he’s outlining the touch controls with tape to let your finger know what it’s doing.

If you’re living in your first home in America there’s a really good chance it’s a 1950’s ranch house considering how many of them were built after World War II. Bring its infrastructure into the information age with a cable retrofit. [Andrew Rossignol] just did so and posted a lot of pictures of the process.

If you liked [Ken Shirriff’s] post about the Sinclair Scientific Calculator we think you’ll love his continuation of a Z80 reverse engineering series.

Spoofing WiFi AP Based Geolocation

[Pierre Dandumont] just finished up a little project that will give Google Maps’ location feature a run for its money. It’s a technique that spoofs WiFi networks in order to relocate the positional data reported via WiFi networks.

He starts with an explanation of the different ways modern devices acquire location data. GPS is the obvious, and mobile network triangulation is pretty well know. But using WiFi networks may be a new trick for you. We’re not 100% certain but we think Google is able to look up location data based on known IP addresses for WiFi access points (this would be a good comments discussion). To trick the system all you have to do is feed some captured AP data into the computer before Google Maps tried to lock onto a location. The video after the break shows Maps with the legit location displayed. After running a quick script whose output is shown above the map position is changed to the spoofed location.

Continue reading “Spoofing WiFi AP Based Geolocation”

Put In Pocket Change, Get Bitcoins

bitcoin

[gbg] put together a neat little project to get people familiarized with Bitcoins. A lot of techies know what Bitcoins are, but the impetus to download the Bitcoin client and start mining is a bit too much for some. [gbg] has a solution for this – a Bitcoin vending machine. Just dump your pocket change in the coin slot, and out comes a QR code that allows you to add Bitcoins to your wallet.

Inside this Bitcoin briefcase is a Raspberry Pi that connects to a local WiFi connection. Every five seconds, the Raspi looks at the current conversion rate of USD to Bitcoins. Once coins are deposited into the briefcase, a receipt complete with a scannable QR code is printed on a small thermal printer.

When [gbg] took this to the latest DEFCON, a lot of people were interested in the project and started shoveling change into the machine. So many people were interested that [gbg] and his compatriots are planning on turning this into a proper open-source device, complete with a bill reader and possibly an ASIC miner so the Pi can sell the coins it produces.

Check out the video below for some more info.

Continue reading “Put In Pocket Change, Get Bitcoins”

Building An Entire Pinball Machine From Just The Playfield

It all started  when [Iancole] bought a Fireball Home edition playfield on some famous auction website for $135. Originally, he had the intent of lighting the lamps with an Arduino, framing it, and hanging it on the wall of his office — which often happens with old pinball parts. But then his boys asked if he “could make it play”.

[Iancole] managed to find the pinball schematics online and started designing the electronics required by the many LEDs, solenoids and switches. As the LEDs and switches are on the same matrix, he chose a simple Arduino to cycle through them, giving the player the impression that the lights are constantly on. [Iancole] originally planned on using his raspberry Pi to control the solenoids, but he later switched to another Arduino because of the precise timing required.

Therefore, his Pi was used as the heart of the machine. It is interfaced to the two Arduinos to read states and send commands while running the game program, displaying HD graphics on a 24″ screen, playing music and game event sounds. All the electronics are proudly displayed on the backbox, and many developments are planned for it. Also, the machine will be on display at the Orlando Mini Maker Faire on October 5th!

Turning A Tiny Linux Box Into A Synthesizer

waveforms

For all the cool things the Raspberry Pi, BeagleBone, and other low-power Linux boards can do, there’s one thing we haven’t seen much of: creating music with software synthesizers. Yes, soft synths have been around for ages now, but compiling them for these ARM boards is something we haven’t seen much of (to say nothing of the Linux audio system). Luckily, [Paul] and [Trev] have put together a tutorial for making synthesizers on these small Linux boards using Csound, the premier audio programming language for Linux.

[Paul] and [Trev] have already put together a few Csound instruments that include a Vangelis-inspired synth, a Lorenz Strange Attractor FM synth, a drum machine, and a classic monophonic style synth. All these instruments are ready to play on a Raspi or BeagleBone and we’re sure we’ll see a few more applications of this great tool for creating musical instruments as more musicians are turned onto these small Linux boards.

The RPC: A Stand-alone MIDI Workstation

raspiMidiRPC

Not just another pretty enclosure, this shiny little red box is [Lauri’s] stand-alone MIDI workstation. The build uses an Arduino Mega 2560 to handle the MIDI inputs and outputs. It communicates via serial with a Raspberry Pi that acts as a sequencer and oversees all user interactions. The Pi’s SD card offers convenient storage for your work, though we wish it was easily ejectable from the front of the box and not trapped under the hood. [Lauri’s] RPC also squeezes in the necessary USB hub for the RasPi and an HDMI-to-VGA converter. As an all-in-one solution, this is a sleek little box that–once paired with some software for arpeggiators, chord harmonies, and scales–will be a handy MIDI sequencer with robust control ready to be conveniently mounted on your rack.

Now all you’ll need is something to plug in. Why not check out the custom MIDI recorder we featured last week, or the organ-to-MIDI keyboard conversion for inspiration.

[Thanks Teemu]