
Homelab Gets Linksys Themed Aesthetic

If you’re building a homelab rig, you could just use off-the-shelf hardware in standard cases and slap it all in a rack like the normies do. Or, you could follow the example of [Justin Garrison] and build a more oddball setup.

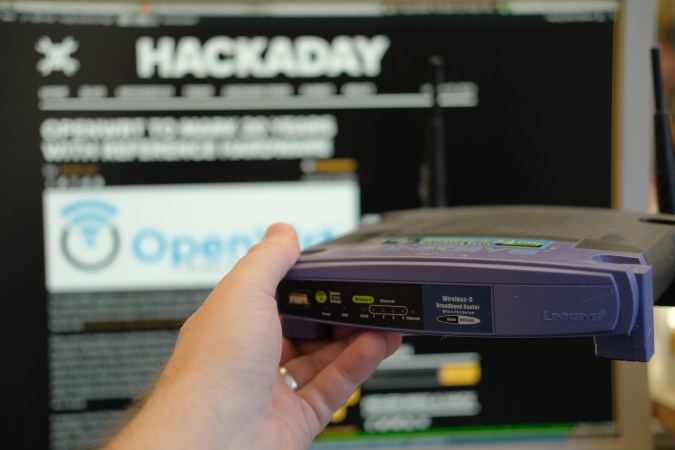
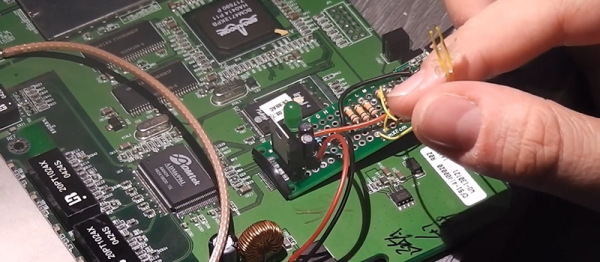
This particular homelab is, at its heart, built from familiar components. There are two Raspberry Pi 5s, two Raspberry Pi 4s, a GMKtec NucBox M6 Mini with an ASUS GeForce RT 2060 GPU, a LattePanda IOTA, an NVidia DGX Spark, and an HP Z4 G4 mini PC. These machines are all laced together with a TP-Link LS108GB PoE switch. [Justin] has the mini PC running the control plane components, with the rig as a whole running Talos and Kubernetes workloads. What makes this build particularly appealing, though, is the aesthetics of the rig. [Justin] documents how he hacked this hardware to fit into a bunch of old Linksys router cases, which provides a pleasant early 2000s look to the build. This included a bit of hackery to get status LEDs flickering as they should be. [Justin] also took the time to make the power buttons accessible.

If you want to stunt on your friends with a rad homelab, you either have to go for maximum power, or maximum style. This build would be the latter. Video after the break.
Continue reading “Homelab Gets Linksys Themed Aesthetic”

Hacking Routers Like It’s 2008

How long have we been hacking routers? To some of you who’ve been in the Hackaday audience for a while, the answer is “nearly forever”. In the early 2000s, they were one of the few consumer gadgets that had the trifecta of hackability: WiFi and networking built in, a user-friendly Linux operating system, and a few spare GPIOs that could control from the OS. Back when the Linksys WRT54GL was the king of the hill, we saw some pretty absurd hacks.

Take this example robot from October 2008. Link-rot hasn’t been kind to the original project, but from what we can tell, it used the GPIOs to drive servo motors hacked for continuous rotation, and features the equally anachronistic CD-ROM wheels. Where would you even get those today?

But the OS that this 18-year-old hack uses is still around: OpenWRT Linux. Although it still takes its name from the lovable purple router of old, it hasn’t supported that particular model in over a decade because of growing memory requirements. But it’s still the go-to distro for any modern router hacks, and it provides a lot more general-purpose Linux than you might expect on otherwise constrained platforms. As Tom pointed out in the podcast, if you see a used router for cheap, see if it’s supported by OpenWRT, and if it is, buy it.

While the project that got us thinking about routers again, Al’s recent networking hack, basically uses the router as a souped-up router, that’s by no means a given. OpenWRT is a real Linux OS, and can make use of most peripherals that your router find has available. Networking? Of course. USB? No problem. If you find a serial port and some GPIOs, you’re most of the way to a Linux SBC, although very likely a headless one.

There are a lot of hacks we see go in and out of style, and we see software projects come and go. But here we tip our hat to the router hacks, and to the plucky Linux OS that’s been ported to them all. Long may it keep old devices out of the landfill!

Featured image: My old baby, about a year or so before something in the radio modem finally gave up the ghost.

Hacking A USB Port Onto An Old Router

Sometimes hacks don’t have to be innovative to be satisfying. We thought that [daffy]’s instructions and video (embedded below the break) for turning an old WRT54G router into an Internet radio were worth a look even if he’s following a well-traveled path and one that we’ve reported on way back when.

The hack itself is simple. [daffy] locates unused USB data lines, adds in a 5V voltage regulator to supply USB bus power, and then connects it all to a USB sound card. Hardware side, done! And while he doesn’t cover the software side of things in this first video, we know where he’s headed.

The WRT54G router was the first commodity Linux-based router to be extensively hacked, and have open-source firmware written for it. If you’re using OpenWRT or dd-wrt on any of your devices, you owe a debt to the early rootability of the WRT54G. Anyway, it’s a good bet that [daffy] is going to find software support for his USB sound card, but we remain in suspense to see just exactly how the details pan out.

Our favorite WRT54G hack is still an oldie: turning a WRT54G into the brains for a robot. But that was eight years ago now, so surely there’s something newer and shinier. What’s the coolest device that you’ve seen a WRT router hacked into?

Continue reading “Hacking A USB Port Onto An Old Router”

Unbricking A Router With A Raspi

About a decade ago, [Mansour] learned of the Linksys WRT54G, a wireless router that’s been shoved into just about every project under the sun. After learning of this device’s power, he decided a firmware upgrade was in order. Unfortunately, he accidentally bricked this router and left it sitting on a shelf for a few years.

Idle devices are the devil’s playthings, and when [Mansour] discovered a Samsung hard drive with a an SDRAM that was compatible with the WRT54G, he decided he would have a go at repairing this ancient router. There was only one problem: the most popular utility for programming the router through the JTAG header required a PC parallel port.

No problem, then, as [Mansour] had a Raspberry Pi on hand. The parallel port utility bit-banged the new firmware over to the router, something the GPIO port on the Pi could do in spades. By adding Pi support to the debricking utility, [Mansour] had a functional WRT54G with just a little bit of patience and a few wires connecting the GPIO and JTAG header.

Tank Router Defends Your Pets?

The guys over at Section9 Hackerspace in Springfield, Missouri just finished building this treaded robot. Despite the juxtaposition of the cat, it really doesn’t defend anything. The project is a reconnaissance robot controlled over the network with video feedback.

The team started off with some lofty goals. They wanted to the robot to be able to climb stairs and to feature a detachable flying portion in order to get a better look at hard to reach places. Cost and complexity are cited as the reasons they ditched the idea of the flyer. The rest of the features came out much as planned. The motor controller for the treads is connected to an Arduino. This uses an Ethernet shield to connect to the WRT54G router which is also coming along for the ride. This seems a bit over-powered but it makes it easy to connect the webcam on the front (also via Ethernet).

On the software side they wrote an Android app. It controls the movement of the robot, as well as that of the camera. Of course you need to see where you’re going so they went the extra mile to include video from the webcam. Check out their show-and-tell video after the break.

Continue reading “Tank Router Defends Your Pets?”

Never Miss Your Transport With This Bus Arrival Notifier

[John Graham-Cumming] was all set to start a new project based on the Raspberry Pi. Well, that was until shipment was delayed due to manufacturing issues. Not to fret, he transitioned over to a router board which displays the arrival countdown for mass transit bus service.

He based the build on a web page the Transport for London provided. You can load it up and see if your bus is running on time or not. There’s no published API, but by studying the source code from the site [John] was able to figure out how the JSON commands were formatted.

The next step is building a standalone device to pull the data and display it. The board seen above is from a Linksys WRT54GL router. This longtime favorite has a serial port header which can be driven from the Linux kernel. He wired up a jack on the router’s case, and uses an extension cable to get from it to the 7-segment displays mounted in a model of the bus. Since there’s four digits the display can tell you minutes until the arrival of two different buses.

[Thanks Pseudo Lobster]

FabLab Helps The Developing World Set Up Long-distance Wireless Ethernet

The wooden frame seen above hosts a parabolic reflector making up one side of a wireless network link. This is a Fab Lab project called FabFi which uses common networking hardware to setup long-distance wireless Ethernet connections. It’s a bit hard to tell in the image above, but the reflector focuses radio waves on the antennae of a router we’re quite familiar with, the Linksys WRT54G. It’s held upside-down in an enclosure meant to protect it from the elements. The node above manages to complete a connection spanning 2.41 miles!

One of the core values of the project is to develop hardware that is easy to build with limited resources, then to make that knowledge freely available. Anyone who has the ability to download and print out the 2D design file can build a reflector for themselves. As we’ve seen in other projects, paper stencils and hand tools can handle this job with no need for a laser-cutter (which was used for the prototype). WRT54G routers are inexpensive and the project uses the open source firmware OpenWRT. They can be run from 12VDC power which means a car battery works when mains power is not an option. The system has been running in Afghanistan for two years and hardware failure is still in the low single-digits.

[Thanks das_coach]