Hacking A Floating RGB LED Decorative Ball

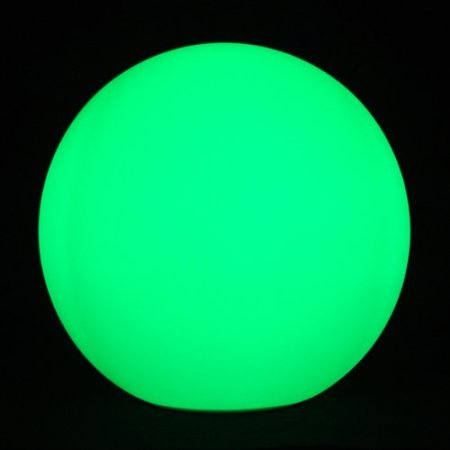
Knowing that I’m always happy to get something new and glowy, my wife brought home a cheap “floating pool light” that she found on sale for roughly $10. This is a large white floating ball that has LEDs inside and cycles through different colors. Meant to be put into a pool for neat effects, we found it to be much more interesting just used around the house.

However, it was a bit too bright and cycled colors too quickly for our taste. It was actually somewhat distracting when we were just trying to sit and have a few beers late at night on our patio. This gave me a perfect excuse to tear it apart and start hacking… like I wasn’t going to do that anyway.

What I found inside was extremely simple. There’s a single un-marked chip that holds the different display modes (there were 3 display modes: warm, cool, and white). The LEDs were arranged in an array of Reds, Blues, Greens, and Whites (half marked yellow).

Continue reading “Hacking A Floating RGB LED Decorative Ball”

Light Painting With The Raspi

The art of taking long exposure photographs with blinking RGB LEDs has improved greatly over the years, mostly due to the extremely easy to use Arduino and hundreds of tutorials on the web. If there’s one problem with light painting with a ‘duino, it’s that large, full color images take up a ton of storage space, much more than the flash memory on an Arduino can provide. Wanting fancier and more colorful light painted images, [Phil] over at Adafruit used a Raspberry Pi to make some very awesome light painted images.

Like any Adafruit tutorial that uses LEDs, the build begins with a digital RGB LED strip wired to the GPIO pins on the Raspi. After loading up the Adafruit educational Raspi Linux distro for hardware SPI support, the only thing left to do was writing a Python script to display images in the air.

[Phil] says vertical, hand-held LED bars are old hat, so he took a hula hoop and a few bits of PVC pipe, attached the LED strip, and put it on his bike. The results are really impressive – we’re loving the flames in the title pic – and considering the Raspi is a full-fledged computer, light paintings larger than what [Phil] made are very possible.

Back Up The Band With Some RGB Stage Lights

Fresh off the 72-hour madness of the Red Bull Creation contest some of the folks a North Street Labs took on a stage lighting project. It’s for a local performing venue that just opened up, and despite the time crunch the team pulled off another great build.

Sixteen meters of LED strip make the electronics for the project a whole lot easier. The strips run up the center of a cabinets built as stand-alone columns which will end up at the back of the stage. Each cabinet has its own 5V 4A power supply (note the burnout issues they mention when using cheap eBay PSUs). Each column has its own Arduino Uno driving the LEDs, with an RS485 shield to connect back to a main Arduino Mega 2560 controller. It uses a PSX controller to switch between different lighting modes.

The seven towers boasting 688 LEDs isn’t all that’s shedding light on the show. There’s also about 300 feet of EL wire at work.

Continue reading “Back Up The Band With Some RGB Stage Lights”

RGB Chandelier May Not Fly With The Wife

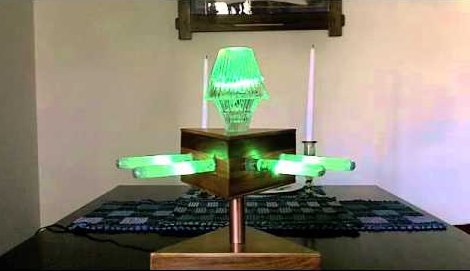
We understand where [Craig] is coming from, leaving no stone unturned when looking for new electronic projects to occupy his time. He tried to convince his wife that they needed a light show to accompany dinner, and while she was skeptical he went ahead and built this remote control RGB chandelier anyway.

He recently purchased fifteen feet of RGB LED strip and has since been trying to use it in his projects. What’s interesting is that he didn’t make direct use of the strip. Just 10 of the LED packages were used. He desoldered and extended each wire leads and used one of the driver chips to address them all. The main body of the light fixture is a triangle, and out of each side two test tubes host one LED each. To diffuse the light [Craig] mixed up some resin and laced it with glitter. Once hardened the resin holds the LEDs firmly in place. The glass shade in the center of the fixture hides four more LEDs.

[Craig] uses a remote control from a Roku box to control the chandelier. An IR receiver is monitored by an Arduino which drives the LEDs accordingly. After the break you can see a demonstration of the completed project. Unfortunately it doesn’t provide as much light as they need. We’d suggest an upgrade along these lines.

Continue reading “RGB Chandelier May Not Fly With The Wife”

A Much Larger Rainbow Board Of Many Ping Pongs

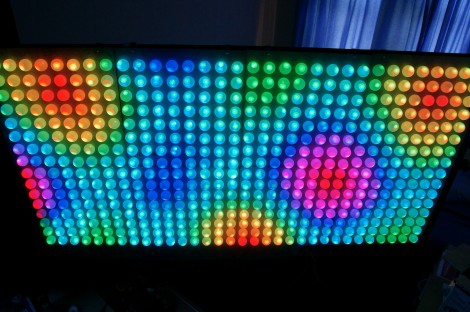
[George] started with an 8×8 grid, but just couldn’t help himself from upscaling to this 32×16 pixel ping pong ball display. That’s right, It’s a 512 pixel array of fully addressable RGB LEDs diffused with one ping pong ball each.

We featured the predecessor to this project back in January. That one was an 8×8 display using a Rainbowduino as the controller. [George] took what he learned from that build and expanded upon it. The larger display is modular. Each module starts as an 8×8 grid which connects back to the Arduino using a breakout shield with some Ethernet jacks used as quick connects. The LEDs are driven by 595 shift registers, with transistors which protect the logic chips from the currents being switched.

He had a lot of help soldering all the connections for the display and ended up bringing it to show off at the Manchester mini maker faire. See it in action in the video after the break.

Continue reading “A Much Larger Rainbow Board Of Many Ping Pongs”

Simple Light Painting Bar Build

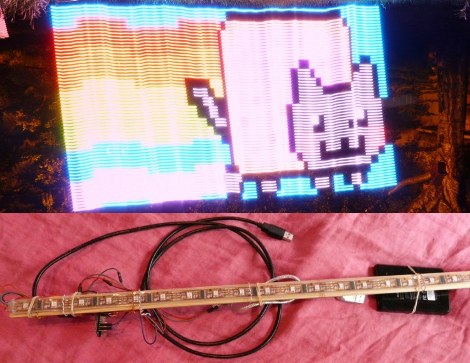
[SkyWodd] took the easy route when it came time to build this light painting bar. But he was still met with great success. Thanks to his well-documented work you should be able to throw this together for yourself in about an hour.

The idea here is to build a full-color display that will draw a picture in a long-exposure photograph. We’ve seen the concept used with 64 discrete RGB LEDs, but there’s almost no soldering to be done with this project. Instead, [SkyWodd] used an addressable RGB LED strip. It has 64 pixels, all taking commands via the SPI protocol. This helps keep the number of microcontroller connections to a minimum. He lashed the entire system onto a long hunk of wooden dowel and grabbed a camera.

You’ll need a DSLR as each image needs to have an exposure time approaching 10 seconds. One thing to note is that it may be best to leave the LED bar stationary and move the camera. If you use a tripod it should help keep the vibrations to a minimum.

Building Fiber Optic Chandeliers

This chandelier keeps the light source hidden and uses fiber optics to illuminate the acrylic diffusers. It’s the second attempt [TheCreator] has made at building his own. Bother projects are interesting in their own way.

The first attempt used marbles as diffusers and had a much different look to it. This time around he’s using what he calls acrylic dowels. They’re not round, but square (which is why we’re not sure dowel is the right term), and he says they work better than marbles for several reasons. The marbles weren’t very heavy so they didn’t really weigh down the glass fibers to keep then straight. They were also difficult to attach to the fibers and prone to breakage.

To attach the dowels he drilled a hole in the end and epoxied a fiber optic strand in place. To direct light into the other end of the filament he built his own frustum (a pyramid with the tip cut off) of inward facing mirror. This helps to focus what is coming from the RGB LEDs in the appropriate direction so that as much light as possible makes it into the fibers.

He didn’t really give any final thoughts so we wonder if it puts out enough light for his needs. We’re sure that if it’s purely a mood piece he’s satisfied.