Light Meets Movement With A Minimum Of Parts

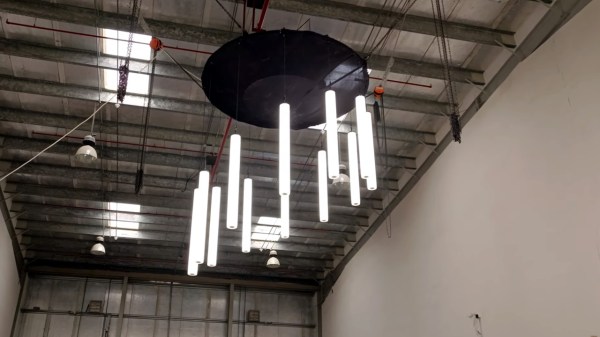
We often say that hardware hacking has never been easier, thanks in large part to low-cost modular components, powerful microcontrollers, and highly capable open source tools. But we can sometimes forget that what’s “easy” for the tinkerer that reads datasheets for fun isn’t always so straightforward for everyone else. Which is why it’s so refreshing to see projects like this LED chandelier from [MakerMan].

Despite the impressive final result, there’s no microcontrollers or complex electronics at work here. It’s been pieced together, skillfully we might add, from hardware that wouldn’t be out of place in a well-stocked parts bin. No 3D printed parts or fancy laser cutter involved, and even the bits that are welded together could certainly be fastened some other way if necessary. This particular build is not a triumph of technology, but ingenuity.

The video below is broken up roughly into two sections, the first shows how the motorized crank and pulley system was designed and tested; complete with various bits of scrip standing in for the final LED light tubes. Once the details for how it would move were nailed down, [MakerMan] switches over to producing the lights themselves, which are nothing more than some frosted plastic tubes with LED strips run down the center. Add in a sufficiently powerful 12 VDC supply, and you’re pretty much done.

As it so happens, this isn’t the first motorized lighting fixture that [MakerMan] has put together.

Continue reading “Light Meets Movement With A Minimum Of Parts”

A Chandelier Guaranteed To Make Some Retro Game Hardware Collectors Wince

If there’s one thing our community is good at, it’s re-imagining redundant old hardware, particularly in the field of classic gaming consoles and their peripherals. Dead consoles have become new ones, Powergloves have ventured into virtual reality, and light guns, well, they’ve become novelty light fittings.

The [JJGames] Nintendo light gun chandelier will probably make collectors wince who prefer their retro hardware pristine, but it’s certainly an eye-catching conversation piece. The twelve guns are carefully disassembled and the Nintendo electronics removed, before a bulb holder and teardrop lamp is installed. Wiring is completed with twist caps,  the guns are joined at the grip with some metal strips and glue, and a chain for ceiling attachment completes the ensemble. A dozen pieces of ireplacable retro hardware sacrificed for a novelty, or a masterpiece of interior decoration? You decide, though we’d opt for the latter in the context of the retro games based business in which it sits.

Our favourite NES lightgun hack ever has to be [Seb Lee-Delisle]’s one that fires a real laser. Meanwhile [JJGames] have made it here before in a similarly wanton use of classic Nintendo plastic, with their urinal made from SNES cartridges.

Fail Of The Week: Blown Light Bulb Controllers

fotw-nyc-resistor-chandelier-driver

We’ve been meaning to get around to this one for many weeks now. It’s been hard to find good fail write-ups… it’s as if hackers are afraid to admit that sometimes projects fail. We hope you’ll shake off that opinion as failure is the fastest path for learning and true understanding!

[xymax] was working on a control system for a chandelier with 150 bulbs which use 5 Watts each. This project was being readied for the NYC Resistor Interactive Party which [Adam Fabio] attended last month. As deadline for the show approached, the last piece was put in place late into the night… but it was connected backwards. In a tale worthy of a slapstick movie, the reverse polarity caused a chip on all seven controller boards for this module to blow like the one seen above. But that’s not all, the laptop being used during prototyping was connected by USB and started smoking!

All of us feel the pain of this type of equipment failure. Luckily [xymax] looked for lessons to learn instead of dwelling on the mistake itself. Use protection diodes, keyed connectors, and write about your failures. Hopefully reading this will help others avoid a similar equipment-destroying mistake.


2013-09-05-Hackaday-Fail-tips-tileFail of the Week is a Hackaday column which runs every Thursday. Help keep the fun rolling by writing about your past failures and sending us a link to the story — or sending in links to fail write ups you find in your Internet travels.

Winch Hack Lets Your Change Chandelier Light Bulbs At Ground Level

We’ve seen a lot of hacks from [Lou] and his latest continues the tradition of excellence. The entryway of his home is a couple of stories high and features a chandelier. Unfortunately he doesn’t have a ladder tall enough to use when changing light bulbs. Even if he did have a way to get up there it would be nice if the light fixture could come to him instead. This hack makes that happen by adding an electric winch to lower the light fixture.

Watching the installation process makes us think that [Lou] might be a little reckless. He’s up in the attic mounting a winch to the rafters before he cuts the board holding the fifty-pound chandelier’s junction box in place. He mentions foregoing the recommended cable fastener in lieu of some baling wire. But he does manage the task without dropping the ball so to speak — perhaps we shouldn’t be so critical of his methods. After altering the chandelier mounting bracket to work with a winch [Lou] wires an outlet in the attic and adds a plug to the cord on the light. This means he needs to go into the attic to unplug the light before lowering the fixture on the winch. But he’s not done yet. After the break you can watch the second part of the project with improves upon this by adding a wall switch to control the winch and extension cord management to route the power.

[Lou] really loves his automated home gadgets. Check out the gaming table which drops from the ceiling.

Continue reading “Winch Hack Lets Your Change Chandelier Light Bulbs At Ground Level”

100,000 Lumen Chandelier Is Like Having The Sun A Few Feet Above Your Head

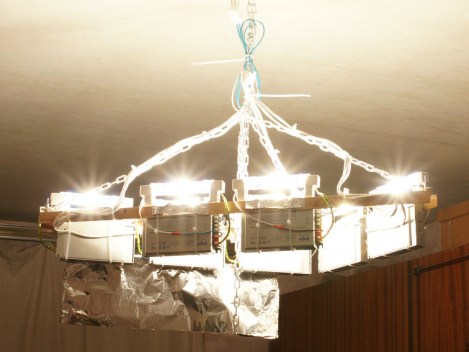
[Michail] doesn’t mess around when it comes to lighting. He built this 100,000 Lumen chandelier to make sure his office is bright during the dreary months. The thought is that it will provide the health benefits of long sunny day. It has been hanging for about a year now, and he slowly came to the realization that it’s several times too bright for indoor use.

We know where he’s coming from though. When it’s dark at 5 pm we want it to be plenty bright inside. He started with an incandescent bulb, then moved through compact fluorescent and halogen bulbs before deciding to undertake the build. What you see above are 150W Metal Halide lamps.  There is some danger to using these without an enclosure. They do emit some UV light and they can explode. So whenever you buy a fixture that uses them there’s a sheet of filtering safety glass sealing up the enclosed sockets. [Michail] decided not to bother with this safety feature, instead depending on the benefits of an electronic ballast. He says these reduce the chances of an explosion sending scorching hot glass shrapnel your way.

As we mentioned earlier, his conclusion is that just one of these bulbs is enough to illuminate his small office.

RGB Chandelier May Not Fly With The Wife

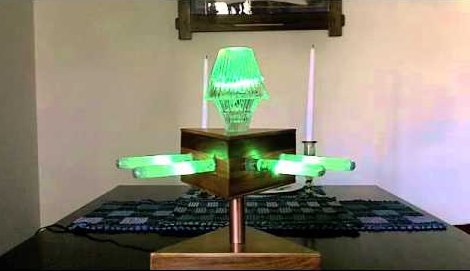
We understand where [Craig] is coming from, leaving no stone unturned when looking for new electronic projects to occupy his time. He tried to convince his wife that they needed a light show to accompany dinner, and while she was skeptical he went ahead and built this remote control RGB chandelier anyway.

He recently purchased fifteen feet of RGB LED strip and has since been trying to use it in his projects. What’s interesting is that he didn’t make direct use of the strip. Just 10 of the LED packages were used. He desoldered and extended each wire leads and used one of the driver chips to address them all. The main body of the light fixture is a triangle, and out of each side two test tubes host one LED each. To diffuse the light [Craig] mixed up some resin and laced it with glitter. Once hardened the resin holds the LEDs firmly in place. The glass shade in the center of the fixture hides four more LEDs.

[Craig] uses a remote control from a Roku box to control the chandelier. An IR receiver is monitored by an Arduino which drives the LEDs accordingly. After the break you can see a demonstration of the completed project. Unfortunately it doesn’t provide as much light as they need. We’d suggest an upgrade along these lines.

Continue reading “RGB Chandelier May Not Fly With The Wife”

Building Fiber Optic Chandeliers

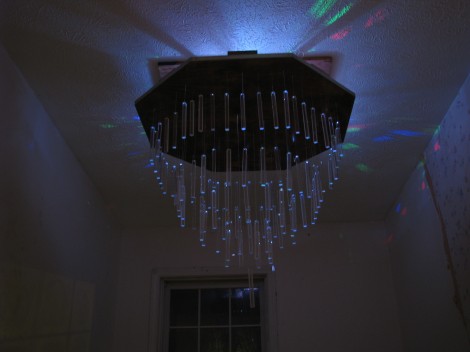
This chandelier keeps the light source hidden and uses fiber optics to illuminate the acrylic diffusers. It’s the second attempt [TheCreator] has made at building his own. Bother projects are interesting in their own way.

The first attempt used marbles as diffusers and had a much different look to it. This time around he’s using what he calls acrylic dowels. They’re not round, but square (which is why we’re not sure dowel is the right term), and he says they work better than marbles for several reasons. The marbles weren’t very heavy so they didn’t really weigh down the glass fibers to keep then straight. They were also difficult to attach to the fibers and prone to breakage.

To attach the dowels he drilled a hole in the end and epoxied a fiber optic strand in place. To direct light into the other end of the filament he built his own frustum (a pyramid with the tip cut off) of inward facing mirror. This helps to focus what is coming from the RGB LEDs in the appropriate direction so that as much light as possible makes it into the fibers.

He didn’t really give any final thoughts so we wonder if it puts out enough light for his needs. We’re sure that if it’s purely a mood piece he’s satisfied.