How’s The 60Hz Coming From Your Wall?

If you’ve ever wondered why NTSC video is 30 frames and 60 fields a second, it’s because the earliest televisions didn’t have fancy crystal oscillators. The refresh rate of these TVs was controlled by the frequency of the power coming out of the wall. This is the same reason the PAL video standard exists for countries with 50Hz mains power, and considering how inexpensive this method of controlling circuits was the trend continued and was used in clocks as late as the 1980s. [Ch00f] wondered how accurate this 60Hz AC was, so he designed a little test.

Earlier this summer, [Ch00f] bought a 194 discrete transistor clock kit and did an amazing job tearing apart the circuit figuring out how the clock keeps time. Needing a way to graph the frequency of his mains power, [Ch00f] took a small transformer and an LM311 comparator. to out put a 60Hz signal a microcontroller can read.

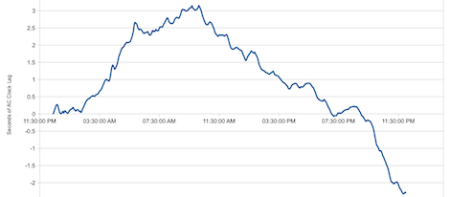
This circuit was attached to a breadboard containing two microcontrollers, one to keep time with a crystal oscillator, the other to send frequency data over a serial connection to a computer. After a day of collecting data, [Ch00f] had an awesome graph (seen above) documenting how fast or slow the mains frequency was over the course of 24 hours.

The results show the 60Hz coming out of your wall isn’t extremely accurate; if you’re using mains power to calibrate a clock it may lose or gain a few seconds every day. This has to do with the load the power companies see explaining why changes in frequency are much more rapid during the day when load is high.

In the end, all these changes in the frequency of your wall power cancel out. The power companies do the same thing [Ch00f] did and make sure mains power is 60Hz over the long-term, allowing mains-controlled clocks to keep accurate time.

Simple Light Painting Bar Build

[SkyWodd] took the easy route when it came time to build this light painting bar. But he was still met with great success. Thanks to his well-documented work you should be able to throw this together for yourself in about an hour.

The idea here is to build a full-color display that will draw a picture in a long-exposure photograph. We’ve seen the concept used with 64 discrete RGB LEDs, but there’s almost no soldering to be done with this project. Instead, [SkyWodd] used an addressable RGB LED strip. It has 64 pixels, all taking commands via the SPI protocol. This helps keep the number of microcontroller connections to a minimum. He lashed the entire system onto a long hunk of wooden dowel and grabbed a camera.

You’ll need a DSLR as each image needs to have an exposure time approaching 10 seconds. One thing to note is that it may be best to leave the LED bar stationary and move the camera. If you use a tripod it should help keep the vibrations to a minimum.

One Remote To Stream Them All

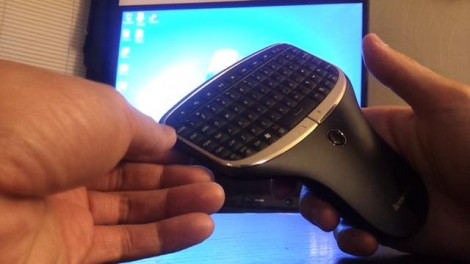
We’d bet that most readers stream video as the lion’s share of their entertainment consumption. It’s getting easier and easier thanks to great platforms like XBMC, but not everything is available in one place, which can be a bit off-putting. [Tony Hoang] is trying to simplify his viewing experience by creating one remote to rule all of his streaming software. He’s got an HTPC connected to his entertainment center, and used a bit of scripting to add some functionality to this Lenovo N9502 remote control.

The hack is entirely software-side. The remote already works quite well, but he remapped the home, end, and page up buttons, as well as the mouse controller. The three buttons will launch XBMC, Hulu, and Netflix respectively. They are also set to kill the other applications before launch so that one button will do everything needed to switch between one another. The mouse remapping takes care of up, down, left, and right keys for navigation in the UI and control of the playing videos. See a demo of the setup after the break.

Everything was done with autohotkey scripts for Windows. But this should be easy to code with other OSes as well. If you’re prone to have a slip of the finger you might want to work out a double-click to launch the applications so you don’t accidentally hit a key in the middle of your favorite show.

Continue reading “One Remote To Stream Them All”

Shakey Robot Plays Angry Birds

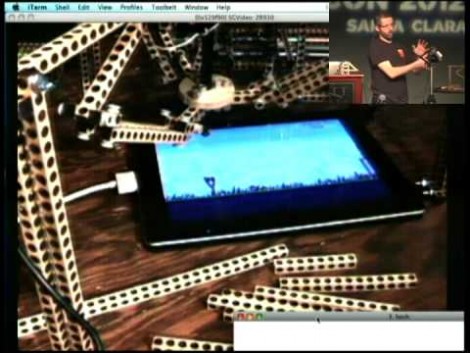
At this year’s Pycon [Jason Huggins] gave a talk about his Angry Birds playing robot. He built a delta robot which includes a pen actuator for controlling a capacitive touch screen. The video after the break starts with a demo of the bot beating a level of Angry Birds on the iPad.

The idea behind the build is that robots like this could be used for app testing. I this case [Jason] has tweaked the servo commands manually to achieve the results. But during the talk he does demonstrate some machine vision to analyze and win a game of tic-tac-toe.

We do enjoy seeing the robot, but we’re not sold on the thought that testing will use robots. Perhaps there is a niche need for this type of thing, but we assume the majority of automated testing can be done in the emulator for the device on which you are developing. What we really want to know is how the capacitive stylus works. We didn’t catch him talking about it at all. We want a reliable, yet simple way to electronically trigger touchscreen inputs (along the lines of this project). If you know how [Jason’s] stylus is working please share your thoughts in the comments section.

Continue reading “Shakey Robot Plays Angry Birds”

Key-covered Textiles

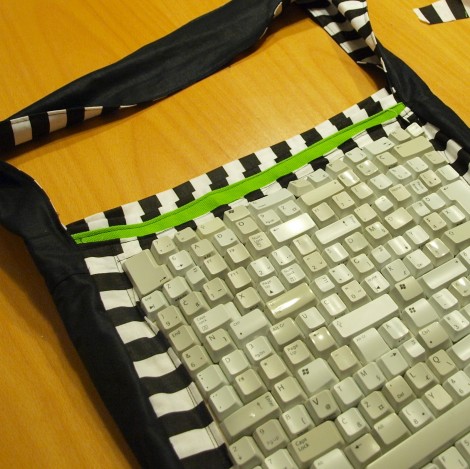
[Karolina] has been hard at work adding a little flair to her bag. Well, a lot of flair actually. She rolled several keyboards worth of keys into one of the panels for this bag. She had seen the idea in a magazine and decided to give it a try. The secret is to use staples.

The first issues is gather enough keys, so if you give this a try make sure to let your friends know you’re looking for old keyboards. Next she wanted each of the keys to lay flat on the fabric panel, which meant cutting away the plastic pegs that extend past the edges of the key. From there [Karolina] laid out her design with each key face down. Notice how careful she was to make sure there were no gaps between them. Now it was time to link them all together. She used heavy-duty staples as connecting brackets. They were bent to provide a large gluing surface on the underside of the face of each key. With the staples in place, each can be sewn to the fabric with a loop of thread. Although she started the project in the fall she’s just now showing off the finished bag.

Heads Up Controls For Your IPod

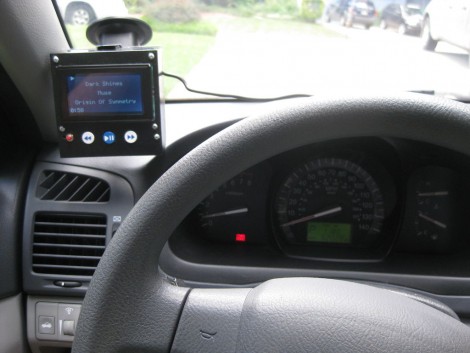
[Cmonaco3’s] girlfriend wanted a better way to control her iPod when driving. She didn’t want to take her eyes of the road and asked him if he could help. He ended up building a heads up display which reads out track information and offers a few simple buttons for control.

The display includes controls for track forward, track back, and play/pause. Those buttons, along with the LCD screen, mount on the windshield using a suction cup. This way the driver doesn’t have to completely remove focus from the road to control the iPod which is sitting in the passenger’s seat.

To accomplish this [Cmonaco] used a dock connector breakout board for communication between an Arduino and the iPod. The Arduino pulls song information to be displayed on the graphic LCD screen, and sends commands to the iPod when it detects a button push. See a quick demo of the setup after the break.

Continue reading “Heads Up Controls For Your IPod”

[Dino’s] Talking Box(es)

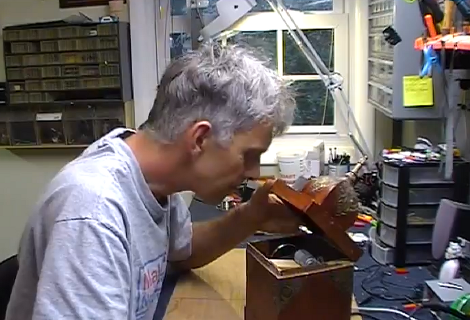
[Dino] is about three-quarters of the way through his talking box project. He’s completed one of the two boxes, and is showing off the technique he uses to marry motion with sound in order to mimic flapping lips with the box top.

You may remember [Dino’s] first look at the EMIC2. It’s a single-board text to speech module which is what provides the voice for the box. But what fun is that without some animatronics to go along with it? So [Dino] started playing around with different concepts to move the box top along with the speech. This is easier said than done, but as you can see in the video after the break, he did pull it off rather well. He built a motor control circuit that takes the audio output of an LM386 amplifier chip and translates it into drive signals for the motor. The shaft is not directly connected to the lid of the box. Instead it has a curved wire which is limited by a piece of string so that it doesn’t spin too far. It lifts the lid which is hinged with a piece of cloth.

Continue reading “[Dino’s] Talking Box(es)”