The practice of developing wearable electronics offers a lot of opportunity for new connector designs and techniques for embedding electronics. Questions like these will eventually come up: How will this PCB attach to that conductive fabric circuit reliably? What’s the best way to transition from wire to this woven conductive trim? What’s the best way to integrate this light element into this garment while still maintaining flexibility?
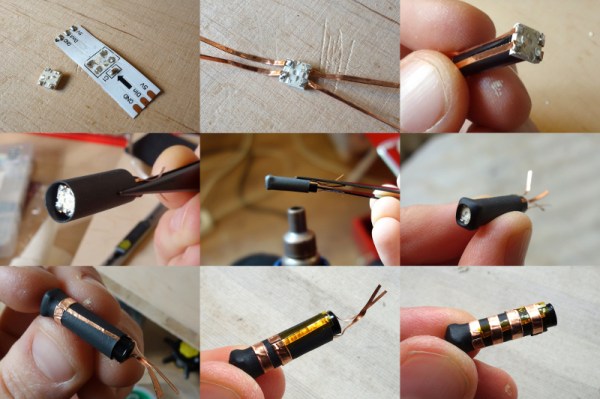
Mika Satomi and Hannah-Perner Wilson of Kobakant are innovators in this arena and inspire many with their prolific documentation while they ask themselves questions similar to these. Their work is always geared towards accessibility and the ability to recreate what they have designed. Their most recent documented connector is one they call the Bumblebee Breakout. It connects an SMD addressable RGB LED, such as Adafruit’s Neopixel, to a piece of side glow fiber optic 1.5mm in diameter. On a short piece of tubing, the four pads of the SMD LED are broken out into four copper rings giving it the look of a striped bumblebee. To keep from shorts occurring while wrapping the copper tape contacts around the tube, they use Kapton tape to isolate each layer as they go.
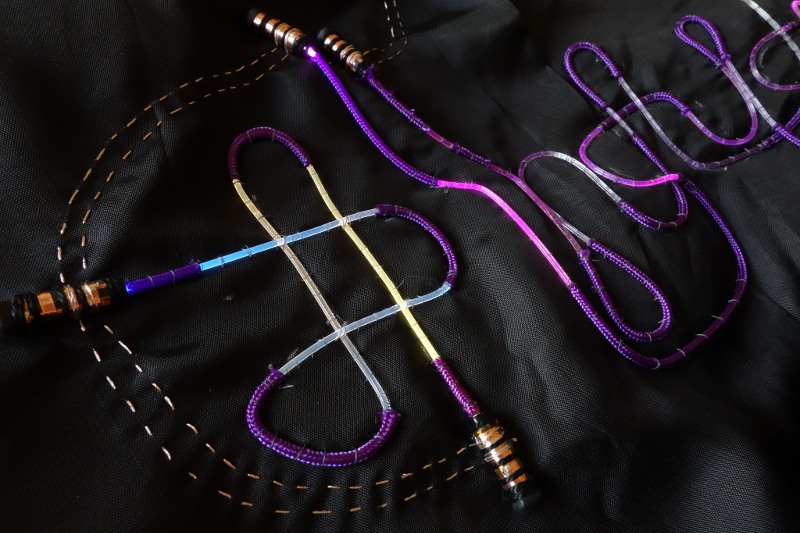 This connector was originally created to be used in a commission they did out of Koba, their e-textile tailor shop located in Berlin. Fiber optics were applied to jackets for a performance called “All Your Base Are Belong To Us” produced by the Puppetry Department of the Hochschule für Schauspielkunst Ernst Busch.
Peruse more e-textiles techniques and learn how to build a connector transitioning from an embroidered thread bus to a wire and how to knit solderable circuit boards. And make sure to click around Kobakant’s website, it’s full of e-textile DIY tutorials!