Fine-pitch SMD Soldering With Minimal Tools

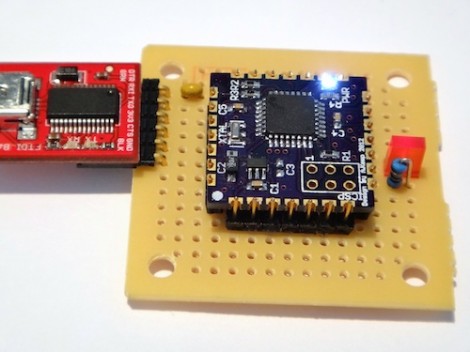
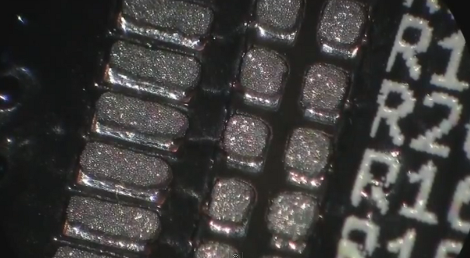
We try to stick to the 0805 parts because they’re still big enough to solder by hand. But [Scott] shows us that it doesn’t take too many special tools to reflow fine-pitch components at home. In this case he’s using 0402 resistors, a footprint that we consider functionally impossible to solder using an iron.

The two parts of the equation that he spent some money on are professionally produced PCBs and a solder stencil. The stencil is laser-cut from Kapton, which is heat-resistant so it doesn’t warp during the cutting process. An acrylic frame holds the PCB in place, and he just tapes the stencil over it and uses a chunk of acrylic as a squeegee to evenly apply the solder paste. Splurging on the PCB and stencil means you’ll achieve tolerances which lead to success.

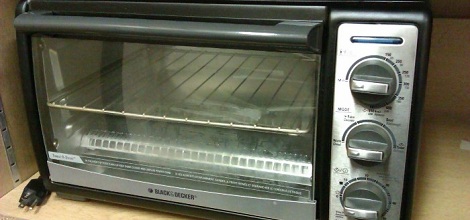
The next issue is placing the components. [Scott] shows off some vacuum tweezers he built using an aquarium pump. Watch the video after the break to see how small those 0402 parts are when he extracts one of the resistors from the tape packaging. With the board manually populated (check everything twice!) he moves the board to a completely unaltered toaster oven for reflow. We have seen a lot of projects which add controllers to these ovens, but he really makes the case that you don’t need it. Instead, he uses a thermocoupler read by a multimeter just to let him know what’s going on with the temperature. He uses a smart phone as a timer, and switches the oven on and off to match the solder’s heat profile. Continue reading “Fine-pitch SMD Soldering With Minimal Tools”

Toaster Oven Reflow Soldering Roundup

SMD components have a lot of advantages over the through-hole parts our fathers and grandfathers soldered. Working with these tiny surface mount components requires a larger investment than a soldering iron and a wire-wrap gun, though. Here’s a few reflow ovens that were sent in over the past week or two.

[ramsay] bought a 110 V toaster oven off of eBay. Even though [ramsay] is in England and has 230 V mains, everything in the oven is mechanical and works just fine with a higher voltage. His first test didn’t go quite as planned; the solder paste wasn’t melting at 120° C, so he cranked up the temperature and learned that the FR in FR-4 stands for flame retardant. Never deterred, [ramsay] decided to build a controller so the temperature ramps up and cools off at the right rates for the flux and paste to do their thing.

Solder paste has a temperature profile that requires the board to be kept at a temperature between 150° and 180° C for a minute or so before climbing up to 220° for a second so the solder will melt. [Nicolas] had the interesting idea of putting a USB port in his toaster oven and storing the heating profiles on his desktop. The build uses an MSP430 microcontroller to turn the relays powering heating elements on and off. [Nick] is working on a C# desktop app to monitor and regulate the oven temperature from his computer, so we’re fairly interested in seeing the final results.

Watching the SMD self-alignment videos on YouTube is a lot more fun than messing around with tweezers, stereo microscopes, and extremely fine soldering irons. If you’ve got a better idea for a toaster/reflow oven, send it in on our tip line and we’ll check it out.

Flowerboard LED Cube

Here’s a neat 4x4x4 LED cube made with an ElecFreaks Flower Protoboard.

A few days ago, we posted a neat new prototyping board made specifically for SMD work. Instead of the usual ‘holes-with-circles’ protoboard layout, the ElecFreaks team decided to go with a flower-shaped pad. This makes it especially easy to deal with SMD components when building whatever. To demonstrate their new protoboard, ElecFreaks built an awesome-looking 4^3 LED cube. Just look at those solder traces.

The LED cube itself is nothing we haven’t seen before, but the construction of this thing is amazing. The entire build is on the Arduino Mega Flower shield, meaning there are no wires at all. Everything, from the resistors to the transistors, is an SMD component. The only problem now is bending and soldering all those LED leads.

This Flower Protoboard is starting to look more and more interesting; check it out in action after the break.

Continue reading “Flowerboard LED Cube”

Hackaday Links: December 16, 2011

Free-form Christmas ornament

Here’s [Rob]’s free form circuit that’s a Christmas ornament for geeks. It looks great, but sadly isn’t powered through a Christmas light strand. It’s just as cool as the skeletal Arduino we saw.

Prototyping with flowers

Well this is interesting: protoboard that’s specifically made to make SMD soldering easier. The guys at elecfreaks went through a lot of design iterations to make sure it works.

We’ll call it Buzz Beer

The days are getting longer and cabin fever will soon set in. Why not brew beer in your coffee maker? It’s an oldie but a goodie.

Christmas oscilloscope

With just an ATtiny and a little bit of  futzing around changing the coefficients of a partial differential equation, you too can have your very own oscilloscope Christmas tree. Don’t worry though, there are instructions on how to implement it with an Arduino as well. HaD’s own [Kevin] might be the one to beat, though.

So what exactly does a grip do?

You know what your home movies need? A camera crane, of course. You’ll be able to get some neat panning action going on, and maybe some shots you couldn’t do otherwise. Want a demo? Ok, here’s a guy on a unicycle.

OpenPnP Working To Create An Affordable And Completely Open Pick And Place Machine

open-pick-and-place

If you happen to do a lot of SMD work, a pick and place machine is an incredible time saver. The problem is that most automated pick and place solutions are well outside of the “small outfit” price range, let alone the budget of a hobbyist.

We have seen some great DIY pick and place implementations around here, though most are lacking professional features or the sort of documentation that would make it easy for others to replicate. The OpenPnP project is looking change things, with a completely open source hardware and software solution with a price target of under $1,000.

Things are already well under way, with plenty of details available in the project’s wiki. According to the development page, a prototype should go into construction in the near future, and development of the pick and place’s control software is coming along nicely.

While things are looking great for the OpenPnP project, they can always use some help to keep things moving. Be sure to check out the project page if you are interested in lending a hand.

To see some of the progress being made, stick around to see a short demo video of the control software and camera in action.

[via Make]

Continue reading “OpenPnP Working To Create An Affordable And Completely Open Pick And Place Machine”

Surface Mount Solder Assitant

Make sure those tiny parts know their place by using this surface mount solder assistant (translated). It’s like a clamp for small packages; gravity and a needle to hold them in place while you do some hand soldering. [Red Devil] started the built by soldering together some brass rails into a hinged frame with a clamp to accept the needle tip. Next, a pair of tubes were added to accept LEDs which light the work area (we think that’s a fantastic touch). Finally, the assembly was mounted to the corner of a square base that makes up the work surface.

This is basically a complex version of a simple gravity clamp. But if you’re doing some assembly line soldering this would be indispensable. For this kind of work, custom jigs are often built. That would still be the case, but this armature removes the need of building something into each jig to hold the SMD components in place.

Toaster Oven Forgoes Pop-Tarts, Reflows Solder

For SMD work, solder paste and a heat gun is great. Heat guns aren’t the cheapest thing, so [Karel] decided to make cheap reflow oven out of a toaster oven. With a PCB taken from a laminator temperature control board, the build was fairly successful, so [Karel] decided to add a thermistor to his oven.

There was a problem with placing this thermistor near the board: solder melts in a reflow oven, so [Karel] needed to figure how to connect the thermistor to the control board outside the oven. The solution was crimping thin copper tubing to the thermistor leads and passing that tube through the wall of the oven. Epoxy was used to avoid an electrical short. A low tech solution, but very effective. After applying some solder paste and going in the oven, this board looks very clean. There are a few solder bridges, but nothing a wick can’t take care of.

[Karel] is now working on an update to the temperature controller that controls the oven over a serial connection. Check out the video of a few temperature cycles after the break.

Continue reading “Toaster Oven Forgoes Pop-Tarts, Reflows Solder”