Building Your Own Fusion Drive

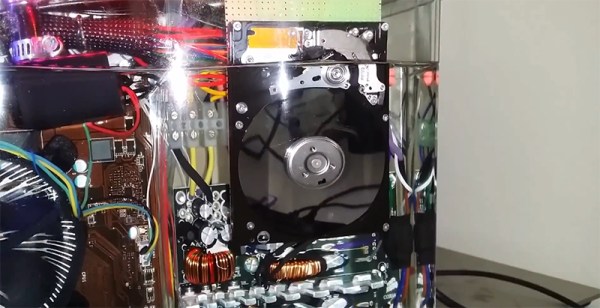
We missed the original announcement, but Apple unveiled more than just the iPad Mini at their last event. They’ve got a new storage system called Fusion Drive which is supposed to combine the access speeds of solid state with the storage density of platter drives. When you look just under the surface what you’re really seeing is a disc drive with grossly enlarged cache in the form of an SSD drive. How about moving from the 64 MB or so of cache seen on many large hard drives today to something like 64GB?

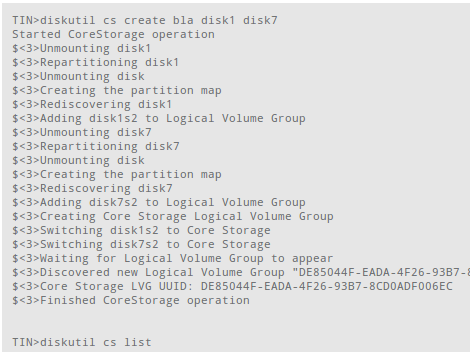
Well you don’t have to wait for Apple to do it. [Patrick Stein] gave it a shot using command line tools to combine an SSD with a physical drive. Sure, it’s not an all-in-one solution, but it is a pretty good proof. The linchpin that will really make it possible is a low-level driver that can handle the caching on the SDD, while ensuring that the data eventually makes it to the platter for long-term storage.

[via Engadget]

SSD Flex Connector To SATA

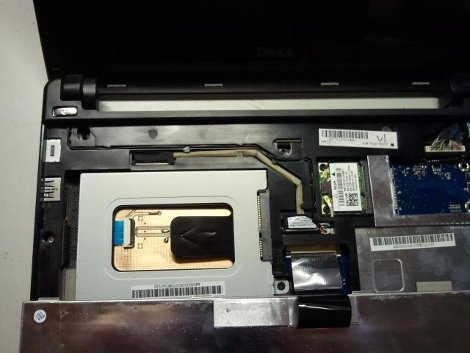
[Scott] was trying to fix a laptop, and we all know how that sometimes ends. Having a spare 128GB solid state drive and a Dell Mini 10 netbook to shove it in, there was only one problem, the drive did not have SATA connectors. That problem was taken care of like a pro with this FPC to SATA converter.

Inspired by our recent spot about Speeding up a ThinkPad, he was able to find information about the FPC connector from a similar Samsung model, order a SATA connector, FPC zero force connector and matching 24pin jumper. From there a board is designed to connect the two interfaces, taking notes of how other drives have their SATA traces laid out to ensure proper function.

The board is etched and connectors soldered, with every thing plugged in and tested, a little bit of glue is used to hold everything in the stock netbook’s drive sled, resulting in really fast boot times, and a factory look.

Speeding Up A ThinkPad X41 Via A SATA SSD Conversion

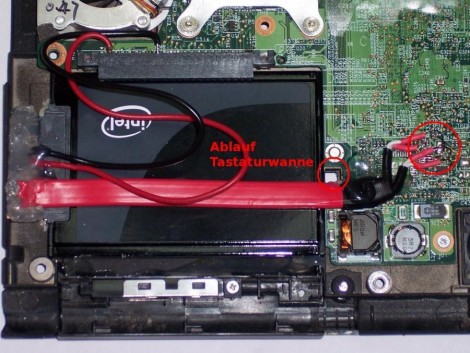
[Marek Walther] uses a ThinkPad x41 tablet for business on a daily basis. Since he’s on the go with the device he figures that hardware failure is eventually going to strike and with that in mind he purchased a second unit – slightly broken – to fix as a backup. He had never been excited about the speed of the tablet so he set out to find improvements. One of the options was to replace the traditional hard drive with a solid state model (translated). But simply dropping in an SSD isn’t going to make things faster. That’s because the stock drive uses a PATA interface. After a bit of snooping [Marek] discovered that the motherboard has a SATA interface that has a bridge connecting to the PATA plug. By removing the bridge and soldering a SATA cable to the board he was able to improve performance while increasing storage capacity at the same time.

Making MSATA Work With Mini PCI Express

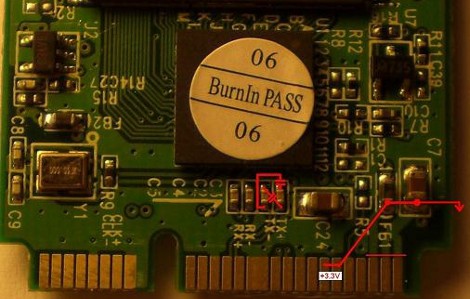
[Trucki] wanted to upgrade the internal storage on his JooJoo. There’s an mSATA connector inside but devices that use that protocol are hard to come by and when you do they’ll cost you and arm and a leg. He knew he could get solid state drives cheaply that use the mini PCI Express standard, which is mechanically compatible with mSATA. So he set out to alter a mini PCI Express device to work with the mSATA protocol. This entails swapping the transmission lines and rearranging the voltage traces on the connector. To handle the TX- and TX+ lines he desoldered their decoupling capacitors and realigned them to trade their signals. For the 3.3V lines he had to cut the feed and solder jumper wire to the correct pads.

This is some nice work which let him add a 32 GB drive for just sixty Euros. Since the device only comes with a 4 GB SSD an upgrade is almost mandatory if you’re planning to install an alternate OS on the Joojoo.

SSD Upgrade For 24″ IMac

24-inch-imac-ssd-conversion

The hard drive in [Jason’s] 24″ iMac was on the blink. He decided that instead of just swapping out the bad drive for a traditional unit he would upgrade to a solid state drive. Tearing apart high-end hardware like this can be a bit nerve-racking but luckily the drive is mounted right behind the screen so he didn’t have to take everything apart.

The SSD he picked up was 2.5″ but the mounting hardware in the iMac is only setup for 3.5″ form factors. We would have used a bit of hackery to make it work but [Jason] went with an adapter kit. Uh-oh, once installed there was no problem with the mounting but the SATA cable didn’t reach far enough to plug it in. The cable snaked around under the motherboard and would have been a lot of work to swap for  a longer one. He ended up removing all of the mounting screws except for one coercing the drive close enough for the connection.

It worked for him and it can for you as well. If you do this make sure to devise your own mounting scheme so that you don’t hit the same snag.

[Photo: AppleInsider iMac teardown]

[via TUAW]

32GB Solid State Zune Upgrade

Top_by_Top.preview (Custom)

[Andrew] wrote in to show us how he upgraded a broken Zune to solid state. He had one that was giving the Error code 5 when it booted. This means the hard drive is bad. He was able to find a compatible solid state 32Gb drive that, with a little bit of case modification, he made fit. Everything fit back into the Zune and looked completely stock. This was all done for less than $130. He seems pretty proud of getting a 32GB Zune for $150, and we don’t think that’s too big of a deal. We found a bunch of them on eBay for under $100. He even states that he doesn’t see any performance or battery life improvements. So why do we post this? Well, we like to see stuff split open and we actually like the idea of a no-moving-parts mp3 player. We’re hard on our electronics and the thought of that platter getting jarred over and over and over and over really bothers us. Great job [Andrew].

Dell Adamo Teardown

dell_adamo

TechRepublic and iFixit partnered to teardown Dell’s flagship notebook, the Adamo. The Adamo is positioned to compete directly with Apple’s MacBook Air. The Dell crams a lot of technology into a very thin frame and they use a clever locking system for the backplate to hide any screws. The built in battery has a longer life than the Air and an SSD comes stock. The team points out that the Windows logo is etched on the backside instead of the standard ugly stickers; apparently this took quite a bit of teeth-pulling to get approved. Check out the full photo gallery which includes the fetish packaging and comparison shots to the Air and Dell Mini 9.