3D Printering: Making A Thing With Solidworks, Part I

printering1

Brian has graciously allowed me to hop on the 3D Printering bandwagon to write a brief intro to the wonderful world of Solidworks. We’ll be making the same ‘thing’ as done in the previous ‘Making a Thing’ tutorials:

engineeringdrawingblack1

Admittedly, most Hackaday readers probably don’t have Solidworks as it is a very expensive program. The main reason we are posting this tutorial is so that you can understand the work flow and compare it to some of the free/open packages out there.

Continue reading “3D Printering: Making A Thing With Solidworks, Part I”

3D Printering: Making A Thing In FreeCAD, Part II

printering

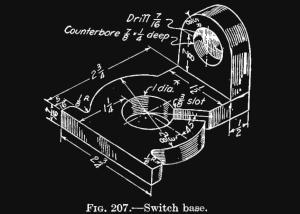
It’s time once again for another installment of a Making A Thing tutorial, where I design the same part, over and over again, in multiple 3D design software packages.

Last week we took a look at FreeCAD, a free, open source parametric modeller. It’s an amazingly powerful tool, and not it’s finally time to complete our model of a strange object ripped from the pages of an 80-year-old drafting textbook.

Here’s some links to previous Making A Thing tutorials, doe:

Read on for the second part of our FreeCAD tutorial

Continue reading “3D Printering: Making A Thing In FreeCAD, Part II”

3D Printering: Making A Thing In FreeCAD, Part I

printering

I’ve been writing these tutorials on making an object in popular 3D modeling programs for a while now, and each week I’ve put out a call for what software I should do next. There is one constant in all those comment threads: FreeCAD. I don’t know if these suggestions reflect the popularity or difficulty of FreeCAD nevermind, it’s totally the difficulty.

FreeCAD is an amazing tool that, if used correctly, can be used to make just about any part, and do it in a manufacturing context. If you need a bauble that’s three times the size of the original, FreeCAD’s parametric modeling makes it easy to scale it up. If you’re designing a thumbscrew and want the head larger while keeping the threads the same, FreeCAD is for you. Basically, you can think of this as a graphical extension of the Thingiverse Customizer. Very powerful, very cool, and unlike a lot of CAD packages out there, free.

Our in-house, overpaid SEO expert (he’s really just a monkey someone trained to use a bullwhip) demands I link to the previous ‘Making a Thing’ tutorials:

The tutorial for FreeCAD continues below.

Continue reading “3D Printering: Making A Thing In FreeCAD, Part I”

KiCad Video Series: From Concept To Manufacture

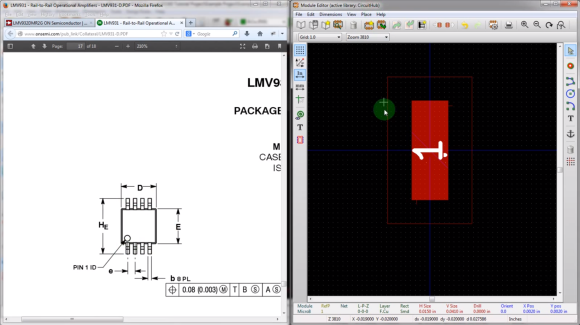
Many of our readers took the habit of using Eagle to design their PCBs. Even if you’ll find plenty of support for this software as well as a lot of parts libraries, the software comes with limitations. The useable board area is limited to 4×3.2 inches, only two signal layers can be used and more importantly the schematics editor can only create one sheet. On the other side, some of you may already know KiCad, a free open source and unrestricted schematics and layout software. [Chris] just tipped us of a video series he made, showing people how to design and build their very first PCB using this software. It’s a simple 555 circuit, but goes through all the steps necessary to design a PCB that costs only $5 through OSHpark… and will blink by the end. All the videos are also embedded after the break.

Continue reading “KiCad Video Series: From Concept To Manufacture”

GuruBrew’s 15 Minute Windows 8 Survival Guide

GuruBrew Windows 8 Survival Guide

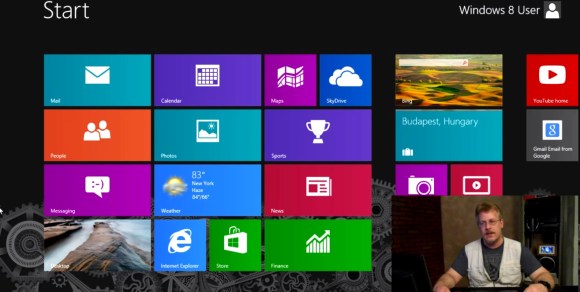
One thing very common to all of us is our reliance on operating systems in our hobby life. If that OS is Windows then you could be in for quite a shakeup with Windows 8. Many readers are Linux or Apple users and couldn’t care less if Microsoft is releasing an entire paradigm shift in desktop navigation. However, you just might find yourself facing this new OS and you’ll look like you’re on training wheels if you don’t get acquainted now, and considering the number of computers being released with Windows 8 its inevitable that day will come soon.

So if you haven’t been behind the wheel of Windows 8 then checkout [Steve’s] Windows 8 Survival Guide from the Guru Brew Tech Show. This is an excellent overview of the new touch screen navigation methods you’ll find in the Windows 8 desktop including hotspots, charms and tiles to name just a few. You’ll also learn tips to get around with a mouse and keyboard. It’s not a complete tutorial on using Windows 8 but you’ll at least know how to navigate, search for apps, work with multiple apps and find tools like task manager, control panel, file explorer as well as your familiar desktop.

Follow the break to watch the short survival guide video.

Continue reading “GuruBrew’s 15 Minute Windows 8 Survival Guide”

Assigning New Packages To Eagle PCB Components

adafruit-eagle-component-creation-tut

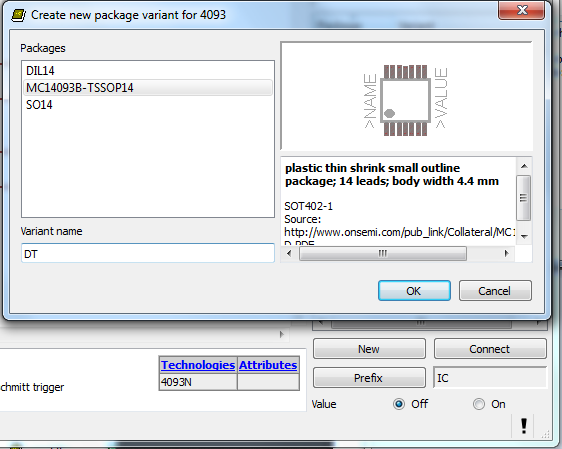
If you’ve spent any time at all laying out your own circuit boards we’re sure you’ve run into the issue of not having the right component or package available in the standard libraries. If it’s a common part, chances are the symbol definition will be there.  But perhaps the footprint you want to use is missing? Here’s an easy to follow tutorial which demonstrates how to assign new packages to existing Eagle PCB components. It even shows the basics of how to tweak the footprint to fit your needs (like making SMD footprints easier to hand solder).

This will not teach you how to make your own custom symbols, or how to build packages from scratch. But it will let you locate the package you want to use from a different component, then copy it to your own library for use with different parts. And the techniques shown make this a quick and relatively painless process.

We certainly don’t want to start another comment quagmire like the recent PIC v. AVR discussion. But we’ve used both Kicad and Eagle rather extensively and feel that neither one has really mastered part/footprint creation in a user-friendly way. We like Kicad’s total separation of footprints from components, and it’s myriad of parameters which can be used to tweak the layout. But if you use the same components frequently, Eagle’s standard of linking parts and footprints does end up saving a lot of time. What do you think?

Learn A Little Assembly Language For The 6502 Processor

6502-assembly-tutorial

Evern wanted to write your own Atari 2600 games? This won’t get you quite that far, but it will teach you the very basics. It’s an assembly tutorial for the 6502 processor. The nice thing is that you need nothing more than your browser to participate thanks to the embedded JavaScript emulator which acts as assembler, machine, and debugger in one.

The 6502 was in a lot of early equipment. In addition to the previously mentioned Atari they can be found in the Commodore 64, Apple II, and the original NES. You can even find folks building their own computers around the chip these days (most notable to us is the Veronica project). The guide starts off slowly, providing a working program and challenging the reader to play with to code in order to alter the outcomes. It moves on to an overview of registers and instructions, operators and branching, and culminates in the creation of a simple game.

[Thanks Mathilda]