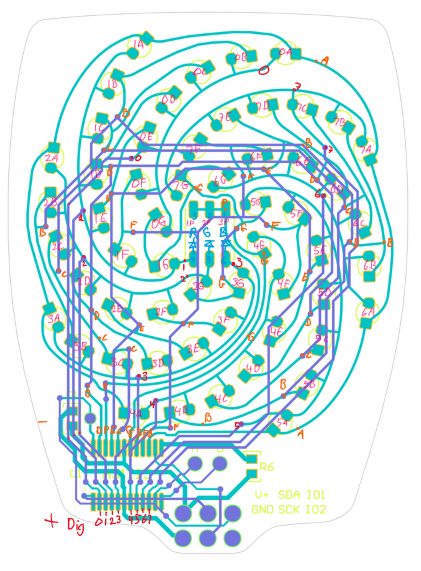
Schematics, For A Modern Flagship Phone

The mobile phone is an expensive and often surprisingly fragile device, whose manufacturers are notorious for making them as difficult to repair as possible. Glued-together cases and unreplaceable batteries abound, and technical information is non-existent. But amongst all that there’s one manufacturer with a different approach — Fairphone. Case in point, they’ve released the full service guide including schematics for their flagship Fairphone 5.

Fairphone’s selling point is the repairability and internal accessibility of their products and of course they’ve made hay with this as a marketing opportunity. But aside from that, it’s a fascinating chance to look in-depth at a modern smartphone from the inside out. We see the next-level PCB layout and how everything is so neatly packed into the minimum space, all without resorting to a heat gun.

It’s great to have another hackable phone, and fair play to Fairphone for releasing all this stuff, but perhaps the most interesting part from where we’re sitting is how and where this phone is being sold. There have been hackable phones before, for many the Pinephone will spring to mind, but they have always been sold to an audience who buy to hack. Here in Europe where this is being written, the Fairphone is being sold as a consumer device. It won’t shake Apple or Samsung from their perches, but for a hackable device to be so generally available to those who wish to do things with it can never be a bad thing.

We took a quick look at Fairphone back in 2015, when they launched.

Vectorscope KiCad Redrawing Project

When I saw this year’s Supercon Vectorscope badge, I decided that I had to build one for myself. Since I couldn’t attend in-person, I immediately got the PCBs and parts on order. Noting that the GitHub repository only had the KiCad PCB file and not the associated schematics and project file, I assumed this was because everyone was in a rush during the days leading up to Supercon weekend. I later learned, however, that there really wasn’t a KiCad project — the original design was done in Circuit Maker and the PCB was converted into KiCad. I thought, “how hard can this be?” and decided to try my hand at completing the KiCad project.

Fortunately I didn’t have to start from scratch. The PCB schematics were provided, although only as image files. They are nicely laid out and fortunately don’t suffer the scourge of many schematics these days — “visual net lists” that are neither good schematics nor useful net lists. To the contrary, these schematics, while having a slightly unorthodox top to bottom flow, are an example of good schematic design. Continue reading “Vectorscope KiCad Redrawing Project”

Pocket Radio Powered By Tiny Microcontroller

Before the days of MP3 players and smartphones, and even before portable CD players, those of us of a certain age remember that our cassette players were about the only way to take music on-the-go. If we were lucky, they also had a built-in radio for when the single tape exhausted both of its sides. Compared to then, it’s much easier to build a portable radio even though cassettes are largely forgotten, as [wagiminator] shows us with this radio design based on an ATtiny.

The build is about as compact as possible, with the aforementioned ATtiny 402/412 as its core, it also makes use of an integrated circuit FM tuner,  an integrated audio amplifier with its own single speaker, and a small OLED display. The unit also boasts its own lithium-polymer battery charger and its user interface consists of only three buttons, plenty for browsing radio stations and controlling volume.

The entire build fits easily in the palm of a hand and is quite capable for a mobile radio, plus all of the schematics and code is available on the project page. While it doesn’t include AM capability, just the fact that FM is this accessible nowadays when a few decades ago it was cutting-edge technology is quite remarkable. If you’re looking for an even smaller FM receiver without some of the bells and whistles of this one, take a look at this project too.

Reverse Engineering The SEGA Mega Drive

With the widespread adoption of emulators, almost anyone can start playing video games from bygone eras. Some systems are even capable of supporting homebrew games, with several having active communities that are still creating new games even decades later. This ease of programming for non-PC platforms wasn’t always so easy, though. If you wanted to develop games on a now-antique console when it was still relatively new, you had to jump through a lot of hoops. [Tore] shows us how it would have been done with his Sega Mega Drive development kit that he built from scratch.

While [Tore] had an Atari ST, he wanted to do something a little more cutting edge and at the time there was nothing better than the Mega Drive (or the Genesis as it was known in North America). It had a number of features that lent the platform to development, namely the Motorola 68000 chip that was very common for the time and as a result had plenty of documentation available. He still needed to do quite a bit of reverse engineering of the system to get a proper dev board running, though, starting with figuring out how the cartridge system worked. He was able to build a memory bank that functioned as a re-writable game cartridge.

With the hard parts out of the way [Tore] set about building the glue logic, the startup firmware which interfaced with his Atari ST, and then of course wiring it all together. He was eventually able to get far enough along to send programs to the Mega Drive that would allow him to control sprites on a screen with the controller, but unfortunately he was interrupted before he could develop any complete games. The amount of research and work to get this far is incredible, though, and there may be some helpful nuggets for anyone in the homebrew Mega Drive community today. If you don’t want to get this deep into the Mega Drive hardware, though, you can build a cartridge that allows for development on native Sega hardware instead.

ASCII Schematic Diagrams

We wondered recently about those crude ASCII schematics you see in some documentation — are there any dedicated schematic-focused tools to draw them, or are they just hand-crafted using various ASCII-art drawing tools? To our surprise, there is such a tool. It is called AACircuit and was developed by [Andreas Weber]. It has a history going back to 2001 when it was first introduced as ASCIIPaint. Be forewarned, however, the quality of the code may be questionable. According to the notes on [Andy]’s GitHub repository:

WARNING: a lot of spaghetti code ahead

This code was created in 2001-2004 when I taught Borland Delphi 3 to myself. It contains many, many global variables, unstructured and undocumented procedural code and bad variable names.

If you don’t want to wrestle with old and sketchy object-oriented Pascal code, you’re in luck. [Chaos Ordered] has made a Pythonized version which you can get from his GitHub repository. We tried it out and got it working on Ubuntu in short order (after wrestling with a pycairo dependencies). This might not be everyone’s cup of tea, but it has some uses now and then. While we wouldn’t want to document a computer motherboard with ASCII schematics, it’s great for a quick-and-dirty circuit diagrams.

Not exactly schematics, but [Duckman] has some Arduino pinout diagrams he made using ASCII-art. These could be useful when pasted into source code as comments, documenting the pinouts for your project.

Do you recommend any tools for making ASCII schematics, or this just a waste of time?

DIY 8-Bit Computer Knows All The Tricks

Some projects are a rite of passage within their respected fields. For computer science, building one’s own computer from scratch is certainly among those projects. Of course, we’re not talking about buying components online and snapping together a modern x86 machine. We mean building something closer to a fully-programmable 8-bit computer from the ground up, like this one from [Federico] based on 74LS logic chips.

The computer was designed and built from scratch which is impressive enough, but [Federico] completed this project in about a month as well. It can be programmed manually through DIP switches or via a USB connection to another computer, and also includes an adjustable clock which can perform steps anywhere from 1 Hz to 32 kHz. Complete with a 1024 byte memory, a capable ALU, four seven-segment LEDs and (in the second version of the computer) a 2×16 LCD disply, this 8-bit computer has it all.

Not only is this a capable machine designed by someone who clearly knows his way around a logic chip, but [Federico] has also made the code and schematics available on his GitHub page. It’s worth a read even without building your own, but if you want to go that route without printing an enormous PCB you can always follow the breadboard route.

Thanks to [killergeek] for the tip!

Continue reading “DIY 8-Bit Computer Knows All The Tricks”

You’ll Flip For This 7404 IC Motherboard Fix

We often lament that the days of repairable electronics are long gone. It used to be you’d get schematics for a piece of gear, and you could just as easily crack it open and fix something as the local repairman — assuming you had the knowledge and tools. But today, everything is built to be thrown away when something goes wrong, and you might as well check at the end of a rainbow if you’re searching for a circuit diagram for a new piece of consumer electronics.

But [Robson] writes in with an interesting story that gives us hope that the “old ways” aren’t gone completely, though they’ve certainly changed for the 21st century. After blowing out his laptop’s USB ports when he connected a suspect circuit, he was desperate for a fix that would fit his student budget (in other words, nearly zero). Only problem was that he had no experience fixing computers. Oh, and it takes months for his online purchases to reach him in Brazil. Off to a rocky start.

His first bit of luck came with the discovery he could purchase schematics for his laptop online. Now, we can’t vouch for the site he used (it sure isn’t direct from Dell), but for under $5 USD [Robson] apparently got complete and accurate schematics that let him figure out what part was blown on the board without even having to open up the computer. All he had to do was order a replacement IC (SY6288DAAC), and solder it on. It took two months for the parts to arrive, and had to do it with an iron instead of a hot air station, but in the end, he got the part installed.

Continue reading “You’ll Flip For This 7404 IC Motherboard Fix”