Is That A Tweet On Your Belt Buckle Or Are You Just Happy To See Me?

What a time to be alive! The range of things you never knew you needed but absolutely must have expands at a breakneck pace, such that it’s now possible to pick up a belt buckle with an embedded LED matrix to scroll messages. We have no idea what the use case for something like this is, but some people will buy anything.

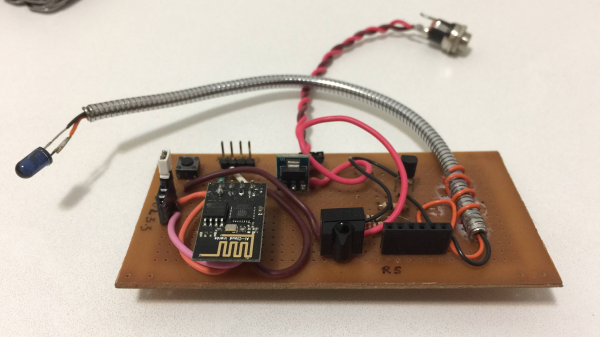
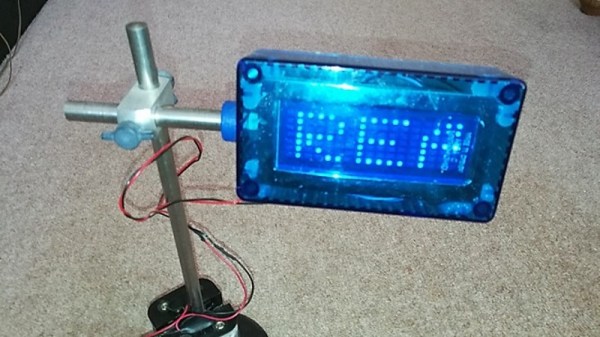
One such person was a friend of [Brian Moreau], who doubled down after being gifted the glowing bauble by turning it into a WiFi enabled Tweet-scrolling belt buckle. It appears to be a just for fun project, and to be honest one would need a heck of a belt for the buckle after his mods. He added an ESP8266 to take care of monitoring his Twitter account and driving the display on the belt buckle, a non-trivial task given that the thing is programmed with only two buttons that scroll through characters to compose a message. The microcontroller might have fit inside the original buckle or only added a little to its bulk, but [Brian] decided to replace the two coin cells powering it with an external 6-volt battery pack. That required a buck converter to power the ESP, so the whole thing ended up being thrown in a case and acting more like a neat display than a flashy fashion statement.

We’d bet some tradeoffs could be made to reduce the bulk and get that buckle back where it belongs, though. Once it does, maybe it’ll be part of a complete LED-laden ensemble, from head to toe.

Control The Air Conditioning With Slack

[Raphael Baron] needed a better way to control his office’s air conditioning units. Sure, they have remotes, but that’s too easy. [Raphael] came up with a solution that uses an ESP8266, a computer, IR LEDs, and a bot that runs on Slack.

[Raphael] built a prototype of the ESP8266 hardware on protoboard and used it to read and record the IR signals from the remote. Once he’d figured out the issues he was having with the IR library he was using, he could use it to send the IR commands to the AC unit. Since their office has two AC units, [Raphael] built a second prototype which had two IR LEDs but didn’t have the IR receiver. Using this he could turn both AC units on and off and set their temperatures.

For the server, [Raphael] turned to Clojure, a dialect of Lisp, which provides easy access to the Java Framework, mainly to get practice working with the language. The server’s main responsibility is to use Slack’s real-time API to listen for messages from a Slack bot and forward them to the ESP. In this way, a user talking to the Slack bot can send it messages which the server forwards to the microcontroller which, in turn, parses the messages and send IR commands to the AC units.

[Raphael] admits that this isn’t the most advanced, professional stuff, but it doesn’t matter. The schematics for the ESP8266 board and the code for both the ESP board and the server are available on GitHub. There seems to be a lot of hacks using Slack, such as this NERF Turret controlled by a Slack bot.  Or this jukebox that users can interact with by talking to a Slack bot.

DIY ESP8266 Development Board

Those small, super-cheap, ESP8266 modules are being installed everywhere, creating all sorts of frivolous internet connected thingamajigs. But consider this period as a training ground of sorts, as hackers smarten their chops on figuring out how to get the best out of this IoT gravy train. Right now, getting the ESP8266 to work requires a fair amount of work and to make things easier, [Abdulgafur] built a ESP8266 development board.

The dev board lets the user connect the ESP8266 to a PIC micro controller as well as to a host PC. In addition, it hosts several peripherals such as a 2×16 LCD display, 4 push buttons, couple of indicator LEDs and some GPIO’s broken out to a header. PC communication is via a FT232RL USB-UART converter over a Mini-USB connector. There’s also a few bi-directional level converters to translate between 5V and 3.3V and pull-up resistors for the ESP8266.

As of now, the dev board only supports the ESP8266-01 module. A nice upgrade would be to add support for other ESP8266 modules too. Maybe a separate, 3d printed, pogo pinned, test fixture for the other modules. If you plan to build you own version, [Abdulgafur] has the schematic, PCB and BoM available for download, although we couldn’t spot the PIC code, so you might have to ask for that. And it would be a good idea to remove the GND copper pour from under the ESP8266 footprint.