Streaming Video From A Mouse

The first optical mice had to be used on a specially printed mousepad with a printed grid that the four-quadrant infrared sensor could detect. Later, mice swapped the infrared sensor for an optoelectric module (essentially a tiny, very low-resolution camera) and a powerful image processing. [8051enthusiast] was lying in bed one day when they decided to crack the firmware in their gaming mouse and eventually start streaming frames from the camera inside.

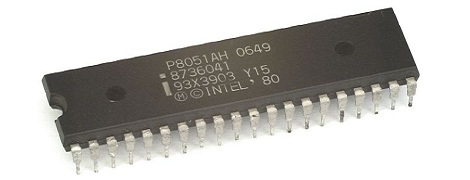
Step one was to analyze the protocol between the mouse and the host machine. Booting up a Windows VM and Wireshark allowed him to capture all the control transfers to the USB controller. Since it was a “programmable” gaming mouse that allowed a user to set macros, [8051enthusiast] could use the control transfers that would normally query that macro that had been set to return the memory at an arbitrary location. A little bit of tinkering later, and he now had a dump of the firmware. Looking at the most abundant bytes, it seems to match a profile similar to the Intel 8051. In a fascinating blur of reverse engineering, he traced the main structure of the program back from the function that sets the LED colors for the scroll wheel (which is dependent on the current DPI setting). Unfortunately, the firmware prevented the same macro mechanism from writing to arbitrary locations.

Looking through the code, a good old buffer overflow exploit seemed possible, but it caused the system to reset via watchdog. So he took another approach, invoking recovery mode and loading an entirely new firmware on the device, which a set_report control transfer can invoke.

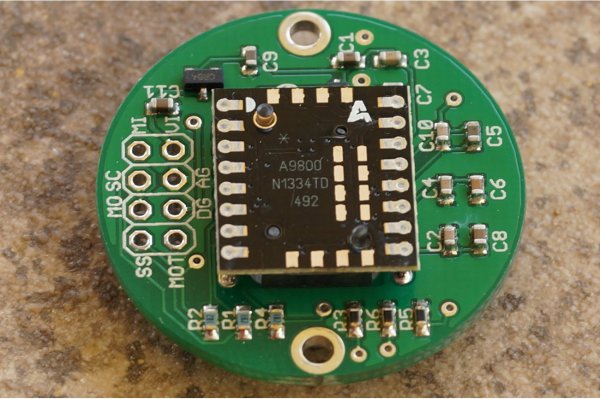
Next, he moved onto the ADNS-9800 optical sensor (pictured in the top image provided by JACK Enterprises), which had a large encrypted blob in the firmware. Some poking around and deduction lead to a guess that the optical sensor was another 8051 system. With some clever reasoning and sheer determination, [8051enthusiast] was able to crack the XOR stream cipher encryption with a program that showed him versions of the disassembled assembly and allowed him to pick the one that was the most likely. With the firmware decrypted, he was able to see the encryption code and confirm his deducted algorithm.

With the sensor now cracked open, it was onto the 30 x 30 240 fps video stream. The sensor communicates over SPI, and the USB controller has to bit-bang the connection as it doesn’t have the hardware. Putting two custom firmware images on with a few extra functions was easy enough, but the 7 fps was somewhat lacking. The first optimization was loop unrolling and removing some sleeps in the firmware, which bought it up to 34 fps. By measuring the cycle counts of individual instructions, he was able to find some alternatives such as a mov instead of a setb that took one less cycle. Going from a 17 cycle loop to an 11 cycle loop and some other optimizations gave him 54 fps. Not content to stop there, he modified the ADNS-9800 firmware to continuously sample rather than waiting for the USB controller to finish processing. While this yielded 100 fps, there was still more to do: image compression. At a whopping 230 fps, [8051enthusiast] decided to call it done.

However, there was one last thing he wanted to do: control the mouse with the video stream. Writing some image processing into his Python-based program that received the image files allowed him to use the mouse, however impractically.

All in all, it’s an incredible journey by [8051enthusiast], and we would highly recommend reading the whole journey yourself. This isn’t the first time he’s modified the firmware of 8051-based devices, such as modifying the firmware of the WiFi chipset in his laptop.

[Thanks to JACK Enterprises over at Tindie for the use of the image of an ADNS9000].


Extracting The WiFi Firmware And Putting Back A Keylogger

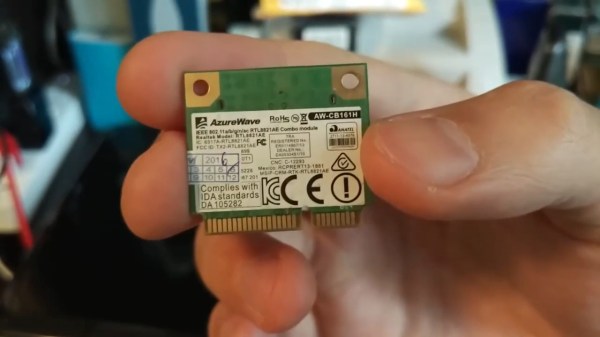
In the interest of simplification or abstraction, we like to think of the laptop on the kitchen table as a single discrete unit of processing. In fact, there is a surprisingly large number of small processors alongside the many cores that make up the processor. [8051enthusiast] dove into the Realtek rtl8821ae WiFi chip on his laptop and extracted the firmware. The Realtek rtl8821ae chip is a fairly standard Realtek chip as seen in this unboxing (which is where the main image comes from).

True to his name, [8051enthusiast] was pleased to find that the rtl8821ae was clearly based on the Intel 8051. The firmware was loaded on startup from a known file path and loaded onto the chip sitting in an M.2 slot. Careful consideration, [8051enthusiast] reasoned that the firmware was using RTX51 Tiny, which is a small real-time kernel.

The firmware is loaded at 0x4000 but it calls to code below that address, which means there is a ROM on the chip that contains some code. The easiest way to extract it would be to write some custom code that just copies the masked ROM back to the main CPU via the shared memory-mapped config space, but the firmware is checksummed by the masked ROM code. However, the checksum is just a 16-bit XOR. With a tweak in the kernel to allow accessing the shared config space from userspace, [8051enthusiast] was on his way to a complete firmware image.

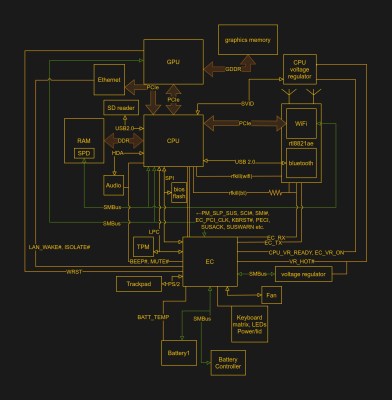
Next, [8051enthusiast] looked at what could be done with his newfound hackability. The keyboard matrix is read by the Embedded Controller (EC), which happens to be another 8051 based microcontroller. There also happens to be an RX and a TX trace from the EC to the m.2 slot (where the rtl8821ae is). This has to do with 0x80 postcodes from the processor being routed out somewhere accessible via the EC. With a bit of custom code on both the EC and the WiFi chip, [8051enthusiast] had a keylogger that didn’t run on the main processor broadcasting the PS/2 keystrokes as UDP packets.

Of course, there are plenty of other 8051 based devices out there just waiting to be discovered. Like this 8051 based e-ink display controller.

[Main image source: Realtek RTL8821AE unboxing on YouTube by Евгений Горохов]

A Deep Dive Into E-Ink Tag Hacking

Over the last decade or so, e-ink price tags have become more and more ubiquitous, and they’ve now reached the point where surplus devices can be found inexpensively on various websites. [Dmitry Grinberg] found a few of these at bargain-basement prices and decided to reverse engineer and hack them into monochrome digital picture frames.

Often, the most difficult thing about repurposing surplus hardware is the potential lack of documentation. In the two tags [Dmitry] hacked, not only are the labels not documented at all, one even has an almost-undocumented SoC controlling it. After some poking around and some guesswork, he was able to find connections for both a UART and an SWD debugging interface. Fortunately, the manufacturers left the firmware unprotected, so dumping it was trivial.

Even with the firmware dumped, code for controlling peripherals (especially wireless devices) is often inscrutable. [Dmitry] overcomes this with a technique he calls “Librarification” in which he turns the manufacturer’s firmware into libraries for his custom code. Once he was able to implement his custom firmware, [Dmitry] developed his own code to wirelessly download and display both gray-scale and two-color images.

Even if you’re not interested in hacking e-ink tags, this is an incredible walk-through of how to approach reverse-engineering an embedded or IoT device. By hacking two different tags with completely different designs, [Dmitry] shows how to get into these systems with intuition, guesswork, and some sheer persistence.

If you’d like to see some more of [Dmitry]’s excellent reverse-engineering work, take a look at his reverse-engineering and ROM dump of the PokeWalker. If you’re interested in seeing what else e-ink tags can be made to do, take a look at this weather station made from the same 7.4″ e-ink tag.

Going Old School With An 8051

A while back, [Matt] bought a few 8051 MCUs and tucked them away for a future project. He just found these fabulous little chips in a component drawer and decided it was time to figure these guys out. Eventually, [Matt] stumbled across this awesome resource for 8051 programming.

The 8051 featured a still reasonably respectable 4k of ROM and 128 bytes of RAM – not too dissimilar from an ATtiny of today until you realize this 30-year-old chip has 32 IO pins. This microcontroller, along with its bigger brother the 8052, served as the de facto microcontroller standard for 20 years. You’ve no doubt taken a ride in a car that used one, and was even put to use doing low-level grunt work in early PCs.

[Matt] says he couldn’t find a Hackaday project featuring this 30-year-old microcontroller (not true, here’s one of those tilty mazes and an electronic toll booth), but even we have to admit we don’t feature much outside of the usual AVRs and PICs. Even though it’s 32 years old, the 8051 family still has some tricks up its sleeve like playing audio CDs. If you’ve got an 8051 project lying around, send it in on the tip line and we’ll probably throw it up.