Appliances fail, but that doesn’t mean it’s the end for them. This impressive hack from [solopilot] shows the results possible when not just fixing but also improving upon its original form. The toaster’s failed function selector switch presented an opportunity to add smart features to the function selection and refine control over its various settings.
Before upgrading the toaster, [solopilot] first had to access its components, which is no trivial task with many modern appliances. Photos document his process of diving into the toaster, exposing all the internals to enable the upgrade. Once everything was accessible, some reverse engineering was required to understand how the failed function selector controlled the half-dozen devices it was wired to.
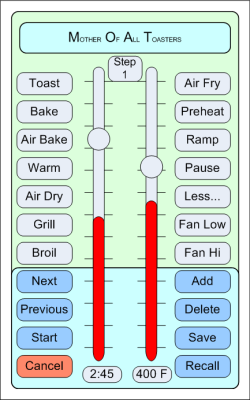 Next came the plan for the upgrades—a long list that included precise temperature control and the ability to send an SMS showing the state of your meal. A Raspberry Pi Zero, a solid-state relay, a relay control board, and a thermocouple were added to the toaster, unlocking far more capability and control than it had originally. Some tuning is required to fully enable these new features and to dial in the precision this once run-of-the-mill toaster is now capable of.
The work wasn’t limited to the toaster itself. [solopilot] also seized the opportunity to create an Android app with speech recognition to control his now one-of-a-kind Cuisinart. It’s probably safe to say his TOA-60 is currently the smartest toaster in the world. If you check out his documentation, you’ll find all the pinouts, circuits, code, and logic explanations needed to add serious improvements to your own toaster. We’ve featured several other toaster oven projects over the years, most of which have focused on turning them into reflow ovens, so it’s exciting to see one aimed at improving upon its original design.