Keeping Beer Chilled From Keg To Tap

beer_chiller

[Stan] was putting together his nano-brewery, and while waiting for his beer to finish fermenting, he decided to work on the storage portion of his project. He built a kegerator to store his forthcoming brews but realized that since it was about 10 feet away from his tap tower, the beer was becoming unacceptably warm and frothy in transit.

In commercial tap systems, a separate line of chilled propylene glycol is bundled with the beer lines, keeping it cool as it travels from keg to tap. [Stan] decided to replicate this setup, and after three different iterations, he nailed it.

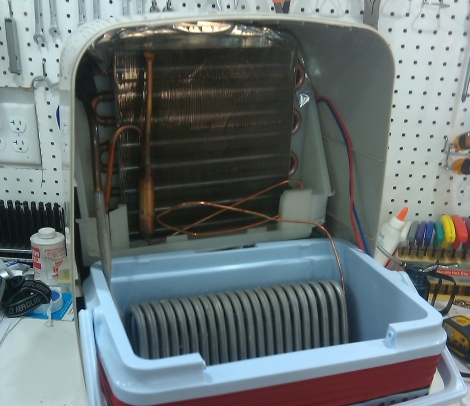
His first two attempts involved keeping the cooling solution inside of the kegerator, but he found that either the pumps added too much heat to the solution, or that the kegerator was running at nearly a 100% duty cycle. Scrapping any sort of kegerator-based cooling, he decided to build a separate cooling unit with a dehumidifier he had sitting around. After fitting the unit into a cooler and filling it with solution, he found it to cool so well it turned the propylene glycol solution to slush!

Check out his site for more details on his cooling setup – if you are in the business of homebrew, you will be glad you did.

Automated Home Beer Brewery — Best Laundry Room Add-on Ever

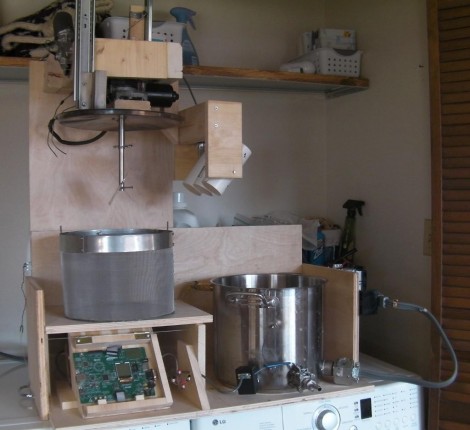
All-grain home brewing takes time… a lot of time. We’re not going to pretend like a good batch of beer isn’t thanks mostly to the artist that is the brewmaster, but at the same time it’s pretty amazing to see a compact system like the one above that can boil a batch of wort without much help from you.

[Zizzle] built this machine as his entry in the Renesas contest. You can see the development board there just to the left of the brew kettle. It’s network connected with a web interface that allows you to take recipes from Brewtarget and import them directly to the system. All you need to do is make sure that you load up the grain basket and boil addition modules to match your recipe. The bot takes it from there, filling the kettle, preheating that water, lowering the grains and maintaining temperature for the mash, and completing the boil with additions from the servo-controlled PVC pipe pods. Experienced brewers will notice a few steps missing, like the sparge, and a quick way to cool the finished wort. But this does take a huge part of the drudgery out of our hands. If only it had a clean-in-place system… then we’d really be happy! Don’t miss the video after the break and take a moment to check out the build-log posts.

Continue reading “Automated Home Beer Brewery — Best Laundry Room Add-on Ever”

Your Robot Stand-in Has Arrived

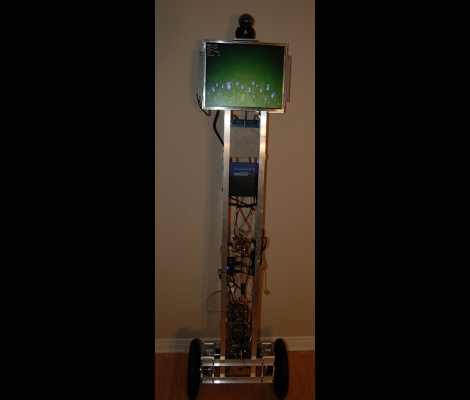
Meet TIPI, the Telepresence Interface by Pendulum Inversion. TIPI is something of a surrogate, giving physical presence to telecommuters by balancing an LCD screen and camera atop its six foot frame. The user has full control of the robot’s movement, with their own camera image shown on the display so that others interacting with the bot will with whom they are conversing.

A pair of 12.5″ wheels connec to DC motors via a gear box with a 37:1 ratio. These specs are necessary to recover from a sudden 20 degree loss of equilibrium, quite impressive for a bot of this stature. An Orangutan SVP board monitors a two-axis accelerometer and a gyroscope for accurate positioning data. This board automatically keeps balance, while taking user commands from a second control, a Beagle Board. The Beagle Board handles the communications, including sending and receiving the video signals, and delivering incoming position control data to the Orangutan. Separating the two systems guards against a screen-shattering fall by making sure the hardware likely to face slow-down or lockup is physically separate from that responsible for balance.

Check out the video clip after the brake to see some balancing goodness. It shouldn’t be hard to build your own version for much less than the $15k price tag enjoyed by some commercial versions.

Continue reading “Your Robot Stand-in Has Arrived”

Nano Sumo Robot Takes On All Comers

nano_sumo_bot

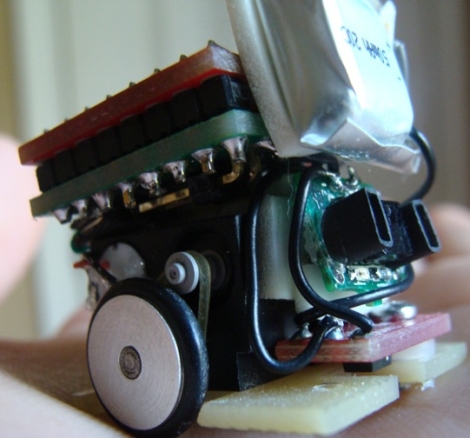
While most Sumo-style robots are fairly sizable, there is a subsection of the Sumo robot movement that focuses on making small robots. Really small robots.

[Patrick] wrote in to share his latest creation, a Nano Sumo robot measuring a scant 1 in. x 1 in. The Nano Sumo is operated by an ATMega 328 micro controller housed on a custom-built PCB. The board was designed to interface directly with the 1A Dual Motor Driver from SparkFun, which provides all of the PWM signaling to the motors for speed control and braking. A small 50mAh Li-poly battery is attached to the robot, which can be charged using 4 AA batteries via a custom charging circuit. The mechanical components of the bot were handled by his friend [Gary], which you can read about here.

As you can see in the video below, the bot does its job pretty well. It does seem like the object detection gets confused every once in awhile, but that can likely be remedied with a few software tweaks.

Check out his page for additional build videos, including the PCB construction and programming processes.

If you’re interested in learning more about Sumo bots, check out this slightly larger robot we covered a short while back.

Continue reading “Nano Sumo Robot Takes On All Comers”

Nintendo Hacked To Fit Inside An NES Cartridge

nintendo_meta_console

Instructables user [dany32412] recently built what is arguably one of the smallest NES consoles we have seen to date. Using a Nintendo on a Chip (NOAC) board, he has fabricated an NES system that fits inside a hollowed out NES cartridge.

He purchased a NOAC system at a local resale shop and got to work disassembling it. As most of these devices typically consist of a game system built into the controller with a Famicom game slot added for good measure, he knew he had a lot of work ahead of him if he was going to convert it to work properly with actual NES games and controllers.

He hacked apart most of the NOAC’s board, leaving just the CPU and the controller interface chip. He then built a custom controller interface board in order to properly map his NES controller’s buttons to the pads on the NOAC. He wired in a 72-pin NES cartridge slot, then added a pair of controller ports and a power switch. Once he had everything connected and tested, it was all secured in a Super Mario Brothers NES cartridge.

Check out the video below of his mini NES in action.

If you can’t get enough Nintendo hacks, be sure to take a look at this portable NES as well as this emulator-based NES in a cartridge.

Continue reading “Nintendo Hacked To Fit Inside An NES Cartridge”

Breathing New Life Into A Broken IPod

ipad_nano_button_fix

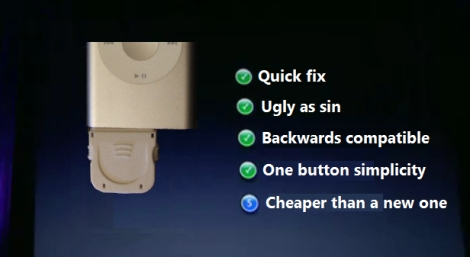
[Craig] had a busted 2nd Gen iPod Nano that was well out of warranty. The play/pause button no longer worked, leaving him unable to play or pause music, nor power off the device. He didn’t want to scrap the iPod, so he figured out a way to add an external play/pause button instead.

He ordered an iPod dock connector from SparkFun and found that it had just enough space inside for the electronic components he would be adding. He consulted some online references for pinout information, then got busy cramming an ATiny13 and a pushbutton into the dock connector.

To minimize the drain on the iPod’s battery, he puts the ATiny into sleep mode when it is not being used. When the button is pressed, it wakes up the microcontroller and sends the proper signal to the iPod. Based on his estimations, it would take nearly 250 years for the ATiny to drain the iPod’s battery completely, so he’s pretty comfortable leaving the dongle attached at all times.

If you have an iPod with similar issues, he has made his source code available so you can save yours from the trash heap as well.

Motion Sensing Minecraft Creeper Will Scare The Pickaxe Offa’ya

[Chris] Writes in to tell us about his motion sensing, Arduino powered Creeper.  As if these buggers were not frightening enough in game, [Chris] had to go and make the closest (legal) real world facsimile.  The Creeper utilizes an Arduino Uno with a wave shield to playback creeper noises, PIR sensor to detect victims, and an RC car as a motorized cart. The creeper sits and waits for a signal from the PIR detector, when it sees motion the RC remote is triggered, Creeper noises played and (we assume) panic ensues.

We might have forgone the entire RC part of the toy car and found the H-bridge motor controller, but using the RC remote has potential. The whole triggering mechanism can be placed remotely allowing the Creeper to jump out from some kind of cover.

Not enough Minecraft? Check out some our other Minecraft projects if you are interested in more tree-punching goodness.

A video of the creeper in action is available after the jump!

Continue reading “Motion Sensing Minecraft Creeper Will Scare The Pickaxe Offa’ya”