Squishy Circuits For Tiny Tinkerers

squishy_circuits

Getting kids interested in electronics at a young age is a great idea. Feeding their developing minds via creative projects and problem solving is not only rewarding for the child, it helps prepare the next generation of engineers and scientists. University of St. Thomas professor [AnnMarie Thomas] along with one of her student [Samuel Johnson] have put together a winning recipe for getting kids started in electronics tinkering at a very young age.

While some 5-year-olds can wrangle a soldering iron just fine, some cannot – and younger kids should probably stay away from such tools. This is where the the team from St. Thomas comes in.

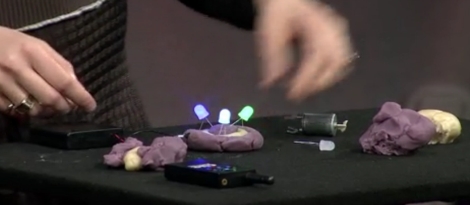
They scoured the Internet looking for Play Dough recipe clones, testing the resistance and useability of each before settling on two formulas. The first formula incorporates salt, and has a very low resistance. The second contains sugar and has about 150 times the resistance of the first formula. If you use them together, you have very simple conductor and insulator substrates that can be manipulated safely by tiny hands.

As seen in the demo video below, a small battery pack can be wired to the conductive putty easily lighting LEDs, turning small motors, and more. We can only imagine the delightful smile that would emerge from a child’s face when they power on their putty circuit for the first time.

While only two different types of putty have been made so far, we would be interested to see what other materials could be integrated – how about homemade peizo crystals?

[Thanks, Spence]

Continue reading “Squishy Circuits For Tiny Tinkerers”

Variable Super Capacitor Battery Provides Power On The Go

super_cap_battery

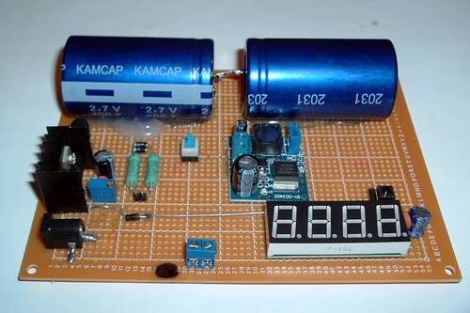
Instructable user [EngineeringShock] got sick of buying batteries for his devices all the time and has instead opted to build himself a super capacitor bank that can be used to power common household items.

His “forever” rechargeable capacitor bank is made of two large super capacitors rated at 400 farads apiece. It is charged through a LM317-based charging circuit that is adjustable to allow for slow or fast charging, the latter of which he admits, is slightly dangerous.

Since the super caps are only rated at 2.7 volts, they are wired through a DC-DC booster circuit that allows him to adjust the output voltage from 4.3 v to 34 v. The adjusted voltage is then passed through a digital display that allows him to see what the output voltage is at any time.

He says that the super cap bank can power his computer’s speakers for about two hours before requiring a recharge, which takes just a few short minutes, depending on how he is charging them.

While it’s not exactly cheap, the capacitor bank could be useful for those requiring quick portable power for relatively short periods of time. If we were to build one ourselves, we would likely fit all of the components into a small project box to protect the caps from accidental discharging, and top it off with a couple of solar cells to charge it for free during the day.

Keep reading to see a quick video demonstration of his super cap “battery” in action.

Continue reading “Variable Super Capacitor Battery Provides Power On The Go”

HsNet: Node Communications For Feature-limited Microcontrollers

[Diego Spinola] wrote in to tell us about a node communication system he’s been working on called HsNet. The aim is to build a system of nodes that can be made up of small and inexpensive microcontrollers. The problem is that the least expensive controllers often don’t have a hardware UART. HsNet implements the RS485 protocol using a software UART along with a slim and sleek addressing scheme.

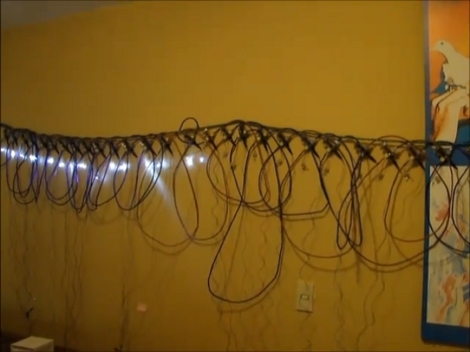
The first module developed, seen in the image above and video after the break, is a single channel pulse-width-modulation node using a PIC 12F683. It can be sent commands in the payload of the HsNet packet format. The PWM modules accept three different commands; one is a desired PWM value, another is a delay between steps for the PWM, and the last toggles a blink function.

He has also developed an analog sensor module and an Arduino-based TCP/IC gateway module. Now that the packet communications have been established, it will be rather simple to add nodes based on that groundwork. [Diego] brought these components together to build an interactive wall which can also be seen after the break.

Continue reading “HsNet: Node Communications For Feature-limited Microcontrollers”

3-phase Jacob’s Ladder

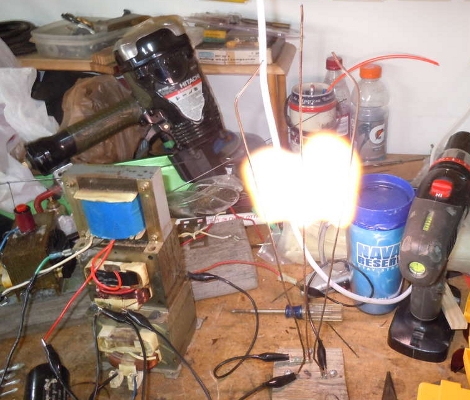
Two sparks are better than one, a sentiment that was never more blindingly illustrated than with this three-conductor Jacob’s Ladder. The build centers around three-phase power, which uses a trio of alternating current sources sharing the same frequency, but offset by 1/3 from one another. If we’re reading the schematic correctly, [Jimmy Proton] is using normal mains as a power source, then connecting three transformers and a capacitor to set up the different phases. Two of the transformers, which were pulled from microwave ovens, are wired in antiparallel, with their cores connected to each other. The third transform is connected in series on one leg of the circuit.

The video after the break starts with the satisfying hum of power, only to be outdone by the wild sparks that traverse the air gap between conductors of the ladder. After seeing the first demonstration we kind of expected something to start on fire but it looks like all is well. We’ll probably stick to a less complicated version of Jacob’s Ladder.

Continue reading “3-phase Jacob’s Ladder”

Tactical Wifi Cantenna Needs Picatinny Rails

[Wes] built a cool looking Tactical Wifi Cantenna with some parts from a broken airsoft pistol. The antenna is a cookie can type with an added cone to increase performance, as seen in this tutorial. Once the antenna was built it was time to add some kind of handle, [Wes] just so happened to have such a thing on hand. After epoxy puddying the pistol’s grip to his cookie cantenna he observed that the magazine lock was still functioning. Quick thinking and the application of a  hammer in nut allows the whole rig to quickly attach to the tripod. The antenna also sports a plastic lid and textured paint finish for that ultimate tactical look and feel. A USB Alpha AWUSO36H Wifi dongle even mounts on the back of the rig. We wouldn’t go around outside pointing this at stuff attaching and detaching the tripod but the finish looks great, nicely done!

Check out some other various types of cantennas, even a rifle version if you crave more wifi goodness.