Wedding Gift Fail Has Happy Couple Cursing Your Name

[Superluminal] received an invite to his friend’s wedding. He got together with some mutual acquaintances to take up a collection as a wedding gift. But as things go, a suitable present couldn’t be found. The pooled money itself ended up being the gift, but apparently a greeting card with a money pocket inside of it wasn’t good enough. The group decided to encase the coinage in a block of sugar that doubles as a lamp.

Now as with many well-meaning projects this started out with a rendering of what the final product would look like. That image came out great, with a high-gloss dark amber cube lit from the bottom with the coins suspended throughout catching a bit of a glint. They bought 43kg (almost 100 pounds) of refined sugar, and made a base/mold combination out of sheet metal. A lot of induction cooking went into producing thick syrup that could be poured into the mold. The problem is the final product is basically opaque. Not a sign of the 300 Euros within.

But don’t feel too bad for the groom and his bride. The image above shows him trying to get at the prize. He must do some hacking himself because he has a pressure washer, jack hammer (or is that big drill?), humongous cold chisel, and sizable hatch already at his disposal.

We can’t help but wonder if a heat gun could have polished the sides of the cube and helped add translucence?

Collimated Displays Wrap Around That Home Cockpit

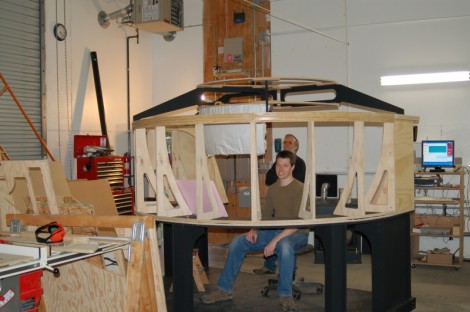
We don’t recall having heard the term ‘collimated display’ before, but we’ve seem them in action. These are mirrored projection display that give the viewer a true peripheral vision experience thanks to well-designed optics. Here is a project that [Rob] and [Wayne] have put a ton of time into. It’s their own version of a DIY collimated display that uses a shop vac and Arduino to form the screen shape.

The frame above is the structure that will support the screen. A sheet of mylar was later attached to the edges of that frame. That is pulled into place by the suction of the vacuum. But it needs to be stretched just the right amount or the projected image will be distorted. They’ve got something of a PID controller to manage this. A valve box was built to vary the amount of vacuum suction inside the screen’s frame. A switch positioned behind the mylar sheet gives feedback to the Arduino when the screen reaches the appropriate position and a servo closes off the suction box. If you lost us somewhere in there the description in the clip after the jump will help to clear things up.

Here’s an unrelated project that implements the same concept on a smaller scale.

Continue reading “Collimated Displays Wrap Around That Home Cockpit”

Hacking An AC Outlet Timer For Project Use

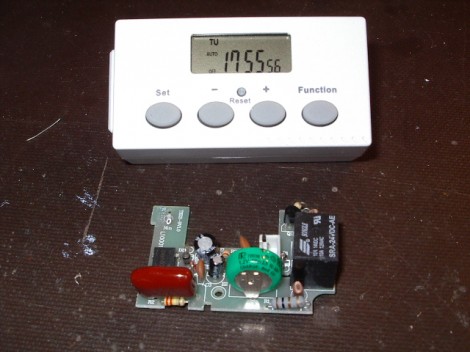
[Karl] needed a programmable real-time clock for one of his projects. He considered adding an RTC chip, LCD screen, and some buttons for use with a microcontroller. That’s not necessarily hard, but it takes time and can be considered a project in itself. Instead, he headed to the hardware store to look for a cheap solution. He was able to get this AC outlet timer for a song. It’s got everything he needs; twenty programmable on/off events, a calendar to track time and day of week, and a user interface made up of a low-power LCD and four buttons. He cracked open the case and patched into the electronics for use with any project.

You can see the solder-tab battery in the middle of the board (green coin-cell). That actually runs the timer circuitry and display. It’s topped off when the unit is plugged into mains, but [Karl] ended up replacing it with a much higher capacity AA rechargeable battery. The device works just like a thermostat, using very little power and driving a relay at the appropriate time. Batteries in thermostats seem to last forever and we can expect the same performance from this device. [Karl] rerouted the trigger signal from the relay to his own 2N2222 transistor. This way the device can switch loads running at voltages other than its own 1.2V operating level.

Stock timers are great. They’re mass-produced which makes them cheap, and you can do some interesting stuff with them. We really enjoyed see this other mechanical version hacked for hydroponic use.

Wire Loop Game Penalizes For Touches By Shrinking Your Wand

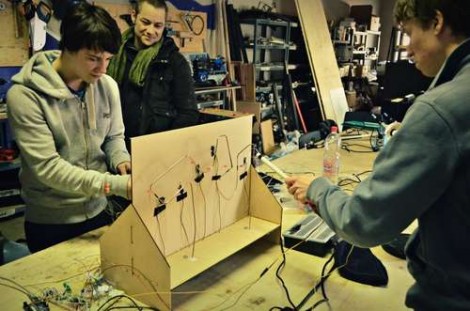
We really like this take on a conductive wire maze game. It’s the result of a 48-hour hackathon in Belgium which required that all projects stemming from the event use an Arduino. We think [Jan] and [Kristof] made perfect use of the prototyping device in the time allotted. The event organizers thought so too because this took top prize.

As you can see, the gaming area is two-sided, and consists of some copper wire bent into a maze. There’s a wand made out of a PVC pipe with a loop of braided cable running through it. The loop surrounds the copper track and each player needs to get from the beginning to the end, touching checkpoints along the way without coming in contact with the track.

Pretty standard, right? Well there’s a twist. At each checkpoint the Arduino signals a servo motor in the wand to make the loop smaller. Add to that a penalty/reward system: if you touch the track, your loop gets smaller and your opponent’s loop grows larger. Don’t miss the head-to-head action after the break.

This reminds us of that wire-based cave racer from a few years back. Continue reading “Wire Loop Game Penalizes For Touches By Shrinking Your Wand”

Kicad Symbol Generating Script Shows Promise

Kicad is a fantastic PCB layout tool. We think creating a part for use with Kicad is in many ways easier than in Eagle, but it never hurts to have a few shortcuts. Here’s a new way to quickly get your parts into the schematic editor. It’s a Python script that generates symbols from an XML input file. You create the XML file with a list of all the pins on your part and the function they will serve. The Python script will then format that as a library file which can be imported by Kicad.

It’s a little bit clunky due to the number of steps in the process. But it is possible to use a CSV file generated in a spreadsheet program to create the XML needed by the script. We’ve used the online component builder ourselves, and appreciate the possibility of mass pin assignments instead of the drop-box for every pin as used by the web interface. One time we were 20 pins into the naming process and accidentally refreshed the page… ugh!

The code is available in their git repository, with a description of the XML format, and a wiki tutorial outlining the component building process. After you give it a try we’d love to hear what you think in the comments.