A DIY handheld PONG game

DIY Pocket PONG Breaks The Mobile Spell

[Minikk], aka [Athul] is about to enter 10th grade and reports that they and their contemporaries are eschewing boring mobile games for 90s stuff and old games like PONG. Well, we already knew the 90s were back, but it’s nice to see that even older stuff is coming along with it. The kids are alright.

Whether you want to play alone or with a friend, it’s a classic to have in your pocket for sure. The brains behind this 70s-era operation is a Seeed Xiao ESP32-C3, which takes input from the two potentiometers and outputs the game on a 128 x 64 OLED. There’s also a small buzzer for when the ball hits the paddle, or you or your friend slips one past the goalie.

Our favorite part of this build has to be the DIY rivets that hold the OLED in place. [Athul] built posts into the enclosure that get heat-smashed into place with a soldering iron. Pretty neat, huh?

PONG is a specific thrill, certainly. How can it be more thrilling? Maybe with LEDs instead of a screen? Just a thought.

A composite picture with a 3D printed cylinder with a magnet at one end held in a 3D printed housing ring on the left composite picture and a fridge buzzer board with buzzer, CR2032 battery, MCP430 microcontroller and hall effect sensor slid into a 3D printed base on the right part of the composite picture

Don’t Lose Your Cool With This Fridge Buzzer

[CarrotIndustries] wanted to add an audible warning for when the refrigerator door was left open. The result is a fridge buzzer that attaches to the inside of a fridge door and starts buzzing if the door is left ajar for too long.

The main components of the fridge buzzer consist of an MSP430G2232 low-power MCU connected to a SI7201 hall sensor switch, along with a CR2032 battery holder, push button and buzzer. The MSP430’s sleep mode is used here, consuming less than 3 µA of current which [CarrotIndustries] estimates lasting 9 years on a 235 mAh CR2032 battery.

A 3D printed housing is created so that the board slides into a flat bed, which can then be glued onto to the fridge door. The other mechanical component consists of a cylinder with a slot dug out for a magnet, where the cylinder sits in a mounting ring that’s affixed to the side of the fridge wall that the end of the door closes on. The cylinder can be finely positioned so that when the refrigerator is closed, the magnet sits right over the hall sensor of the board, allowing for sensitivity that can detect even a partial close of the fridge door.

All source code is available on [CarrotIndustries] GitHub page, including the Horizon EDA schematics and board files, the Solvespace mechanical files, and source code for the MSP430. We’ve featured an IoT fridge alarm in the past but [CarrotIndustries]’ addition is a nice, self contained, alternative.

Pomodoro timer helps you focus on tasks without burning out.

World’s Cutest Pomodoro Timer Is Also A Clock

Student and hacker [prusteen] recently fell in love with the Pomodoro method of time management. That’s where you concentrate on your task for 25 minutes, then take a five-minute break, and repeat this four times with a longer break at the end. Initially, [prusteen] was keeping track on their phone, but hated having to change the timer value between Pomodoros and break times. In order to keep the flow mode engaged, [prusteen] came up with this darling little study buddy that does it all with the push of a button.

By default, this tomato shows the current time, which we think is a handy and often-overlooked feature of Pomodoro timer builds. Press that momentary switch on the front, and it starts counting upward to 25 minutes. Then it beeps in stereo through a pair of buzzers when the time is up, and automatically starts a five-minute break timer. Press it again and the display goes back to clock mode, although judging by the code, doing this will cancel the timer.

Inside the juicy enclosure is an Arduino Nano, an RTC, and a 7-segment display. We love the attention to detail here, from the little green leaves on top to the anatomically-correct dimple on the underside. And we always like to see lids that snap on with magnets. So satisfying. Check out the brief demo after the break, which unfortunately does not include any lid-snapping action.

Do you need more interaction with your Pomodoro timer? Build yourself a pomo-dachi instead.

Continue reading “World’s Cutest Pomodoro Timer Is Also A Clock”

Tiny Trash Can Repels Trash Pandas, Medium-Sized Cats

Are you tired of cats and other wildlife relieving themselves in your outdoor plant pots? As if accidental neglect won’t kill them fast enough. [TecnoProfesor] has a solution, and it doesn’t even involve a microcontroller. It detects the presence of approaching animals and then blasts them with annoying sounds and a couple of bright green LEDs to drive them away.

Thanks to a couple of modules, the circuit is really pretty simple. There’s a PIR to detect the animals, a buzzer, and a 555-based pulse generator to play tones through the buzzer. This circuit can run 24/7 on a pair of 6V solar panels that charge up a battery. We particularly like the desk trash can enclosure, though we have to wonder how waterproof this system is. Check out the brief demo after the break.

For all of you satisfied with the 555 implementation here, your reward is this giant functioning 555. If you’re a 555 naysayer, how would you have done it better?

Continue reading “Tiny Trash Can Repels Trash Pandas, Medium-Sized Cats”

Arduband Gives Your Eyes A Hand

Let’s face it, we probably all sit at our computers for way too long without getting up. Yes, there’s work to be done, games to be played, and the internet abounds with people who are wrong and must be down-voted and/or corrected. We totally get and respect all that. However, if you want to maintain your middle- and long-range vision, you should really get up regularly and gaze out the window for a bit.

In fact, the Arduband does you one better. Its Arduino Nano and accelerometer check your position every ten minutes. If you haven’t changed your Z by the third check, then it’s time for a break. The combination of an RGB LED, buzzer, and vibrating disc motor working together should be enough to pull you out of any computerized stupor, and they won’t give up and go back to sleep until you have stood up and remained upright for one minute.

We like that [ardutronics123] spun up a board and made it small enough to be wrist-mounted using a watch strap. It would work just as well worn around your neck, and would probably even fit in your pocket. Blink a few times before you check out the build video after the break.

Arduband would be great on the go, but who does that anymore? If you spend every day at the same desk, you could point a time-of-flight sensor at your chair and start a timer.

Continue reading “Arduband Gives Your Eyes A Hand”

Break The Caps Lock Habit With This Annoying Buzzer

The much-maligned Caps Lock key has been causing problems for decades, and its continued existence is controversial enough that Google decided to drop it all together in their Chromebooks. Until the rest of the industry decides to follow their lead, they’ll likely be no shortage of awkward emails or overly aggressive comments that are the direct result of this treacherous key.

But [Glen Akins] thinks he has the solution. His creation is a tiny little USB notification device that has only one purpose: to make a terrible noise as long as the Caps Lock key is engaged. Think of it like the little indicator LED on your keyboard, but one that makes a terrible screeching noise that you simply can’t ignore. This is made possible by the fact that the Caps Lock status is handled at the OS level rather than the local input device.

The notifier is built around the PIC16F1459, as it allowed him to implement USB 2.0 while keeping the part count low. Beyond the PIC, the board uses a handful of passives and a transistor to drive the buzzer from a PWM signal. To avoid duplicated effort, everything was designed to fit inside the enclosure he already developed for his single-key keyboard that we covered last year. [Glen] and a fellow coworker from Keysight put together an excellent video on the creation and use of the buzzer that you can see after the break.

On the other end of the spectrum, and even smaller, is the “USB Capslocker” which is designed to weaponize this already troublesome feature of your keyboard.

Continue reading “Break The Caps Lock Habit With This Annoying Buzzer”

Game On With These Open Source Arduino Buzzers

Planning a game of Hacker Jeopardy at your next meetup? You’re going to want some proper buzzers to complete the experience, but why buy when you can build? [Flute Systems] has released an open source DIY game buzzer system based on the Arduino that will help instantly elevate your game. Certainly beats just yelling across the room.

The design has been made to be as easily replicable as possible: as long as you’ve got access to a 3D printer to run off the enclosures for the buzzers and base station, you’ll be able to follow along no problem. The rest of the project consists of modular components put together with jumper wires and scraps of perfboard. Granted it might not be the most elegant solution, but there’s something to be said for projects that beginners and old salts alike can complete.

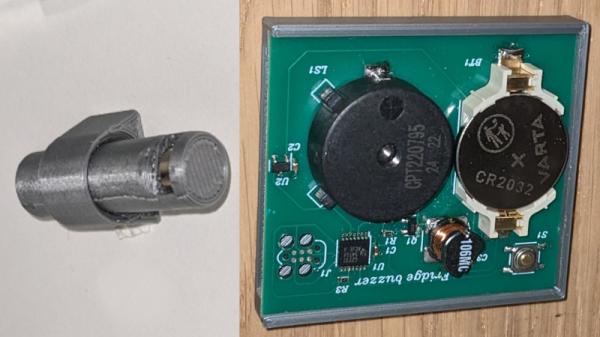
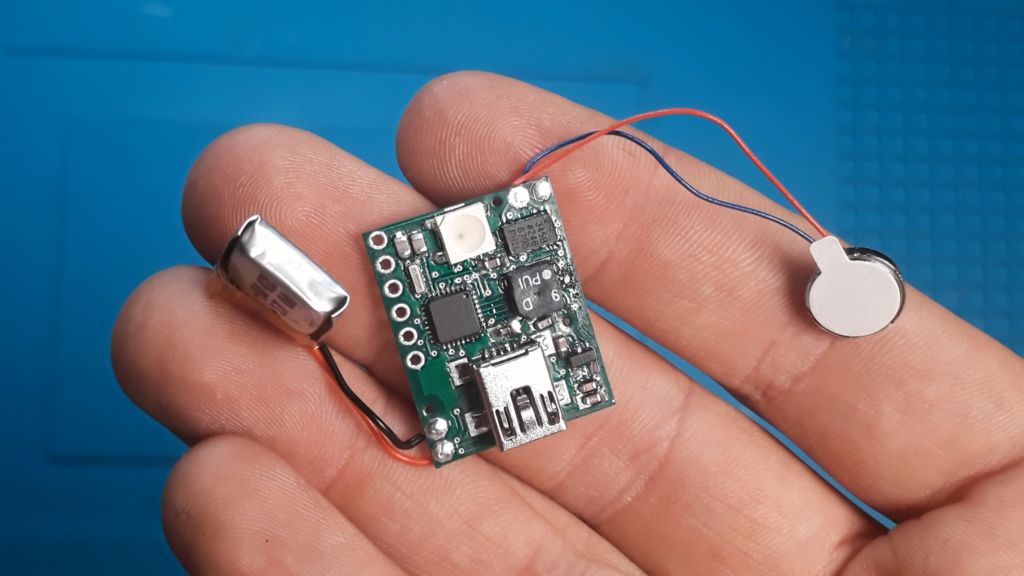
Each buzzer consists of an Arduino Pro Mini 3.3 V, a nRF24L01, and of course a big pushbutton on the top. Each one is powered by a 110 mAh 3.7 V LiPo battery, though [Flute Systems] notes that the current version of the buzzer can’t actually recharge it. You’ll need to pull the pack out and charge it manually once and awhile. Thankfully, the printed enclosure features a very clever twist-lock mechanism which makes it easy to open anytime you need to poke at the internals.

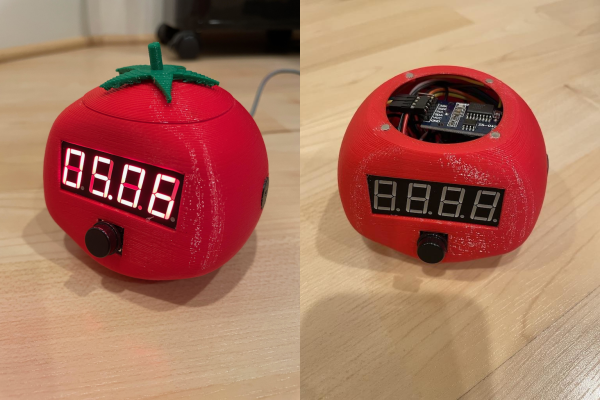
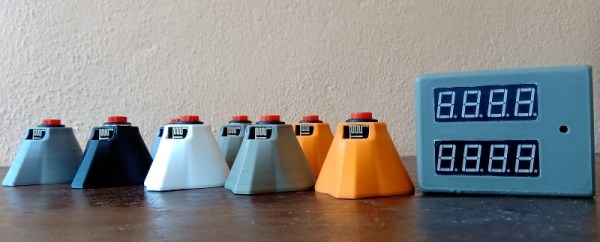
The base station uses the 5 V version of the Pro Mini, with a Adafruit PowerBoost 1000C to step up the voltage from its 2,000 mAh battery. Of course it also has a nRF24L01, and also adds a buzzer and twin four digit seven-segment LED displays. [Flute Systems] says you can expect about five hours of runtime for the base station.

An especially nice feature of this setup is that the eight digit display allows the base station to show the number of each button in the order it was received. So rather than just getting a display of who buzzed in first, you can see the chronological order in which all eight buttons were pressed. Coming up with clever applications for this capability is left as an exercise for the reader.

Of course, there’s more than one way to build a buzzer. If you don’t like the way [Flute Systems] did it, then check out this version that uses 900 MHz radios and an OLED to show the results.
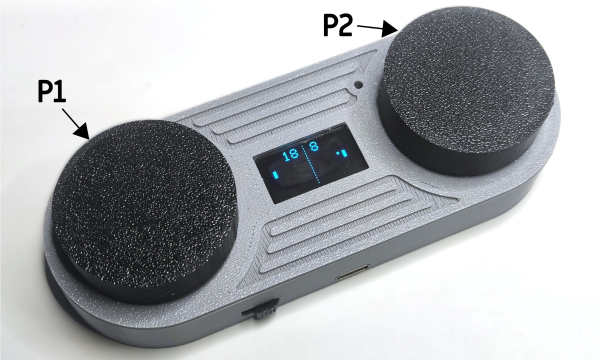
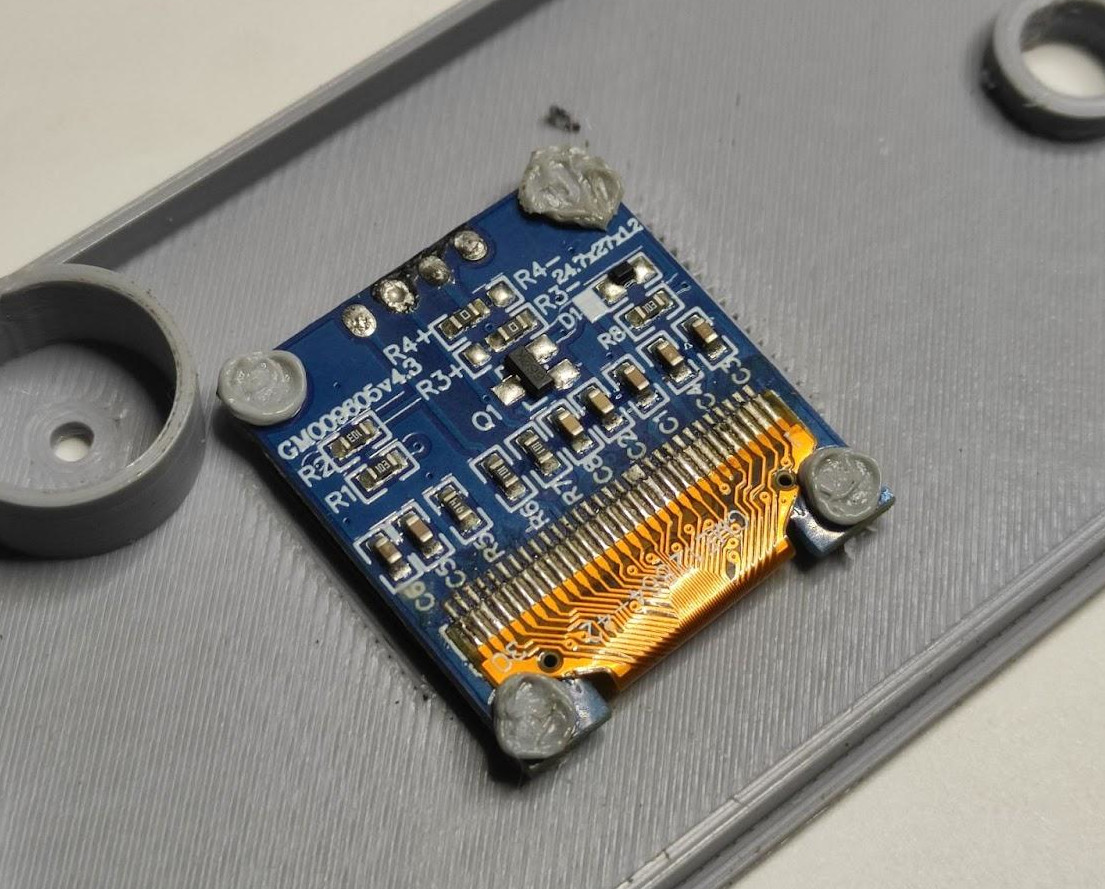