4004 ROM Emulator Allows Fast Development On Slow Computers

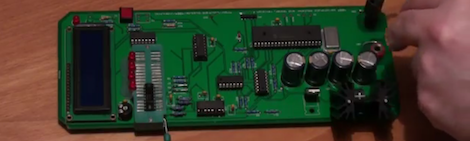
Developing for extremely old computers is a chore; not only are you limited by assembly or pure machine language, there’s also the issue of burning ROMs to actually run your programs. [Frank Buss] came up with a neat solution to developing for the venerable 4004 CPU – build a ROM emulator using a modern microcontroller.

The build started off with a ZIF socket for the 4004 CPU and a 256 byte 4001 ROM chip emulated on a PIC micro. The CPU looked a little lonely sitting in the ZIF socket all by its lonesome, so [Frank] updated his board to allow a 4002 RAM chip to be plugged in as well.

Because [Frank] chose a 4004 for his entry for this season’s retrochallenge competition, we need to point we’re offering a prize for loading our retro site with this CPU. Yes, it’s most likely impossible but nothing worth doing is easy.

You can check out a video [Frank]’s ROM emulator after the break.

Continue reading “4004 ROM Emulator Allows Fast Development On Slow Computers”

Hundred Dollar Capacitive Discharge Welder

[Robert] needed to weld metal tabs on a few batteries. In a proper manufacturing situation, this is usually done with outrageously expensive welders. Not wanting to spend thousands of dollars to attach bits of metal together, [Robert] built his own capacitive discharge welder for only $100.

Instead of the giant transformers you’d find in a spot welder, a capacitive discharge welder uses a huge bank of capacitors – greater than 1 Farad – to weld pieces of metal together. Huge caps like these are commonly used for ridiculous car stereo setups, so with the addition of a car battery charger purchased from Walmart, [Robert] had most of a welder on his workbench.

To control the mass of power coming from his huge cap, [Robert] used a 13o amp Silicon controlled rectifier to improve the control of his welder. With the battery charger, cap, and SCR, [Robert] only needed a few bits of heavy gauge wire to tie the entire build together.

[Robert]’s build welds metal tabs on battery terminals beautifully, but the possibilities don’t end there. This welder could easily be repurposed to build the skeleton of outrageously intricate dead bug circuits, or maybe even keeping that thing you made with your Erector set in one piece permanently.

Telepresence Robot With Skype Connectivity

[Claire] sent in a project she’s been working on for the past few years. It’s called Botiful and aims to turn any Android phone into a mobile telepresence robot.

Botiful is built around the IOIO Android to Arduino dev board and provides a very clean way to interface your current cell phone with a tiny – and cute – robotic platform. The big feature of Botiful is its integration with Skype; just call a Botiful owner’s phone or tablet, and a panel pops up allowing you to control the robot, tilt the camera up and down, and even robotic yes, no, and ‘dance’ gestures.

Because Botiful is based on the IOIO, there’s a few pins available inside the bot for an I2C bus, PWM control, and even a serial output. It’s also possible to develop your own apps for Botiful, making for a neat mobile robotics platform.,

Right now, Botiful is only for Android but if [Claire] gets $100,000 out of her Kickstarter, she’s promised to add iDevice support. That seems fairly likely, as more than $60,000 has been pledged with three weeks to go. Pretty cool, and we can think of a few very useful asocial applications of the Botiful including running cable in a drop ceiling, and checking out that thing under your car.

Arduino Taipan! Clone Stays True To The Original

taipan

Fans of vintage Apple ][ and TRS-80 games will undoubtedly recognize the image above in short order. Taipan! was a popular game in its time, and [Simon] decided it was a great title to try recreating with an Arduino.

His goal was to use a standard Arduino Duemilanove to reproduce the game, rather than opting for a Mega or something like the Raspberry Pi. Seeing those two options as “too easy”, he ventured into the project with some self-imposed limitations, making it a more fruitful adventure.

In the end, [Simon] had to use two Arduinos – one to control the gameplay and another to run the display. Simon tucked both boards, a keypad, and an LCD screen inside a first run copy of Tai-Pan, a move that is sure to please Apple aficionados and Xzibit fans alike.

[Simon] made sure that no detail was overlooked during the port, making sure to include every line of text as well as every bug found in the original game.

Check out a video of the finished project below, and be sure to swing by his site for a very thorough build log.

Continue reading “Arduino Taipan! Clone Stays True To The Original”

Reworking The Electronics For Better Computer Speaker Audio

[Michael Chen] liked the sound he was getting out of these Corsair SP2200 computer speakers, with one big exception. They were giving off some unpleasant crackling sounds. He figured this might be as easy as replacing a faulty potentiometer, but soon found out the fix was going to be more complicated than that. All said and done he ended up reworking the design of the speakers’ amplifier board.

The hardest part was identifying the problem. Once he had cracked open the case he found the volume potentiometer was working correctly by testing it with a multimeter. Next he inspected the board for bad solder joints but didn’t really find any. The breakthrough came when he realized that the crackling was also happening when he used headphones. With that discovery he started making a few more observations and realized that the crackling didn’t happen when the volume knob was all the way up or all the way down. There was an impedance issue between that potentiometer and the amplifier circuit. He rerouted the signal flow on the board to use the headphone amp as a filter and it fixed the problem. Fittingly, he’s entered this project into the Instructables Fix & Improve contest.

A Look At The Upgraded MSP430 Chip Shipping With The TI Launchpad

[JMN] took some time to look at the MSP430G2553 mircocontroller (translated). Specifically, he was interested in the clock options and the low power modes. This chip is one of the upgraded processors which have been shipping with the TI Launchpad.

Both the MSP430G2553 and MSP430G2452 come with the Launchpad development board. They replace the MSP430G2231 and MSP430G2211 which came with the original offering. If you already have a Launchpad the chips themselves can be had for around $2.25 and are easily programmed since the development hardware hasn’t changed.

The review starts off by looking at clock options for the processor. The internal VLO is put to the test first, with a look at the power consumption followed by temperature stability through the use of a hair dryer. The actual frequency provided has fairly low accuracy, but it stays pretty stable when hit with the hot air. The next test uses the provided 32.768 kHz clock crystal as an external input. The crystal came with the Launchpad board, and the chip has configurable internal capacitors so this is as easy as soldering the package in place. Hit the link at the top to find out how this clock source fared in testing.

[Thanks D]

MSP430 Gaming Shield Based On The Gameduino

Get your 8-bit gaming fix with this gaming shield for the TI Launchpad. It’s called the Launchpad GamingPack and was developed as part of TI’s 2012 Intern Design Contest. The team had just six weeks to complete the project.

The video after the break starts off with some fast-motion PCB layout. It is followed by footage of the board being populated, then anchored with graphics testing and some game play demonstrations. It looks like a real blast! NES controller ports were included on the board, and the device puts out 400×300 VGA, as well as audio.

As with the Gameduino, the hard work is done by the FPGA at the center of this board. It handles all of the VGA timing work, using what looks like 3-bit color. It is also responsible for generating the audio and monitoring the inputs. Since the team was under a time crunch the shield also includes a 10-pin header on the underside which was added for easy connection with a logic analyzer.

Continue reading “MSP430 Gaming Shield Based On The Gameduino”