How To Build OpenOCD With Stellaris Launchpad Support

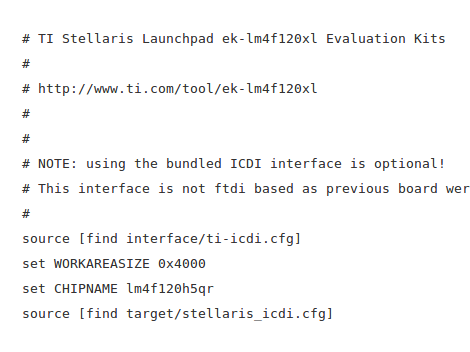
The stable version of OpenOCD (an open source On-Chip Debugging software package) doesn’t have support for the ICDI protocol used by the Stellaris Launchpad board. But it is pretty easy to build your own OpenOCD from source after patching it to use the protocol.

We’ve already seen an open source tool used to flash binary images to the TI ARM board. But that can’t be used with GDB. With the recent inclusion of USB-based ICDI in the OpenOCD development branches we gain all the features that come with the package. We’re quite happy hear about this as we use OpenOCD for many hardware architectures and this makes development for this board feel more like normal.

Our Stellaris Launchpad hasn’t just been sitting in the closet since we got it. We’ve learned a lot by using the lm4tools to program the chip as we work our way through the online workshop. We’re really beginning to like the Stellarisware peripheral library that has been provided. For us it works in a much more intuitive way than the one that STM uses with their ARM Discovery boards. We’d recommend taking a look at the workbook PDF (which is basically a verbose listing of what’s in the video series) and the library reference (called SW-DRL-UG-9453.pdf) which is in the docs folder of the Stellarisware package.

[via Dangerous Protoypes]

Launch Day Wii U Homebrew Is Very Encouraging

[youtube=http://hackaday.com/?v=5RBQG8As7Rs&w=580]

With the launch of the Wii U yesterday, we were wondering exactly how long it would take for this new console to be broken wide open allowing for the execution of homebrew code. Technically, it only took a day, as [wraggster] shows us, but the results aren’t what you would expect. Right now, he’s using methods meant for the classic Wii to open his system up; probably not the best way to open up the Wii U, but a start nonetheless.

This hack revolves around the Super Smash Bros. Brawl exploit that allows for the execution of unsigned code. It’s called Smash Stack and is one of the more popular ways of getting homebrew code running on the old, last-gen Wii.

Of course [wraggster]’s hack is dependent on the fact the classic Wii has been open for homebrew development for years now, and only works because of the Wii U’s ability to play classic Wii games. This probably isn’t the direction Wii U hackers want to go into, but it does provide a way for anyone to get into the Wii U system without using any new tricks.

[Jeri] Uses Light Bulbs In An Oscillator

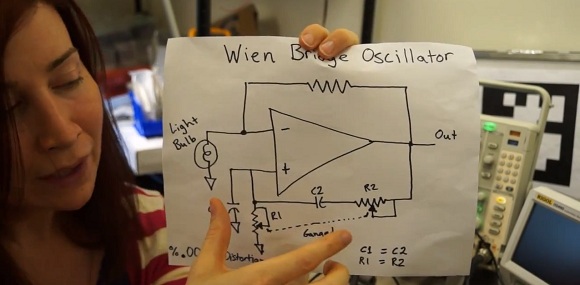
Way back when [Ms Ellsworth] was a kid, she kept seeing the same circuit over and over again in her various op-amp books. It was a Wien bridge oscillator, a small circuit that outputs a sine wave with the help of a light bulb. Now that [Jeri] is much wiser, she decided to play around with this strange oscillator and found it’s actually pretty impressive for, you know, a light bulb.

The interesting portion of the Wien bridge is the gain portion of the circuit. It’s just a simple resistor divider, with a light bulb thrown in on one of its legs. When the current increases, this causes the light bulb to warm up (not enough to glow, though). When the temperature increases, the resistance in the light bulb increases, making the oscillator reach an equilibrium.

It’s a clever setup, but what about swapping out a resistor in place of the light bulb? In the video, [Jeri] tries just that, and it’s a mess. Where the light bulb circuit is amazingly stable with very, very low distortion, the resistor circuit looks like a disaster on the scope with harmonics everywhere.

A very cool build that would be perfect for an audio synth, but as [Jeri] says in her YouTube comments, “This doesn’t have enough distortion for indie bands.”

Continue reading “[Jeri] Uses Light Bulbs In An Oscillator”

One Dimensional PONG, Take Two

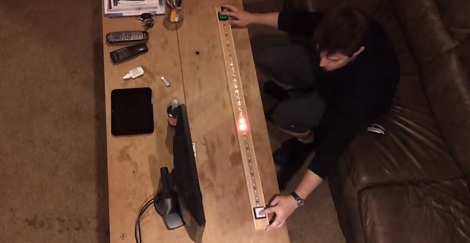
Needing a Christmas present for his 4- and 5-year-old nieces, [John] built a one-dimensional PONG game, sure to be the delight of rosy-cheeked children on a Christmas morn.

The new and improved 1D PONG game is built around a digital RGB LED strip with an LPD8806 LED controller. The speed of the ‘ball’ is controlled by a pot on one side of the game. With each player pressing their button at the right time, the ball bounces back to the other player. Missing the ball awards a point to the other team and most likely an increase in the player’s frustration, greatly increasing the risk of this game being thrown across the room.

While it’s not an obscenely long 1D PONG game like [Jason]’s previous 5 meter version, it’s more than enough to keep a pair of kids occupied for more than a few minutes, a remarkable achievement for just a microcontroller, buttons, and a piece of LED strip.

You can get [John]’s AVR code in this pastebin or just check out the video after the break.

Continue reading “One Dimensional PONG, Take Two”

Controlling A Quadcopter With A Leap Motion

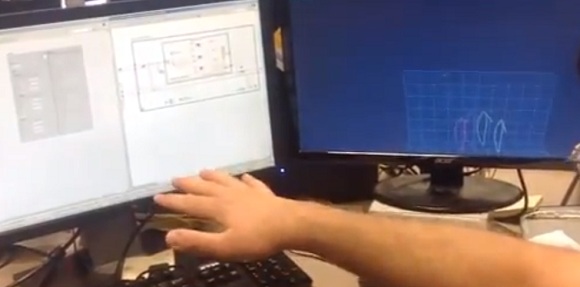
A few folks over at National Instruments going under the name LabVIEW Hacker have gotten their hands on a Leap Motion dev kit. The Leap is an interesting little input device designed to track fingertips in 3D space, much like a Kinect but at much higher resolution. Needing something to show off their LabVIEW prowess, these guys controlled their office AR Drone with the Leap, making a quadcopter controller that is completely touchless.

Building on their previous AR Drone hack, the LabVIEW team spent the better part of a day adding wrappers around the Leap SDK and adding in control for their RC quadcopter. Now, simply by moving their fingertips over the Leap sensor, they can control their office quadrotor using a very high-resolution 3D scanner.

Video after the break.

Continue reading “Controlling A Quadcopter With A Leap Motion”

Making An Overhead Camera Gantry, Take 2

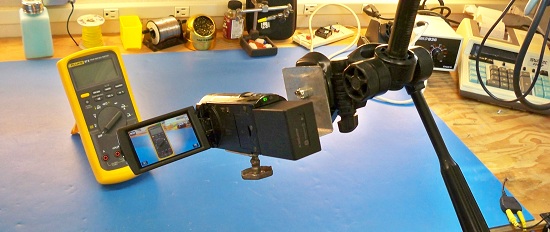
Last week we saw [Todd]’s solution to getting a tripod out-of-the-way when filming a few DIY videos. It’s an overhead camera gantry that allows him to move a camera around his garage workshop without a tripod getting in the way. This weekend, he’s back with a new and improved version. It’s a vast improvement over his Mk 1 gantry system, and it much simpler to build, to boot.

[Todd]’s new and improved overhead camera gantry builds is a vast improvement on his previous build. In the original build, [Todd] used only one cross piece between the overhead garage door tracks, and the carriage suspending the tripod overhead was extremely clunky.

Version 2 of [Todd]’s camera gantry again makes use of unused garage door tracks to suspend a tripod above his workshop. This time, though, he’s using two rails between these garage door tracks making pushing the tripod around his workshop much easier – even when not pushing it from the middle.

To move the camera across the workspace, [Todd] did away with the square tube between the garage door tracks and used another set of garage door tracks. It’s a beautiful system that moves very, very smoothly between his workbench and welding station, perfect for making a few high-quality DIY videos.

You can check out [Todd]’s build video after the break.

Continue reading “Making An Overhead Camera Gantry, Take 2”

EVE Radio Breakout Board For The Raspberry Pi

The Raspberry Pi is an excellent tool to build the ‘Internet of things’ we’ve been hearing about, but there’s still the issue of connecting the Raspi to other devices. The EVE Alpha – a breakout board for several wireless radio modules for the Raspberry Pi – hopes to change that with their Kickstarter campaign.

The idea behind the EVE is to provide a link between low-power radio modules found in a few of the microcontroller projects we’ve seen and the Raspberry Pi. It does this by simply serving as a breakout board, taking the GPIO pins on the Raspi and connecting them to solder pads for a few of the many radio modules currently available.

Already the EVE supports the RFM12B wireless tranciever, a Z-Wave module, 868-915Mhz SRF modules, and has a breakout for an XBee module, allowing the EVE to communicate using one of the many different XBee boards. There’s also a battery-backed real-time clock and temperature sensor thrown in for good measure making this board the perfect building block for an outdoor weather station or solar array.

It’s an awesome idea, and if you already have a few radio modules, incredibly cheap; just the PCB is only £6, and a board with all the SMD components is only £20.