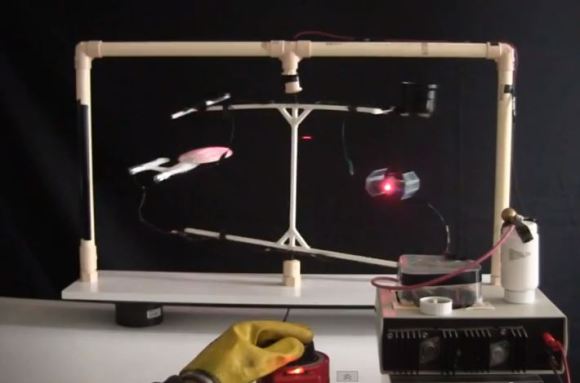
Ion Propelled Tie Fighter Now Has A Laser!

ion

[Steven Dufresne] has been playing around with ion propulsion using high voltage lately, and he’s added another spaceship to his experiments — Darth Vader’s TIE Fighter — and as an added bonus, he’s thrown on a laser too!

We originally covered his Ion Wind Propelled Star Trek Enterprise a few months ago, after someone had mentioned that the ion winds he was generating in experiments kind of looked like the warp drives on the Enterprise. Well, someone else pointed out that a TIE Fighter was an even better candidate for this. After all, TIE stands for Twin Ion Engines. So he decided to build one too. The ion winds look even better on this one as he’s turned the entire back of the fighter into the electrode, which creates a wide and very visible arc.

Oh, he also decided to add lasers to it for some extra flare — unfortunately TIE Fighters used green lasers — not red ones. Stick around for the following videos to see the TIE Fighter in all its ionic glory.

Continue reading “Ion Propelled Tie Fighter Now Has A Laser!”

SMD Soldering On… Hot Sand?

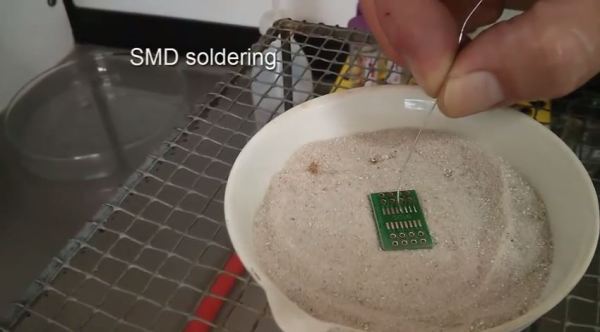
Need to do some SMD soldering? No tools? No problem! Here’s a creative method that could be a handy tool to add to your belt: SMD soldering using hot sand.

[Oliver Krohn] recently released this little video demonstrating how to perform re-flow soldering using hot sand. He’s using a bunsen burner to heat up a ceramic pot of sand to use as a kind of hot plate. It seems to work pretty well, and it’s a very unique way of doing it — if you wanted to get a bit more technical, you could also throw a temperature probe in the sand to get a much finer heat control!

Of course there are lots of other ways of doing re-flow soldering, like using a re-purposed toaster oven, frying up some circuits on a skillet after you’ve had your bacon, or if you want to be fancy, you could even build your own toolkit for it!

Anyway, stick around for the epic video of SMD soldering on hot sand.

Continue reading “SMD Soldering On… Hot Sand?”

Chinese 3020 CNC Machine Gets Some Upgrades

If you frequent any CNC Forums out on the ‘web you’ll find that these Chinese 3020 CNC routers are generally well received. It is also common opinion that the control electronics leave something to be desired. [Peter]’s feelings were no different. He set out to make some improvements to his machine’s electronics such as fixing a failed power supply and adding PWM spindle control and limit switches.

[Peter] determined that the transformer used in the power supply was putting out more voltage from the secondary coil than the rest of the components could handle. Instead of replacing the transformer with another transformer, two switch mode power supplies were purchased. One powers the spindle and the other is for the stepper motors. So he wasn’t guessing at the required amperage output of the power supplies, [Peter] measured the in-operation current draw for both the steppers and spindle motor.

Continue reading “Chinese 3020 CNC Machine Gets Some Upgrades”

Generating Embroidery With An Arduino

Arduino Embroidery Generation

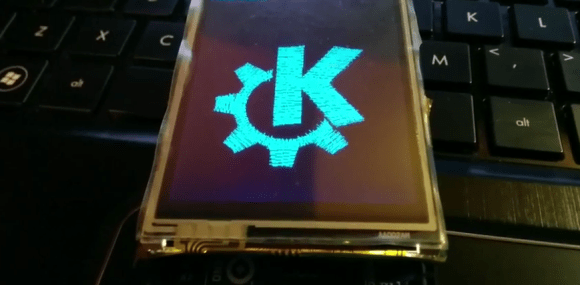
Want a nifty way to combine the craft of embroidery with electronics? The folks working on the open source Embroidermodder demoed their software by generating an embroidery of the KDE logo using a TFT screen and an Arduino.

Embroidermodder is an open source tool for generating embroidery patterns. It generates a pattern and a preview rendering of what the embroidery will look like when complete. It’s a cross-platform desktop application with a GUI, but the libembroidery library does the hard work in the background. This library was ported to Arduino to pull off the hack.

While generating pictures of embroidery with an Arduino might look neat, it isn’t too useful. However, since the library has been ported it is possible to use it to control other hardware. With the right hardware, this could be the beginning of an open source embroidery machine.

After the break, check out a video of the pattern being generated.

Continue reading “Generating Embroidery With An Arduino”

3D Printering: Making A Thing In FreeCAD, Part II

printering

It’s time once again for another installment of a Making A Thing tutorial, where I design the same part, over and over again, in multiple 3D design software packages.

Last week we took a look at FreeCAD, a free, open source parametric modeller. It’s an amazingly powerful tool, and not it’s finally time to complete our model of a strange object ripped from the pages of an 80-year-old drafting textbook.

Here’s some links to previous Making A Thing tutorials, doe:

Read on for the second part of our FreeCAD tutorial

Continue reading “3D Printering: Making A Thing In FreeCAD, Part II”

Robot Controller More Fun Than An Actual Wii-U

wii-u-bot-controller

Okay, that’s probably not fair since we never gave the Wii-U a try at all. But doesn’t this seem like a much better idea for controlling a robot than playing a gaming console?

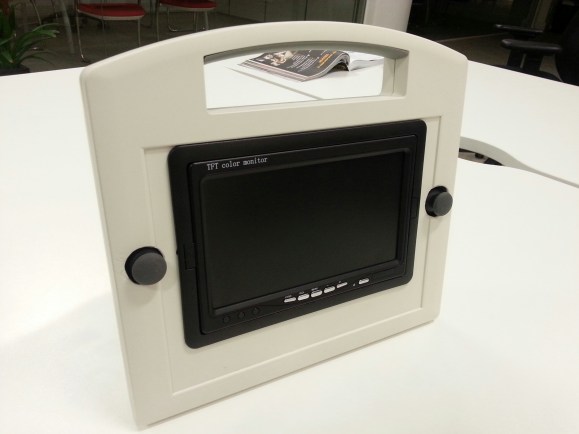
The photo above is a bit deceiving because the unit actually has quite a bit of depth. Despite that, the cleanliness of the build is very impressive. [Alec Waters] started off with a backup monitor meant for automotive use (we’d estimate 7″). There’s a radio receiver, two analog joysticks where your thumbs line up when holding the controller, and an Arduino to pull it all together. If you haven’t figured it out already, this displays the wireless video from the robot he’s controlling. He’s also include an auxiliary port which lets you bypass the radio receiver and plug in a video feed directly.

Still convinced you need Nintendo’s consumer controller with a built-in screen. Yes, that can be hacked to work with all your projects. But seriously, this is way more fun.

Garage Clicker Dashboard Integration

garagedoor-opener-in-dash

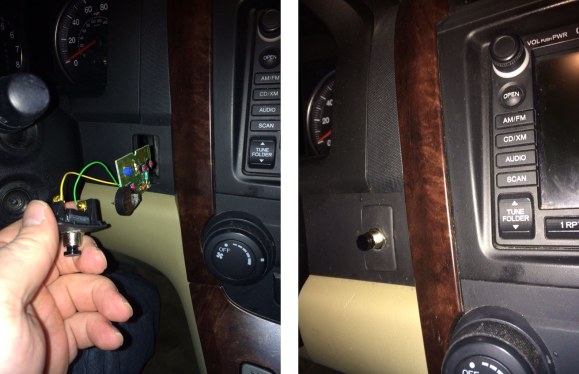
Vehicles with the highest level of trim package sometimes come with the ability to learn garage door opener codes. Less costly offerings lack that feature as well as others bells and whistles, leaving blank plates where fancy buttons would have been. [JiggMcFigg] makes the best of this situation by gutting his garage remote and hiding it behind a button blank.

One thing that raised an eyebrow is the coin cell battery holder you can make out on the size-check image shown to the left. But really, these remotes must drain their batteries at a rate nearly the same as an unused battery so why complicate the hack? A holder was soldered onto the board, and jumper wires were soldered to the push button added to the blank plate. This type of utilitarian button is much more satisfying to use than those fancy-pants silk-screen molded-plastic types anyway!

Of course you could go the other way with this hack. [JiggMcFigg] started out with the problem of losing the remotes in the mess of the car. You could retrofit it with a huge button to make it harder to misplace.