What do you get when you have a computer-controlled laser pointer and a big sheet of glow in the dark material? Something very cool, apparently. [Riley] put together a great build that goes far beyond a simple laser diode and servo build. He’s using stepper motors and a proper motion control software for this one.
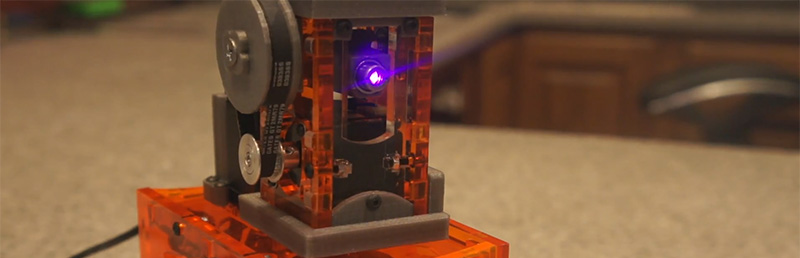
The theory behind the device is simple – point a laser at some glow in the dark surface – but [Riley] is doing this project right. Instead of jittery servos, the X and Y axes of the laser pointer are stepper motors. These are controlled by an Arduino Due and TinyG motion control software. This isn’t [Riley]’s first rodeo with TinyG; we saw him at Maker Faire NYC with a pendulum demonstration that was absolutely phenomenal.
Right now, [Riley] is taking SVG images, converting them to Gcode, and putting them up on some glow in the dark vinyl. Since the Hackaday Skull ‘n Wrenches is available in SVG format, that was an easy call to make on what to display in weird phosphorescent green. You can see a video of that along with a few others below.


What’s causing the jaggy edges in the last video?
You might be seeing the stepper motor step resolution.
probably a smaller sheet of fabric and a closer view. The jaggy edges would come from the texture of the weave.
@Einstein, You nailed it. This piece is my test rig demo sheet. Its quite rippled. That’s why you are seeing that purple glares in the bottom right of the rectangle too. Its around 4 years old and was in my workshop all that time. I have a NICE 5×5 foot sheet that I just tacked up in my media room. I am going to give it a go.
Ok perhaps I spoke too soon. What I think we are seeing is what @hodginsa was describing. I believe this is the actual micro-steps! So we are using 8x uSteps on the gShield. At a distance of 8 ft away they are visible. This is actually pretty cool as you can see something that most of the time we cannot :) There also might be some “play” in the belts and possible “jerk” settings. This machine is set to 250,000 * 1 billion for the max jerk. Its higher than I have ever used before. I suspect I could eliminate much of this by lowering this value but this would result in slower movements. https://github.com/synthetos/g2/blob/master/TinyG2/settings/settings_default.h#L44 Shows the what the typical CNC machine settings use… Just replace 20 with 250,000 :)
Or in a crazy insane fix. Just dial back the focus a bit and it looks fine :)
Now, *that* is cool!
I have an approximately 1×2 meter rectangle of glow-in-the-dark painted (Rustoleum) on a wall in a spare bedroom in the basement. We’ve had it for about 4 years and the kids still occasionally play with it. The 405nm (near-UV) laser pointer is the most impressive, but we also use a flash from an old unused 35mm camera. With the flash, the kids will stand close to the wall and make a pose. After the flash (in a dark room, of course) their sillouettes stand-out.
Thanks for the comment Nater. I was looking for paint. I will have to try that. If you look in the BOM that is linked to in the bottom of the instructable (Intro Page) I bought a 5’x’5 sheet of this stuff that people put on their cars to make them glow? Seriously? Anyways works for me. The crazy thing is it goes on perfectly clear (or so I think as have not tried it yet) But it would be like a clear coat sticker to place on a surface. Going to try it out soon.
@All, If you guys would not mind taking a look at the instructable, I am trying to make sure it is clearly explained for the judges. If something looks off please let me know.
@brian Thanks man for posting my project. It was a lot of fun. My kids love it and my Cat goes absolutely insane, climbing up walls jumping off tables and knocking all my tools / parts all over the place. I have vids :)
“After the flash… their sillouettes stand-out.” Ooohhh…. nuclear shadows! Shades of Hiroshima!
nice, now clear_screen(); :P
That feature seems to work fine, just takes a bit of time :P
I think I remember reading that near IR light will forcefully discharge glow-in-the-dark materials like this one?
Cool, now how about using photographic paper as a background, you could also (I assume) make different shading using multiple laser passes over the same area.
Or photoresist. Etch some nice custom PCBs.
A few years ago we used Rust-olium’s glow in the dark spray paint (http://www.rustoleum.com/product-catalog/consumer-brands/specialty/glow-in-the-dark-spray) on a wall in our entryway mud room, about 6x8ft. Wasted one can standing too far back from the wall trying to get a smooth coat. Pointed my blue (UV) laser at the wall and was disapointed, dropped my hand and the ground lit up. Damn! LOL. Most of the glow solidified in the air and fell to the floor as dust. Did a better job with the second coat. I bought the paint online, but I see it around in hardware and other stores during Halloween.
Works well enough for the kids, but the results you are getting with those sheets look much better. Maybe try some spray adhesive and “tile” a wall with the sheets instead of paint, and give it a clear coat for protection from little grubby fingers. Alternate the green and blue sheets for a cool checkered effect so you don’t have to worry about hiding the seams.
Great job with the build and the documentation, BTW.
Next time just tilt your house 90 degrees, paint the floor, pivot the house back and there; a nice glowing wall.
Great demo!
A while back, there was a posting here where a guy was using the fading of the glow from the sheet to create greyscale images – expose the dark parts first, so by the time you’ve got to the brighter parts, the dark parts have dimmed down. Can’t remember who it was….