For many of us, ad hoc projects end up having a certain permanence to them. Think of the number of Raspberry Pis and RTL-SDRs that are just dangling from a USB cable under a desk or stuffed behind a monitor, quietly going about their business. If it ain’t broke, don’t fix it.
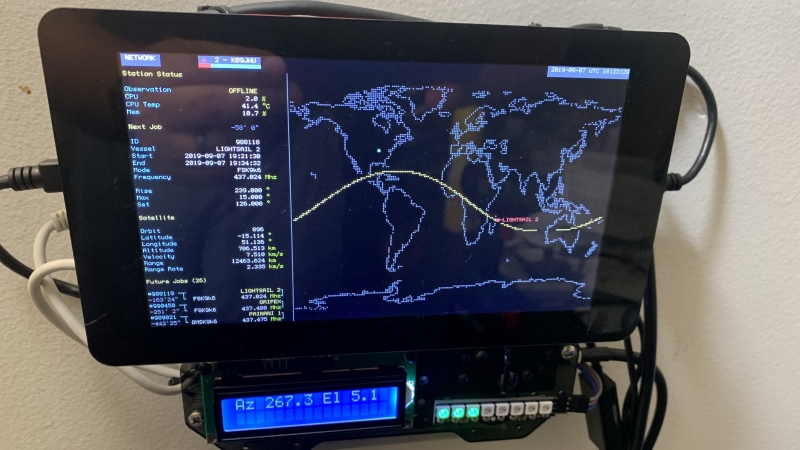
Some projects, though, just end up accreting past the acceptable point. This wall-mounted SatNOGS ground station is a great example of what happens when something needs to be done about the mess. The pile of stuff that [cshields] had cobbled together over time for his ground station needed tidying, so he laid hands on a new Pi 4 and a cool enclosure/breadboard called a Stegoboard. This is just a piece of acrylic with a variety of holes laid out to match every imaginable PC board, hard drive, PC motherboard, Arduino, and just about anything out there that needs mounting. To contain the mess, he mounted the Pi and a 7″ touchscreen to the Stegoboard, along with an RTL-SDR and an Arduino to control his antenna rotator. The ground station wiring is still a little rough, but worlds better than what it was, and now that it’s mounted on the wall it’ll be much easier to use.
For those not familiar with SatNOGS, check out our article back from when the Satellite Network of Ground Stations won the 2014 Hackaday Prize. In the half-decade since then, SatNOGS has only grown, with a huge following of dedicated enthusiasts pointing their antennas at the sky. We know how to pick ’em, and we’ll be selecting the 2019 Hackaday Prize winner very soon.
Thanks to [elkos] for the tip.


We should have an event to share our photos of what we have tangled up behind a monitor somewhere. Electronics without enclosures, defying gravity suspended among cables.
I have a NUC nailed to the wall kind of like this thing. Trailing half a dozen wires and sprouting huge 9db whip antennas.
Would be kind of a cathartic confession session.
I once saw a picture of the back side of a ham radio operator’s equipment that was as much a tangled mess as anything I have seen with computers. The caption was “Why do they call it wireless?”
Also: https://archive.org/details/byte-magazine-1977-04
Wait. That photo is a computer. Someone, was it Roger Amidon?, built it from ICs or maybe transistors, but no microprocessor IC. It looks awful, and hard to move, but probably easier and cheaper to build. If I recall properly, he built it before t
he Altair 8800 came out, making him part of that select group that built or scrounged computers before they could be had off the shelf for hobbyists. There was even a grouo, the Amateur Computer Society I think, which even had an irregular newsletter, a very exclusive group at the time.
Michael
As I recall, it worked after it fell off the the desk and he didn’t dare pick it up! The April 1977 Byte magazine had the full story.
Six pieces of acrylic and a bag of bolts for 80 USD! Gobsmacked!
Someone took the time to determine how to layout all the possible boards and parts on the market… then layout all the holes to be drilled. Yeah, that is super simple other than all the board specs and parts mounting points with a range of layouts.
Neat having the system wall mounted… makes me think of an airport or train terminal way where with a touch screen or mouse the user can select the more in depth view to observe more dimensions of details.
A good way to do this (if you already have all the pieces) is just marking on the acrylic or a sheet of wood where to drill the holes, then scan the object and convert it to a file for a laser cutter. Turns a 1 hour job into 10 minutes if you don’t need to ultimate accuracy. To simply screw things down a few 0.1mm errors don’t matter. Afterwards you can still correct some things on the pc like nice 90 degree angles.