PumpkinOS

PumpkinOS: A Modern Reimplementation Of PalmOS For Today’s Platforms

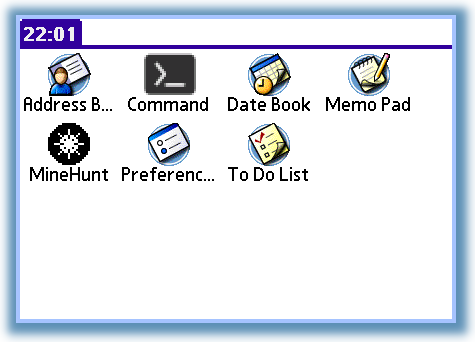
In a world where the personal digital assistant (PDA) has become yet another retro computing system, it’s always nice when experiencing the software for such platforms can be done in a way that does not involve hunting down original hardware of questionable functionality. Here PumpkinOS is a PalmOS-compatible project by [migueletto] which runs as a regular application on modern systems and allows for  original PalmOS applications for the Motorola 68k to run on x86 and ARM host systems.

On start-up the Launcher shows up first, just like with PalmOS, from which the four standard PalmOS applications (AddressBook, MemoPad, ToDoList and DateBook) can be launched. Due to endianness issues (m68k being Big Endian), files created by these applications cannot be shared between PumpkinOS and PalmOS, and as noted on the GitHub page, it’s still a far from finished project. That said, it appears to be able to run quite a few original PalmOS applications from sites like PalmDB, and compatibility should get better over time.

The author maintains a development blog as well, for those who are interested in the more in-depth details of this project.

Query Your C Code

If you’ve ever worked on a large project — your own or a group effort — you know it can be difficult to find exactly where you want to be in the source code. Sure, you can use ctags and most other editors have some way of searching for things. But ClangQL from [AmrDeveloper] lets you treat your code base like a database.

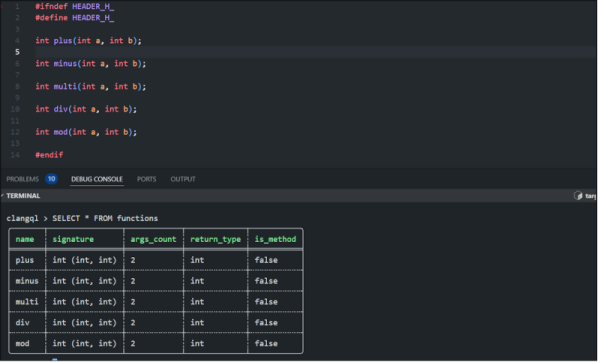
Honestly, we’ve often thought about writing something that parses C code and stuffs it into a SQL database. This tool leverages the CLang parser and lets you write queries like:

SELECT * FROM functions

That may not seem like the best example, but how about:

SELECT COUNT(name) FROM functions WHERE return_type="int"

That’s a bit more interesting. The functions table provides each function’s name, signature, a count of arguments, a return type, and a flag to indicate methods. We hope the system will grow to let you query on other things, too, like variables, templates, preprocessor defines, and data types. The tool can handle C or C++ and could probably work with other CLang front ends with a little work.

Continue reading “Query Your C Code”

A Brief History Of Keyboard Encoding

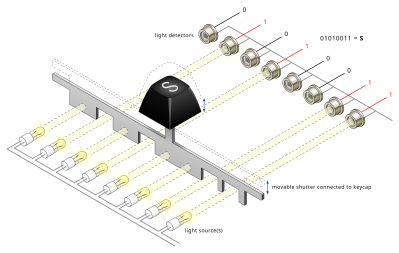
Photoelectric encoder keyboard configured as ASCII

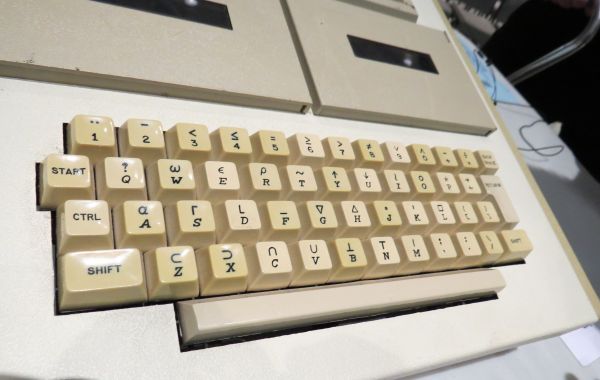
While typing away on our DIN, PS/2, USB or Bluetooth keyboards one of the questions which we rarely concern ourselves with is that of how the keyboard registers which keys we’re pressing. One exception here is when the keyboard can only register a limited number of simultaneous keypresses (rollover). Even though most keyboards today use a matrix which connects the keys, there are many configuration choices even here, which much like other keyboard configurations come with their own advantages and disadvantages. As a good primer we can look at this article by [Daniel Beardsmore] as he takes us through both historical and current-day keyboards.

Especially before  it was realistic to just put an entire microcontroller with a look-up table into every keyboard, more inventive approaches were required to not only register keypresses, but also encode them for the host computer. The photoelectric approach of the 1960s was one such encoding method, before diode matrices became popular, along with more exotic encoding switches that contained their code already hard-wired on their multitude of pins. One inevitable limitation with these was that of a lack of multi-key support, leading to the development of matrix scan technology around 1970.

Matrix scanning keyboards allow for multiple key presses at the same time, tackle debouncing of keys and were at the forefront of what gives us the ubiquitous and generally boringly reliable keyboards which we use today.

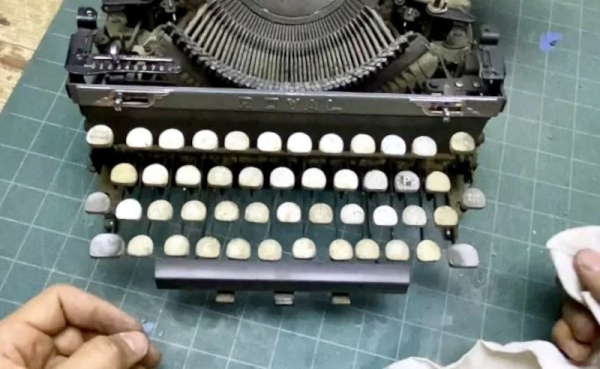
Royal Typewriter Gets A Second (or Third) Life

Usually when we are restoring something with a keyboard, it is some kind of old computer or terminal. But [Make it Kozi] wanted an old-fashioned typewriter. The problem is, as he notes, they are nostalgically popular these days, so picking up a working model can be pricey. The answer? Buy a junker and restore it. You can watch the whole process in the video below, too, but nearly the only sound you’ll hear is the clacking of the keys. He doesn’t say a word until around the 14-minute mark. Just warning you if you have it playing in the background!

Of course, even if you can find a $10 typewriter, it probably won’t be the same kind, nor will it have the same problems. However, it is a good bet that any old mechanical typewriter will need many of the same steps.

Continue reading “Royal Typewriter Gets A Second (or Third) Life”

The Rise And Fall Of Silicon Graphics

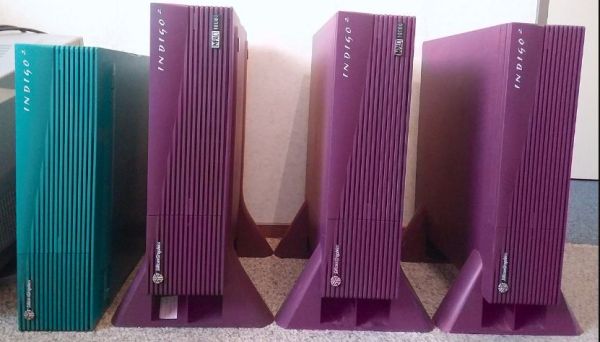
Maybe best known as the company which brought a splash of color to corporate and scientific computing with its Indigo range of computer systems, Silicon Graphics Inc. (later SGI) burst onto the market in 1981 with what was effectively one of the first commercial graphics operations accelerator with the Geometry Engine. SGI’s founder – James Henry Clark was quite possibly as colorful a character as the company’s products, with [Bradford Morgan White] covering the years leading up to SGI’s founding, its highlights and its eventual demise in 2009.

The story of SGI is typical of a start-up that sees itself become the market leader for years, even as this market gradually changes. For SGI it was the surge in commodity 3D graphics cards in the 1990s alongside affordable (and cluster-capable; insert Beowulf cluster jokes here) server hardware that posed a major problem. Eventually it’d start offering Windows NT workstations, drop its MIPS-based systems in a shift to Intel’s disastrous Itanium range of CPUs and fall to the last-ditch effort of any struggling company: a logo change.

None of this was effective, naturally, and ultimately SGI would file (again) for Chapter 11 bankruptcy in 2009, with Rackable Systems snapping up its assets and renaming itself to SGI, before getting bought out by HPE and sunsetting SGI as a brand name.

Ultimate Power: Lithium-Ion Packs Need Some Extra Circuitry

A LiIon pack might just be exactly what you need for powering a device of yours. Whether it’s a laptop, or a robot, or a custom e-scooter, a CPAP machine, there’s likely a LiIon cell configuration that would work perfectly for your needs. Last time, we talked quite a bit about the parameters you should know about when working with existing LiIon packs or building a new one – configurations, voltage notations, capacity and internal resistance, and things to watch out for if you’re just itching to put some cells together.

Now, you might be at the edge your seat, wondering what kind of configuration do you need? What target voltage would be best for your task? What’s the physical arrangement of the pack that you can afford? What are the safety considerations? And, given those, what kind of electronics do you need?

Picking The Pack Configuration

Pack configurations are well described by XsYp:X serial stages, each stage having Y cells in parallel. It’s important that every stage is the same as all the others in as many parameters as possible – unbalanced stages will bring you trouble.

To get the pack’s nominal voltage, you multiply X (number of stages) by 3.7 V, because this is where your pack will spend most of its time. For example, a 3s pack will have 11.1 V nominal voltage. Check your cell’s datasheet – it tends to have all sorts of nice graphs, so you can calculate the nominal voltage more exactly for the kind of current you’d expect to draw. For instance, the specific cells I use in a device of mine, will spend most of their time at 3.5 V, so I need to adjust my voltage expectations to 10.5 V accordingly if I’m to stack a few of them together.

Now, where do you want to fit your pack? This will determine the voltage. If you want to quickly power a device that expects 12 V, the 10.5 V to 11.1 V of a 3s config should work wonders. If your device detects undervoltage at 10.5V, however, you might want to consider adding one more stage.

How much current do you want to draw? For the cells you are using, open their spec sheet yet again, take the max current draw per cell, derate it by like 50%, and see how many cells you need to add to match your current draw. Then, add parallel cells as needed to get the capacity you desire and fit the physical footprint you’re aiming for. Continue reading “Ultimate Power: Lithium-Ion Packs Need Some Extra Circuitry”

1950s Switching Power Supply Does It Mechanically

When you hear about a switching power supply, you think of a system that uses an inductor and a switch to redistribute energy from the input to the output. But the original switching power supply was the vibrator supply, which was common in automotive applications back in the middle part of the last century. [Mr. Carlson] has a 1950s-era example of one of these, and he invites us to watch him repair it in the video below.

Most of the vibrator supplies we’ve seen have been built into car radios, but this one is in a box by itself. The theory is simple. A DC voltage enters the vibrator, which is essentially a relay that has a normally-closed contact in series with its coil. When current flows, the relay operates, breaking the contact. With no magnetic field, the springy contact returns to its original position, allowing the whole cycle to repeat.

Continue reading “1950s Switching Power Supply Does It Mechanically”