FPGA Hack Becomes An Atari Game Genie

The Game Genie is a classic of the early 90s video game scene. It’s how you would have beaten the Ninja Turtles game, and it’s why the connector in your NES doesn’t work as it should. They never made a Game Genie for the Atari 2600, though, because by the time the Game Genie was released, the Atari was languishing on the bottom shelves of Toys R Us. Now though, we have FPGAs and development tools. We can build our own. That’s exactly what [Andy] did, and his Game Genie for the 2600 works as well as any commercial product you’d find for this beleaguered console.

To understand how to build a Game Genie for an Atari, you first have to understand how a Game Genie works. The hacks for a Game Genie work by replacing a single byte in the ROM of a game. If your lives are stored at memory location 0xDEAD for example, you would just change that byte from 3 (the default) to 255 (because that’s infinite, or something). Combine this with 6-letter and 8-letter codes that denote which byte to change and what to change it to, and you have a Game Genie.

This build began by setting up a DE0 Nano FPGA development board to connect to an Atari 2600 cartridge. Yes, there are voltage level differences, but this can be handled with a few pin assignments. Then, it’s just a matter of writing Verilog to pass all the data from one set of address and data pins to another set of address and data pins. The FPGA becomes a man-in-the-middle attack, if you will.

With the FPGA serving as a pass-through for the connections on the cartridge, it’s a simple matter to hard-code cheats into the device. For the example, [Andy] found the code for a game, figured out where the color of the fireballs were defined as red, and changed the color to blue. It worked, and all was right with the world. The work was then continued to create a user interface to enter three cheat codes, and finally wrapped up in a 3D printed enclosure. Sure, the Atari Game Genie works with ribbon cables, but it wouldn’t be that much more work to create a similar project with Lock-On™ technology. You can check out the entire build video below, or get the info over on Element14

Continue reading “FPGA Hack Becomes An Atari Game Genie”

Interfacing Philips Hue Lights With Everything

The Internet of Things is eating the world alive, and we can’t buy incandescent light bulbs anymore. This means the Internet is now in light bulbs, and with that comes some special powers. You can turn lights on and off from a botnet. You can change the colors. This is the idea for the Philips Hue system, which is well respected among people who like putting their lights on the Internet. There are other brands — and you can make your own — but the Hue system does work pretty well.

This is what led [Marius] to create software to interface various electronics with the Hue system. It’s a project called diyHue, and already there’s a vibrant community of devs creating their own smart lights and connecting them to the Internet.

The software for this project is built in Python, and is designed to run on certain single board computers. This allows the SBC to connect to the Hue bridge so Hue bulbs can be controlled, a MiLight hub so MiLight bulbs can be controlled, or, with the addition of a ZigBee radio, all those ZigBee devices can be controlled. Right now the only thing that doesn’t work is Google Home because it requires a remote API, the Home & Away feature from the Hue app (again, remote API), and the Eneco Toon.

There really are a fantastic number of devices this software works with, and if you’re building out your Internet-connected home lighting solution, this is one piece of software you need to check out. Thanks to [cheesemarathon] for bringing our attention to this. He also liked it so much he’s now contributing to the GitHub. Very cool.

Hackaday Links Column Banner

Hackaday Links: December 9, 2018

SpaceX launched a rocket this week, and things did not go as planned. The hydraulics on the grid fins were stuck when the first stage started its atmospheric recovery, and the booster became a fish. The booster landed about a mile or so offshore, which meant we got some great footage of a failed landing, and there are even better shots of the guts of a landed booster. [Scott Manley] whipped out a video showing the ‘new’ discoveries of what’s going on inside a Falcon 9 booster. Interestingly: the weight of the upper stage is carried through the thrust plate of its engine (which makes sense…). There’s a lot of pneumatic stuff going on, and while the composite interstage is very strong along the long axis of the rocket, it doesn’t like being slammed into the ocean.

Winter is coming, and that means you should take your car out during the first snow, drive out to an empty parking lot, and do donuts. I am not kidding this is how you learn to drive in the snow. How do they do it in Russia? They weld 3000 nails to a steel wheel. Does it work? For a while, then the nails bend. We’ve seen this done by drilling screws through a tire, and that works much better; it’s less length for the screws to fulcrum over.

Aaay, we got a date for Sparklecon! It’s February 1-3rd in the endless suburban wastes of Fullerton, California. It’s in an industrial park, there’s a liquor store around the corner, and there’s a remote-controlled couch. Get on it.

Do you wish you had a hassle-free and affordable way to get scorpions delivered straight to your mailbox? Enter Dollar Scorpion Club. Dollar Scorpion Club makes a great gift for all ages. Just enter your friend’s shipping address during checkout, and the extra-special scorpion supply chain management will mean your scorpions are delivered fast to their door.

Regular Car Reviews finally reviewed a Pontiac Aztek. The takeaway is that it’s a bug-out car for Boomers, designed in that episode of The Simpsons where Homer finds out he has a brother.

Want to see something weird? It’s a G3 iMac running Windows 8. This is… weird. Either someone is doing a remote desktop into a Windows 8 machine, someone is just using screenshots, or this machine is way cooler than the craigslist seller is letting on. If you’re in Dallas, it might be worth picking this up.

The Guts Of Switched Mode Power Supplies, Brought To You By Oscilloscope Repair

The Tektronix 2000 series of oscilloscopes are a mainstay for any electronics lab. They work, they’re relatively cheap, they’re good, and they’re available in just about any surplus electronics store. [Mr.RC-Cam] has been hoarding one of these for twenty years, and like any classic piece of equipment, it needs a little refurbishment every now and again. Now, it’s time. Here’s how you repair one of the best values in analog oscilloscopes.

This repair adventure began when the scope died. There were no lights, no screen trace, and a brief hiss sound when it was powered on. (Ten points if you can guess what that hiss sound was!) Armed with a schematic, [Mr.RC-Cam] dove in and pulled the power supply, being careful to discharge the CRT beforehand.

There were no bulging capacitors, no obviously overheated components, and just a little bit of dust. The only solution was to look at the parts with a meter one at a time. Removing the big caps provided access to a row of diodes, which revealed the culprit: a single shorted diode. This part was ordered, and a few other housekeeping tasks were taken care of. The lithium battery on the processor board responsible for storing the calibration constants was replaced, and the new, smaller, caps got lovely 3D printed mounting flange adapters. Now, this old ‘scope works, and we’ve got a lovely story to tell around the electronic campfire.

Liberating Birds For A Cheap Electric Scooter

A few months ago, several companies started deploying electric scooters on the sidewalks of cities around the United States. These scooters were standard, off-the-shelf electric scooters made in China, loaded up with battery packs, motors, and a ‘brain box’ that has a GPS unit, a cellular modem, and a few more electronics that turn this dumb electric scooter into something you can ride via an app. Dropping electronic waste on cities around the country was not looked upon kindly by these municipalities, and right now there are hundreds of Bird and Lime scooters in towing yards, just waiting to be auctioned off to the highest bidder.

This is a remarkable opportunity for anyone who can turn a screwdriver and handle a soldering iron. For mere pennies on the dollar you can buy dozens of these scooters, and you can own thousands of dollars in batteries and electronics if you show up to the right auction. [humanbeing21] over on the scootertalk forums is preparing for the Bird apocalypse, and he’s already converted a few of these scooters to be his personal transportation device.

The subject of this conversion are scooters deployed by Bird, which are in actuality Xiaomi MIJIA M365 scooters with a few added electronics to connect to the Internet. The ‘conversion kit’ for a Bird scooter comes directly from China, costs $30, and is apparently a plug-and-play sort of deal. The hardest part is finding a screwdriver with the right security bits, but that again is a problem eBay is more than willing to solve.

Right now, [humanbeing21] is in contact with a towing company that has well over a hundred Bird scooters on their lot, each accruing daily storage fees. Since these scooters only cost about $400 new, we’re probably well past the time when it makes sense for Bird to pay to get them out of storage. This means they’ll probably be heading for an auction where anyone can pick them up — all of them — for a hundred bucks or so.

Right now, scooter hacking is becoming one of the most interesting adventures in modern-day hacking. You’ve got batteries and electronics and motors just sitting there, ready for the taking (and yes, through these auctions you can do this legally). We’re looking at a future filled with 18650-based Powerwalls from discarded electric scooters and quadcopters built around scooter motors filling the skies. This is cyberpunk, and we can’t wait to see the other builds these scooters will become.

Building The World’s Smallest Jet Turbine By Hand

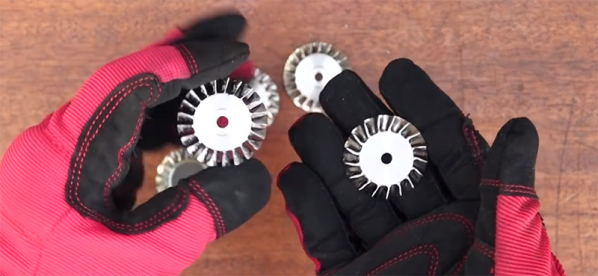
There are very few machines as complex to build as a turbojet engine. The turbine blades on a commercial airliner are grown from a single crystal of metal. The engineering tolerances are crazy, and everything spins really, really fast. All of these problems aren’t a concern for [Igor], who’s building what will probably end up being the world’s smallest turbojet engine. He’s doing it in his home shop, and a lot of the work is being done by hand. We don’t know the Russian translation for ‘hold my beer’, but [Igor] certainly does.

The design of this turbojet — as far as we can tell — is a centrifugal flow turbine, or something that’s not terribly different than the projects we’ve seen that turn the turbocharger from a diesel engine into a jet. The innovation here is using a lathe to machine the compressor stages by mounting an end mill to the headstock and the compressor blank on the cross slide, in a rotary table. It’s weird, but you really can’t argue with something that looks like it’ll work.

[Igor] has made a name for himself by creating some crazy contraptions. The most impressive, by far, is a gigantic remote controlled plane, powered by a handmade jet engine. This is an enormous fiberglass plane with a homebrew engine that spins at 90,000 RPM and doesn’t fly apart. That’s impressive by any measure.

[Igor] is posting a lot of his build process on YouTube and Instagram, including heat treating the compressor stages with a blowtorch. This is an amazing project, and even if this tiny turbine will be able to self-sustain, that’s an amazing accomplishment. You can check out a few more videos from [Igor] below.

Continue reading “Building The World’s Smallest Jet Turbine By Hand”

Better Mechanical Keyboards Through 3D Printing

You’re not cool unless you have a mechanical keyboard. No, you won’t be able to tell if your coworkers don’t like it, because you won’t be able to hear their complaining over the sound of your clack-clack-clacking. You can even go all-in with switch modifications, o-rings, and new springs, or you could use your 3D printer to modify the touch of your wonderful Cherry MX switches. That’s what a few researchers did, and the results are promising.

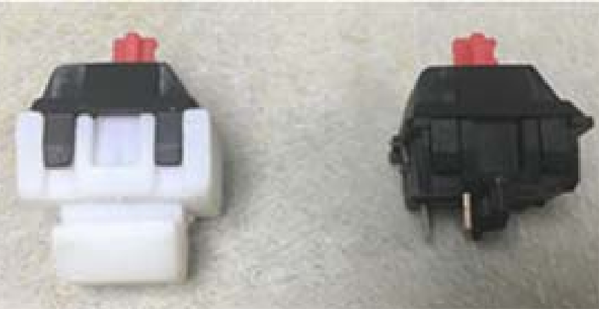
The ‘problem’ this research is attempting to solve is bottoming out on Cherry MX keyswitches. If you’re bottoming out, you’re doing it wrong, but nevertheless, you can get a publication out of solving repetitive strain injury. This was done by modeling the bottom housing of a Cherry MX switch by printing most of it in nylon on a Stratasys Objet 350 polyjet printer, with a tiny bit of of the housing printed with a polymer with a hardness of Shore 40. No, Shore A, Shore B, or Shore 00 was not specified, but hey, it’s just a conference paper.

The experimental test for this keyswitch was dropping a 150 gram weight from 125 mm onto the keyswitch, with a force sensitive resistor underneath the switch, connected to an Arduino. Data was logged, filtered, and fitted in Excel to create a plot of the force on dampened, rigid, and commercial switch housings. Results from ANOVA were p > 0.05 (p=0.12).

Despite the lack of significant results, there is something here. The Objet is one of the few printers that can do multimaterial printing with the resolution needed to replicate an injection molded part. There is a trend to the data, and printing squishy parts into a keyswitch should improve typing feel. There will be more work on this, but in the meantime we’re hopeful some other experimenters will pick up this train of research.