Rim-driven thrusters turn the normal propeller-motor arrangement inside out; rather than mounting the motor at the center of the propeller, they use a large hollow motor, with the blades attached to the inside of the rotor. They’re mostly used in ship propellers, though there have been some suggestions to use them in electric aircraft. [Integza], always looking for new and unusual ways to create propulsion, took this idea and made it into a jet engine.
Rather than using an electric motor, the fan in this design is propelled by miniature rocket nozzles along the edge. The fan levitates on a layer of high-pressure gas between the fan rim and the housing. To prevent too much pressurized gas from escaping, the fan and housing needed to fit together closely, but with minimal friction. A prototype made out of acrylic and resin and powered by compressed air proved that the idea worked, but [Integza] wanted to make to this a combustion-powered engine.
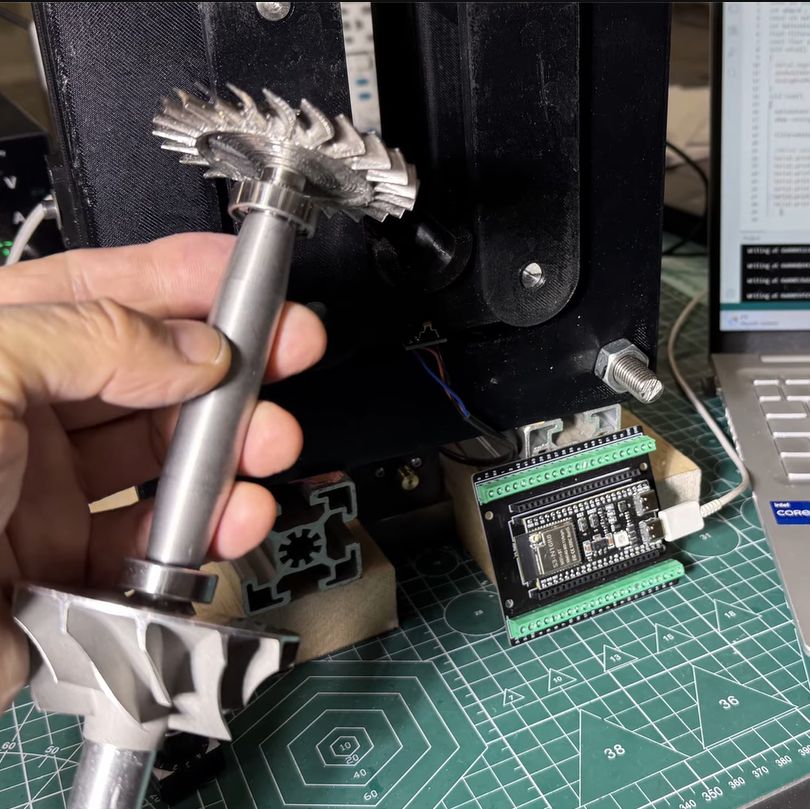
Although jet engines are theoretically quite simple devices, in reality they tread a fine line between working as intended and vaporizing into a cloud of lethal shrapnel. The main reason for this is the high rotational speed of the rotors, with any imbalance due to poor manufacturing or damage leading to undesirable outcomes. It’s for this reason that [AlfMart CNC Garage] on YouTube decided to spend some quality time building a balancer for his DIY RC turbine project and making sure it can prevent such a disaster scenario.
In the previous part of the series the turbine disc was machined out of inconel alloy, as the part will be subjected to significant heat as well when operating. To make sure that the disc is perfectly balanced, a dynamic balancing machine is required. The design that was settled on after a few failed attempts uses an ADXL335 accelerometer and Hall sensor hooked up to an ESP32, which is said to measure imbalance down to ~1 mg at 4,000 RPM.
A big part of the dynamic balancing machine is the isolation of external vibrations using a bearing-supported free-floating structure. With that taken care of, this made measuring the vibrations caused by an imbalanced rotor much easier to distinguish. The ESP32 is here basically just to read out the sensors and output the waveforms to a connected PC via serial, with the real work being a slow and methodical data interpretation and balancing by hand.
It’s been quite a week for asteroid 2024 YR4, which looked like it was going to live up to its “city killer” moniker only to be demoted to a fraction of a percent risk of hitting us when it swings by our neighborhood in 2032. After being discovered at the end of 2024, the 55-meter space rock first popped up on the (figurative) radar a few weeks back as a potential risk to our home planet, with estimates of a direct strike steadily increasing as more data was gathered by professional and amateur astronomers alike. The James Webb Space Telescope even got in on the action, with four precious hours of “director’s discretionary” observation time dedicated to characterizing the size and shape of the asteroid before it gets too far from Earth. The result of all this stargazing is that 2024 YR4 is now at a Level 1 on the Torino Scale of NEO collision risk, with a likely downgrade to 0 by the time the asteroid next swings through again in 2028. So, if like us you were into the whole “Fiery Space Rock 2032” thing, you’ll just have to find something else to look forward to.
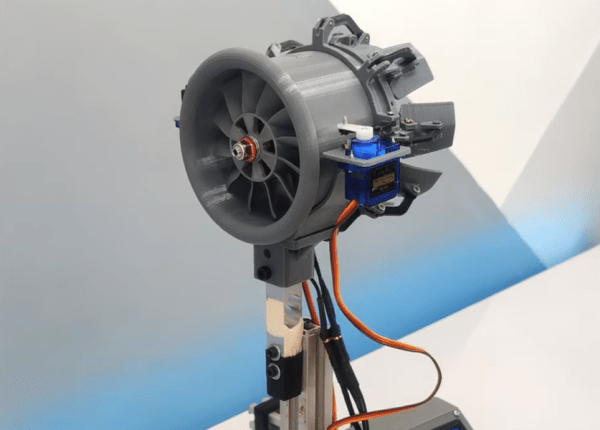
Any student new to the principles of fluid dynamics will be familiar with Bernoulli’s principle and the Venturi effect, where the speed of a liquid or gas increases when the size of the conduit it flows through decreases. When applying this principle to real-world applications, though, it can get a bit more complex than a student may learn about at first, mostly due to the shortcomings of tangible objects when compared to their textbook ideals. [Mech Ninja] discovered this while developing a ducted fan based around an RC motor.
The ducted fan is meant to be a stand-in for a model jet engine, based around a high-powered motor generally designed for drone racing. Most of the build is 3D printed including duct system, but in order to improve the efficiency and thrust beyond simple ducting, [Mech Ninja] designed and built a variable nozzle to more finely control the “exhaust” of his engine. This system is also 3D printed and can restrict or open up the outflow of the ducted fan, much like a real jet engine would. It uses two servos connected to collars on the outside of the engine. When the servos move the collars, a set of flaps linked to the collars can choke or expand the opening at the rear of the engine.
This is where some of the complexity of real-life designs comes into play, though. After testing the system with a load cell under a few different scenarios, the efficiency and thrust weren’t always better than the original design without the variable nozzle. [Mech Ninja] suspects that this is due to the gaps between the flaps, allowing air to escape and disrupting the efficient laminar flow of the air leaving the fan, and plans to build an improved version in the future. Fluid dynamics can be a fairly complex arena to design within, sometimes going in surprising directions like this ducted fan that turned out better than the theory would have predicted, at least until they accounted for all the variables in the design.
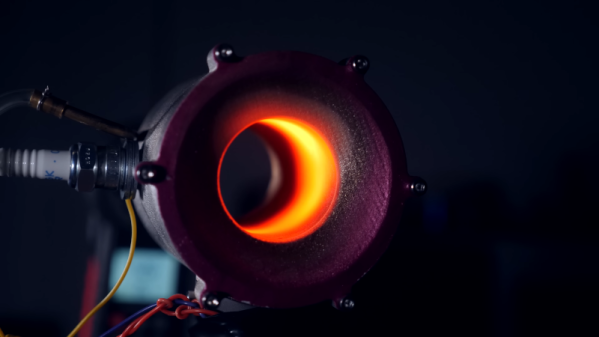
While Dyson makes some good products, they aren’t known for being economical. Case in point: [Integza] spent $500 on a hair dryer. While he does have a fine head of hair, we suspected he wasn’t after it for its intended purpose, and we were right. It turns out he wanted to make it into a jet engine! Why? Oh, come on. The fact that you read Hackaday means you don’t need that question answered. Watch the video below to see how it all turned out.
What got [Integza]’s attention was the power of the very small motor. So he immediately, of course, opened it up. The build quality is very impressive, although for $500, shouldn’t it be? While we are sure the Dyson dryer is more robust than our $9 Revlon special, it seems doubtful that it would handle the high temperatures of a jet exhaust. In fact, he’s had plastic meltdown while trying to build a jet before. So this time, he had a different plan.
That plan involved designing a replacement shell for the dryer and having it 3D printed in metal, which may have cost almost as much or more than the dryer. It came out great, though — and some fuel lines and a spark plug later, he was ready to fire it up.
Did it work? You bet. Test equipment was melted accidentally, and eventually, the engine looked like it flamed out. But it generated some very hot exhaust. We’d like to say that no tomatoes were harmed during the production of the video, but we can’t because of our well-developed sense of ethics. Poor tomatoes! We might have used a Mr. Bill doll, but that probably infringes on someone’s copyright.
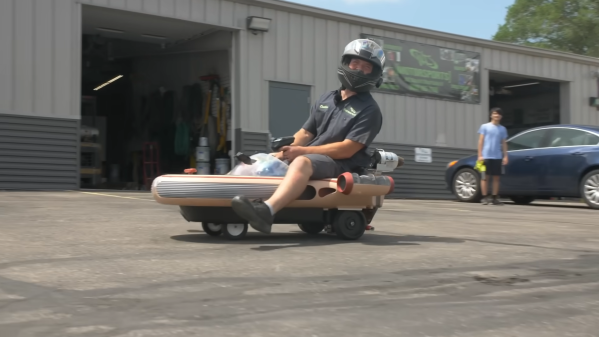
When it comes to children’s ride-on toys, the Star Wars Land Speeder is one of the cooler examples out there. However, with weedy 12-volt motors, they certainly don’t move quickly. [Joel Creates] decided to fix all that, hopping up his land speeder with a real jet engine.
First, the original drivetrain was removed, with new wheels installed underneath. Initially, it was set up with the front wheels steering, while the rear wheels were left to caster freely. A RC jet engine was installed in the center engine slot on the back of the land speeder, and was controlled via a standard 2-channel RC transmitter.
The jet engine worked, but the wheel configuration led to the speeder simply doing donuts. With the speeder reconfigured with rear wheels locked in place, the speeder handled much more predictably. Testing space was limited to a carpark, so high-speed running was out of the question. However, based on the limited testing achieved, it looks as though the speeder would be capable of a decent clip with the throttle maxed out.
It’s not a practical build, but it sure looks like a fun one. [Joel Creates] has big dreams of adding two more jet engines and taking it out to a runway for high-speed testing, and that’s something we’d love to see.
RC jet engines are a bit of a YouTube fad right now, showing up on everything from RC cars to Teslas. Video after the break.
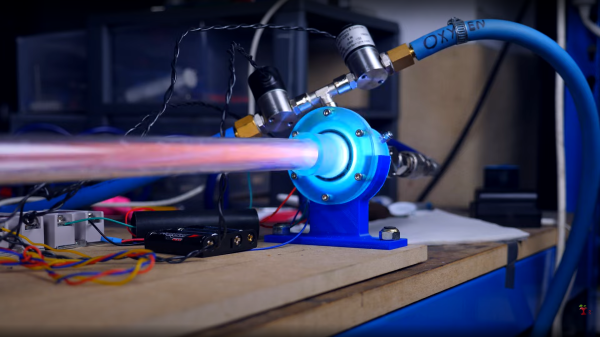
Over the years [Integza] has blown up or melted many types of jet engine, including the humble pulsejet. Earlier improvements revolved around pumping in more fuel, or forced air intakes, but now it’s time for a bit more refinement of the idea, and he takes a sidestep towards the more controllable detonation engine. His latest experiment (video, embedded below) attempts to dial-in the concept a little more. First he built a prototype from a set of resin printed parts, with associated tubing and gas control valves, and a long acrylic tube to send the exhaust down. Control of the butane and air injection, as well as triggering of the spark-ignition, are handled by an Arduino — although he could have just used a 555 timer — driving a few solid state relays. This provided some repeatable control of the pulse rate. This is a journey towards a very interesting engine design, known as the rotating detonation engine. This will be very interesting to see, if he can get it to work.
Supersonic exhaust plume with the characteristic ‘mushroom’ shape
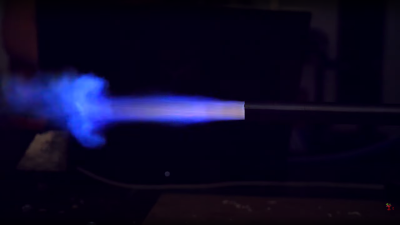
Detonation engines operate due to the pressure part of the general thrust equation, where the action is in the detonative combustion. Detonative combustion takes place at constant pressure, which theoretically should lead to a greater efficiency than boring old deflagration, but the risks are somewhat higher. Apparently this is tricky to achieve with a fuel/air mix, as there just isn’t enough oomph in the mixture. [Integza] did try adding a Shchelkin spiral (we call them springs around here) which acts to slow down the combustion and shorten the time taken for it to transition from deflagration to detonation.
It sort of worked, but not well enough, so running with butane and pure oxygen was the way forward. This proved the basic idea worked, and the final step was to rebuild the whole thing in metal, with CNC machined end plates and some box section clamped with a few bolts. This appeared to work reasonably well at around 10 pulses/sec with some measurable thrust, but not a lot. More work to be done we think.
We hinted at earlier work on forced-air pulsejets, so here that is. Of course, whilst we’re on the subject of pulsejets, we can’t not mention [Colinfurze] and his pulsejet go kart.