OpenPnP Working To Create An Affordable And Completely Open Pick And Place Machine

open-pick-and-place

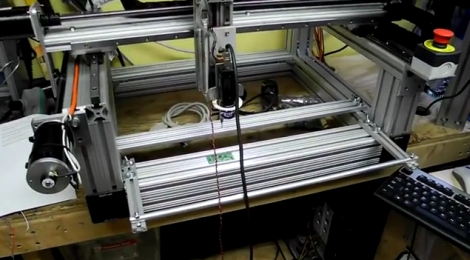
If you happen to do a lot of SMD work, a pick and place machine is an incredible time saver. The problem is that most automated pick and place solutions are well outside of the “small outfit” price range, let alone the budget of a hobbyist.

We have seen some great DIY pick and place implementations around here, though most are lacking professional features or the sort of documentation that would make it easy for others to replicate. The OpenPnP project is looking change things, with a completely open source hardware and software solution with a price target of under $1,000.

Things are already well under way, with plenty of details available in the project’s wiki. According to the development page, a prototype should go into construction in the near future, and development of the pick and place’s control software is coming along nicely.

While things are looking great for the OpenPnP project, they can always use some help to keep things moving. Be sure to check out the project page if you are interested in lending a hand.

To see some of the progress being made, stick around to see a short demo video of the control software and camera in action.

[via Make]

Continue reading “OpenPnP Working To Create An Affordable And Completely Open Pick And Place Machine”

Network Monitoring Panel Built From The IT Department Junk Heap

network-monitoring-panel

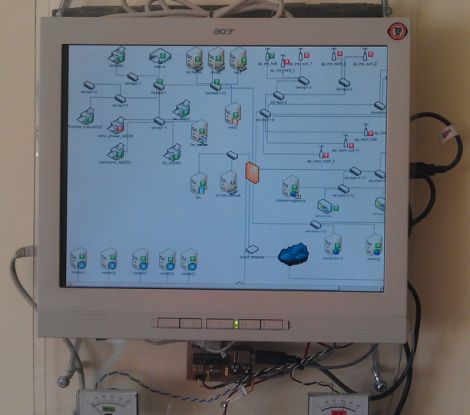
One of the benefits of working in IT is that there is typically a healthy supply of miscellaneous, half-functioning equipment to mess around with. [Vittore] had an old laptop with a busted LCD sitting around (Google Translation), so he figured he might as well get it to do something useful. With a spare desktop LCD panel and some software tweaking, he built himself a slick network monitoring panel that hangs in his office.

He stripped the laptop down to the bare essentials, and mounted it along with an LCD screen in a plexiglass enclosure. He has Nagios running a server in his office, and with the help of a few plugins, he created a simple web interface that show him the topology of his entire network. The panel itself runs a live version of Debian, which he configured to load up his Nagios web page each time it is started.

While having the ability to view the status of every network-connected device in an instant is great, he didn’t stop there. While browsing around online, he found diagram for a simple USB-based performance monitor that uses a PIC to drive a pair of VU meters. He hooked the meters up to a router monitored by Nagios, so he can watch office’s bandwidth usage in real time.

If you’re interested in seeing how it was built, be sure to check out the Flickr photo set put together by [Vittore’s] co-worker [Matthew].

Desktop Coilgun Lets You Play Scorched Earth In Your Living Room

desktop-coilgun

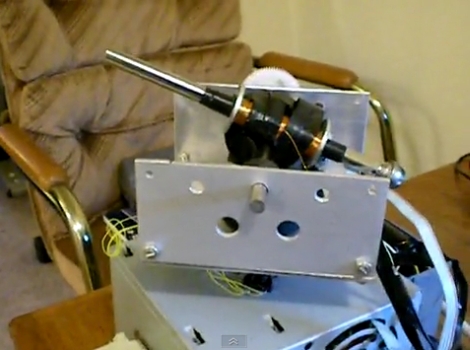
A few years ago when [Dr. West] was wrapping up his collegiate studies, he put together a pretty cool coilgun for his senior project. The gun was built to simulate the Scorched Earth computer game in real life, but due to time constraints he was only able to build one turret instead of two.

The turret was constructed using mainly salvaged components, most of which came from old laser printers and desktop computers. The turret sits atop a computer PSU, which also happens to be the source of the coilgun’s charging power. A Rabbit 2000 microcontroller is used to drive the gun, which is something we’re familiar with from [Dr. West’s] past projects.

The gun can be aimed manually via the attached keypad, but we prefer the more authentic route, allowing the turret to aim itself after being fed X and Y coordinates. As you can see in the demo video, the coilgun works nicely, allowing [Dr. West] to hit a target from across the room.

We love the concept, and think it would be tons of fun to play a real life game of Scorched Earth with a pair of these turrets. If you are interested in making one of your own, you can find the writeup for his final project here in his public Dropbox.

juke-footwell-lighting

DIY Car Lighting Illuminates Areas The Designers Overlooked

[Dave] just can’t seem to get enough of modifying his new car. Where he lives, it’s typically dark on his ride home from work and he finds himself dropping things on the floor of his car all too often. Nissan decided not to include lighting in the Juke’s foot well or glove box, so [Dave] decided that he needed to rectify the situation.

As you might have noticed by his previous tinkering, [Dave] is a big fan of LEDs and ATTiny microcontrollers. He added some Lego-supported LEDs to the driver and passenger side foot wells, installing an additional light in the glove box while he was at it.

The Juke had a couple of usable blank spots on the dashboard, so [Dave] installed a pair of capacitive touch sensors and a small switch into one of the open slots. When touched, the top-most capacitive pin pair ramps up the foot well lights, while the lower pair turns on the LEDs in the glove box. The switch at the bottom is used to toggle on a light in the back seat which he installed a while back.

It’s a simple addition, but it makes all the difference when he is hunting around on the floor in the dark. We are a bit surprised by how many amenities are missing from the Juke, but tweaking them to his liking seems to keep [Dave] happily occupied.

Continue reading to see a short demo video of his interior lights in action.

Continue reading “DIY Car Lighting Illuminates Areas The Designers Overlooked”

New Siri Hack Controls Your Car

siri-viper-smartstart

Siri can make appointments, tell you the weather, but now she can start your car as well!

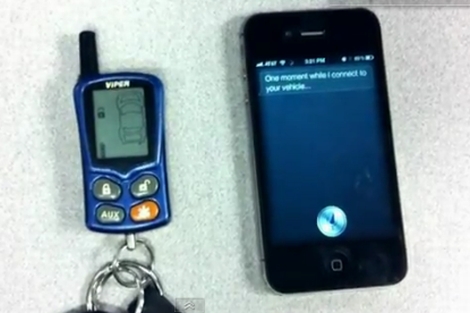
After we showed you how Siri could be hacked to use a custom proxy and execute custom commands, we knew it wouldn’t be long before additional hacks would start rolling in. [Brandon Fiquett] thought it would be great if Siri could remotely control his car, so he built this functionality into Siri using [Pete’s] proxy software.

The hack relies on the Viper remote start system he had installed in his car, along with a few modules loaded into his proxy server. His proxy server tweaks allow Siri to interpret a preset list of commands such as “Vehicle Start” and “Vehicle Arm/Disarm”, relaying the commands to the Viper SmartStart module.

We imagine that the back-end functionality is not unlike the existing SmartStart iOS app, but it looks like [Brandon] beat Viper to the game since Siri has not been made available to 3rd party developers as of yet.

Check out the video below to see Siri in action, then be sure to swing by his web site for additional videos as well as the code that makes this possible.

Continue reading “New Siri Hack Controls Your Car”

Beer Dispenser Talks To Customers, Announces Office Parties Via Twitter

arnie-intelligent-beer-dispenser

Just about the only thing better than beer is free beer.

Staff at the Arnold Worldwide ad agency are free to imbibe in the office’s lounge area, but a few employees thought that it would be pretty awesome to have their beer stash offered up by a vending machine. Using a grant that the company sets aside for “creative projects”, they built [Arnie], the interactive beer dispensing machine.

The machine was stocked with company-branded brews, and each employee carries an RFID key fob pre-loaded with beer credits. When the urge hits, staff members swipe their fob in front of the machine and select their preferred drink from the large, front-mounted touch screen. [Arnie] speaks with his customers and also uses Twitter to announce parties in the making, when a handful of bottles have been vended over a short period of time.

The project was a great use of money if you ask us, and we think that every office should have one of these babies in-house.

Continue reading to see a short video of how [Arnie] came to be.

Continue reading “Beer Dispenser Talks To Customers, Announces Office Parties Via Twitter”

Making A Privacy Monitor From An Old LCD

privacy-screen

[dimovi] had a spare LCD monitor sitting around and thought it would be great to convert it into a “privacy” monitor.

The process is simple enough for anyone comfortable with disassembling electronics. He took apart the monitor’s plastic frame, cutting out the polarized film with a utility knife. Once the film was removed, he spent some time removing the film adhesive from the glass panel using a combination of Oops cleaner and paint thinner.

He reassembled the monitor, which now shines a bright white regardless of what is actually being displayed on the screen. He removed the lenses from a pair of theater 3D glasses, replacing the plastic with the film he removed from the monitor.

Now, [dimovi] is the only one who can see what’s he is doing on his computer, which is just the way he likes it.

While there’s not a lot of magic going on behind the process, we think it’s a neat way to reuse an old monitor.