A Brilliant And Elegant CNC Pendant

pendant

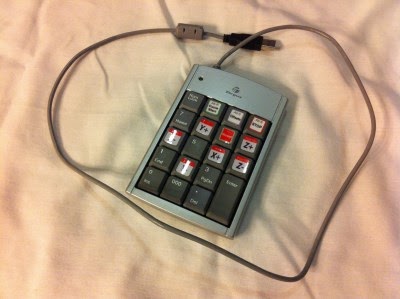
[Mike Douglas] has a small hobby CNC router, which works great — but you’re limited to controlling it from your PC. And unfortunately, there just aren’t pendants made for this consumer level stuff. Annoyed at having to reach over to use his keyboard all the time, he stumbled upon a simple, but brilliant solution: A dedicated USB 10-key pendant keypad.

These USB keypads are designed for laptops that don’t have full size keyboards. They can be had for a few dollars from China, and let you expand your keyboard possibilities… All [Mike] had to do was print off some stickers to put on the keys!

It’s easy to program new hot keys in Mach3  — and there you go! Why haven’t we thought of this before? While you’re at it, why not build a cyclonic dust separator for your CNC too — and if you’re having trouble clamping down work pieces, [Mike] has a pretty cool solution for that as well.


The INFRA-NINJA — A PC Remote Receiver

F3GULGEHTOUJI73.MEDIUM

Laziness sometimes spawns the greatest inventions. Making things to reduce effort on your part is quite possibly one of the greatest motivators out there. So when [Kyle] had to get out of bed in order to turn off Netflix on his computer… He decided to do something about it.

He already had an Apple remote, which we have to admit, is a nice, simple and elegant control stick — so he decided  to interface with it in order to control his non-Apple computer. He quickly made up a simple PCB up using the good ‘ol toner transfer method, and then populated it with a Bareduino, a CP2102 USB 2.0 to TTL UART 6PIN Serial Converter, an IR receiver, a USB jack, header pins, and a few LED and tactile switches.

It’s a bit tricky to upload the code (you have to remove the jumper block) but then it’s just a matter of connecting to it and transferring it over with the Arduino IDE. The Instructable is a bit short, but [Kyle] promises if you’re really interested he’ll help out with any questions you might have!

3D Printed Cyclone Dust Separator

DSCN7011

[Nicholas] has been reading Hackaday for a few months now, and after seeing several people’s dust extractor setups, he decided to make his own 3D printed version. And he’s sharing the files with everyone!

He has a small Lobo mill which produces a lot of dust and to clean up he’s been using a small “Shark” brand vacuum cleaner. It’s a powerful little thing, but has little to no capacity which makes it rather frustrating to use. This makes it a perfect candidate for a cyclone upgrade! If you’re not familiar with cyclonic separator it’s a way of removing dust from air using vortex separation — between rotational forces and gravity, this keeps the dust out of your vacuum cleaner and means you never need to change another filter!

Using Autodesk inventor he designed this 4-stage cyclone separator. It’s made for a 1.75″ OD vacuum hose (the Shark standard) but could be easily modified for different vacuums. We’ve seen lots of cyclone separators before, but this 3D printed one certainly makes it easier to fabricate to exacting standards!

Recovering Nichrome Wire From Unexpected Sources

115b-guitar-hero

Don’t you hate it when you’re in a pinch and all your favorite surplus or electronic stores are closed? You’ve gotta finish this project, but how? He’s a nice real hack for you guys.  How to recover nichrome wire from a ceramic heater!

Necessity spawned this idea, as [Armilar] needed to make 45 cuts in two pieces of foam in order to ship some long circuit boards. Not wanting to make the 90 cuts individually, he improvised this nichrome slicing jig. Not having a spool of nichrome handy, he decided to use a less conventional method. He pulled out a sledgehammer and smashed open a ceramic wirewound resistor.

According to him, nice big ceramic resistors like this 10W one have about a meter of nichrome wire inside!  After breaking the ceramic, it’s quite easy to remove. He made up a jig using nylon spacers and rivets, and then wrapped his wire back and forth across the whole length. It worked perfectly — though he was using 240VDC @ about 1.2A…

If you don’t need such a complex setup, there’s always the bare bones wire foam cutters we’ve featured many times before.

X-Wing Tri-Rotor Brings Star Wars To Life

xwing

Once you realize you can make almost anything fly if you strap a big enough prop and motor to it, you really start thinking outside of the box. That’s what [Rodger] did and he’s come up with this very impressive 19lb, 5′ long X-Wing Fighter from Star Wars.

Recently [Rodger] has found new joy in making movie props come to life with the help of today’s technology. He started with Project Thunderball — a flying James Bond mannequin with a jet pack. From there he brought us the Marty McFly working hover-board, and now an X-Wing Fighter, his biggest flying machine yet.

It measures about 5 feet long, and is a tri-rotor design with three 100A ESCs, 1200W 1050KV motors, and 12″ rotors. The frame is made of PVC to conserve weight. Since it’s a tri-rotor with true vectored thrust, the X-Wing features much better yaw than quadrotors. Then only problem is it pivots around the odd prop out, meaning in this case, the X-Wing turns on its nose — instead of its tail.

Regardless, we can’t wait to see what [Rodger] tries flying next! Stick around to see the X-Wing in action.

Continue reading “X-Wing Tri-Rotor Brings Star Wars To Life”

PiFace Control & Display Tear Down

PIFace4

[John’s] currently working on a rather fun PiNoir & Santa Catcher Challenge, and one of the main components is a PiFace Control and Display, which allows you to use a Raspberry Pi without a keyboard or mouse. Curious to see how this module worked, [John] decided to do a tear down and find out!

Using a de-soldering tool he removed the 16×2 LCD which obstructs most of the components on the panel, which revealed a 16 bit SPI port expander from Microchip MCP23S17. He continued to examine components and checked values using a multimeter to come up with the following circuit diagram:

Continue reading “PiFace Control & Display Tear Down”

Vacuum Formed Portable N64 Is The Real Deal

1_zpsc457798c

This portable N64 looks good enough to be sold in stores — that’s because [Bungle] vacuum formed the case!

He started by creating a wooden template of his controller, using bondo to add grips and features. Once satisfied with the overall look and feel of the controller, he threw it into his own vacuum former and created two shiny plastic halves.

He’s chosen a nice little 3.5″ LCD screen for the display, with a 7.4V 4400mAh battery pack that will last just over 4 hours of constant play — he’s included a battery indicator as well! An old N64 controller takes care of electronics, but [Bungle’s] gone and made custom buttons and is using a Gamecube style joystick as well. He’s included both the rumble pack and an internal memory card which can be changed with the flick of a switch. A tiny HMDX Go portable audio amp and speakers are also integrated directly into the controller.

Continue reading “Vacuum Formed Portable N64 Is The Real Deal”