An Emulated Commodore 64 Operating System For The Raspberry Pi

Commodore-PI


It’s no secret that Commodore users love their old machines with the Commodore C64 being chief among them with 27 Million units sold worldwide. Speaking as a former Commodore Business Machines (CBM) engineer the real surprise for us is the ongoing interest and devotion to an era typified by lumbering 8 bit machines and a color palette consisting of 16 colors. Come to think about it, that’s the description of Minecraft!

Jump forward to today and it’s a generation later. We find that the number of working units is diminishing as age and the laws of entropy and physics take their toll.

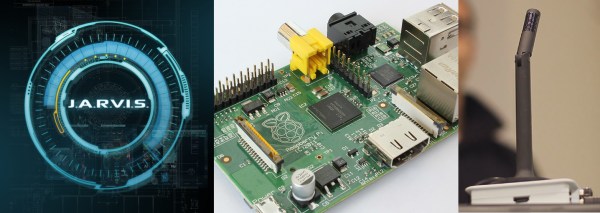
Enter the Commodore Pi, an emulated Commodore 64 operating system for the Raspberry Pi. The goals of the project include an HDMI and composite compatible video output, SID based sound, Sprites and other notable Commodore features. They also plan to have hooks for more modern technology to include Ethernet, GPIO and expansion RAM.

A video demo of the emulator can be found below. If you’re just warming up to the Commodore world, you’ll definitely want to know the real story behind the C128.

Continue reading “An Emulated Commodore 64 Operating System For The Raspberry Pi”

Turning An Analog Scope Into A Logic Analyzer

scope

When [Marco] was planning on a storage oscilloscope build, he realized having a small device to display eight digital signals on an analog scope would be extremely useful. This just happens to be the exact description of a simple logic analyzer and managed to turn his idea into a neat little project (German, Google translation).

The theory of operation for this surprisingly simple, and something that could be completed in a few hours with a reasonably well stocked hackerspace or parts drawer in a few hours. A clock generator and binary counter are fed into the lower three bits of a simple R2R DAC, while the 8 inputs are fed into an 8-input multiplexer and sent to the last bit of the DAC. With nothing connected to the logic analyzer inputs, the output to the scope would just be an 8-step ramp that would appear as eight horizontal lines on the screen. With something connected to the logic analyzer input, an extremely primitive but still very useful logic analyzer appears on the screen.

While it’s not the greatest analyzer, it is something that can be cobbled together in an hour or two, and the capabilities are more than sufficient to debug a few simple circuits or figure out some timings in a project.

Gaming On An 8x8x8 LED Cube

LEDCube

Building an LED cube is a great way to learn how to solder, while building something that looks awesome. Without any previous experience with soldering or coding, [Anred] set out to create a simple 8x8x8 LED cube gaming platform.

Rather than reinventing the wheel, [Andred] based the LED cube off of three separate Instructables. The resulting cube came out great, and the acrylic casing around it adds a very nice touch. Using an Arduino Mega, the 74HC574, and a few MOSFET’s to drive his LEDs, the hardware is fairly standard. What sets this project apart from many other LED cube builds, is the fact that you can game on it using a PlayStation 1 controller. All the necessary code to get up and running is included in the Instructable (commented in German). Be sure to see the cube in action after the break!

It would be great to see a wireless version of this LED cube game. What kind of LED cube will gaming be brought to next? A tiny LED cube? The biggest LED cube ever? Only time will tell.

Continue reading “Gaming On An 8x8x8 LED Cube”

X-Wing Tri-Rotor Brings Star Wars To Life

xwing

Once you realize you can make almost anything fly if you strap a big enough prop and motor to it, you really start thinking outside of the box. That’s what [Rodger] did and he’s come up with this very impressive 19lb, 5′ long X-Wing Fighter from Star Wars.

Recently [Rodger] has found new joy in making movie props come to life with the help of today’s technology. He started with Project Thunderball — a flying James Bond mannequin with a jet pack. From there he brought us the Marty McFly working hover-board, and now an X-Wing Fighter, his biggest flying machine yet.

It measures about 5 feet long, and is a tri-rotor design with three 100A ESCs, 1200W 1050KV motors, and 12″ rotors. The frame is made of PVC to conserve weight. Since it’s a tri-rotor with true vectored thrust, the X-Wing features much better yaw than quadrotors. Then only problem is it pivots around the odd prop out, meaning in this case, the X-Wing turns on its nose — instead of its tail.

Regardless, we can’t wait to see what [Rodger] tries flying next! Stick around to see the X-Wing in action.

Continue reading “X-Wing Tri-Rotor Brings Star Wars To Life”

VCF East Wrapup MegaPost

VCF East, the fabulous retrocomputing festival held in Wall, NJ this last weekend was a blast. We had a great time, dropped t-shirts and stickers to just about anyone who wanted one, took a lot of pictures, and shot a lot of video. Now that it’s over it’s time for the post-mortem, with one insanely long post.

We saw some very cool stuff that merited its own post, and much more that we simply didn’t have time to video. The previous posts from VCF East:

There’s still tons more, including a tour of the retrocomputer museum that hosted VCF East. The biggest talk was from [Dave Haynie], lord of the Amiga giving part three of a multi-year talk on the soap opera that was Commodore International.

Click that ‘Read more…’ to see all this.

Continue reading “VCF East Wrapup MegaPost”

Using SIMMs To Add Some Extra RAM On Your Arduino UNO

A Single In-line Memory Module (SIMM) is a type of memory module containing Random Access Memory (RAM) which was used in computers from the early 1980s to the late 1990s (think 386, 486, Macintoshs, Atari STE…). [Rafael] just made a little library that allows you to interface these modules to the Atmega328p-based Arduino UNO in order to gain some memory space. His work was actually based on the great Linux on the 8bit ATMEGA168 hack from [Dmitry Grinberg] but some tweaks were required to make it work with [Rapfael]’s SIMM but also to port it to the Arduino platform. The 30-pin SIMM shown above is capable of storing up to (hold on to your chairs…) 16MB but due to limited amount of available IOs on the Atmega328p only 256KB can be used. Our guess it that an SPI / I2C IO extender could lift this limitation. A quick (shaky) video is embedded after the break.

Continue reading “Using SIMMs To Add Some Extra RAM On Your Arduino UNO”

Create Your Own J.A.R.V.I.S. Using Jasper

Tony Stark’s J.A.R.V.I.S. needs no introduction. With [Shubhro’s] and [Charlie’s] recent release of Jasper, an always on voice-controlled development platform for the Raspberry Pi, you too can start making your own J.A.R.V.I.S..

Both [Shubhro] and [Charlie] are undergraduate students at Princeton University, and decided to make their voice-controlled project open-source (code is available on GitHub). Jasper is build on inexpensive off-the-shelf hardware, making it very simple to get started. All you really need is an internet connected Raspberry Pi with a microphone and speaker. Simply install Jasper, and get started using the built in functionality that allows you to interface with Spotify, Facebook, Gmail, knock knock jokes, and more. Be sure to check out the demo video after break!

With the easy to use developer API, you can integrate Jasper into any of your existing Raspberry Pi projects with little effort. We could see Jasper integrated with wireless microphones and speakers to enable advanced voice control from anywhere in your home. What a great project! Thanks to both [Shubhro] and [Charlie] for making this open-source.

Continue reading “Create Your Own J.A.R.V.I.S. Using Jasper”