There was a time when soldering stations were unusual in hobby labs. These days, inexpensive stations are everywhere. [Kerry Wong] looks at the TS1C station, which is tiny and cordless. As he points out, cordless irons are not new, but modern battery technology has made them much more practical. However, this iron doesn’t actually have a battery.
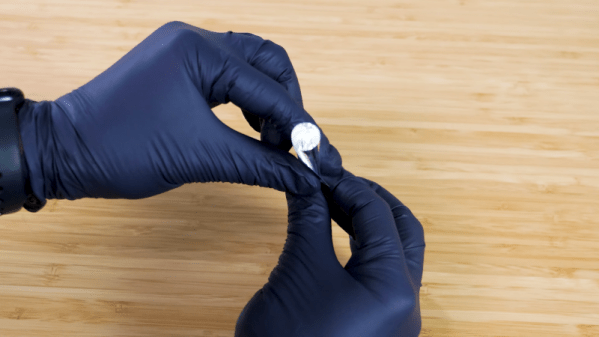
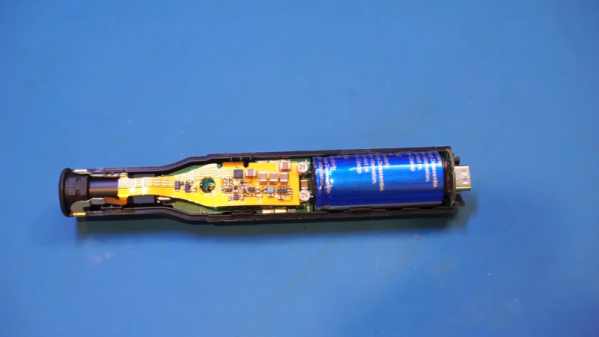
The iron has a large 750 Farad supercapacitor. This has advantages and disadvantages. On the plus side, a supercapacitor charges quickly and doesn’t get weaker with each charging cycle like a conventional battery. On the minus side, the large capacitor makes the unit bulky compared to normal irons. [Kerry] notes that it is ergonomic, though, and he felt comfortable holding it. Also, the supercapacitor limits the amount of charge available while soldering.
It is somewhat of a balance, though. If you want to take the iron and climb a tower, you might be very interested in a longer running time. But if you return the unit to the base every few minutes, the fast charging of the cap will compensate for the lower capacity, and you’ll probably never notice it go flat.
The iron itself doesn’t display any data. The display is on the base, meaning the devices must be paired via Bluetooth. It also requires a PD-enabled USB-C connection, so you can’t just wire it to a battery. You can plug a power supply right into the iron if you prefer, but you still can’t use a simple power connection.
Of course, you assume it does an adequate job of soldering. We wanted to see inside! And [Kerry] didn’t disappoint. If you want to see soldering, skip to about the 10-minute marker. The teardown starts at around 16 minutes.
Honestly, for the bench, we’d probably stick with a wired iron. You don’t always want a base and a PD power supply for a portable iron. But if you absolutely hate cords, this could be a reasonable answer. We’ve seen another review of this iron that didn’t like the plastic casings. Maybe it is like Jedi and lightsabers: you should just build your own.
Continue reading “Inside A Cordless Soldering Station” →