
Remember Duracell’s PowerCheck? The idea was that a strip built into the battery would show if the battery was good or not. Sure, you could always get a meter or a dedicated battery tester — but PowerCheck put the tester right in the battery. [Technology Connections] has an interesting video on how these worked and why you don’t see them today. You can see it below.
Duracell didn’t invent the technology. The patent belonged to Kodak, and there were some patent issues, too, but the ones on the Duracell batteries used the Kodak system. In practice, you pushed two dots on the battery, and you could see a color strip that showed how much capacity the battery had left. It did this by measuring the voltage and assuming that the cell’s voltage would track its health. It also assumed — as is clearly printed on the battery — that you were testing at 70 degrees F.
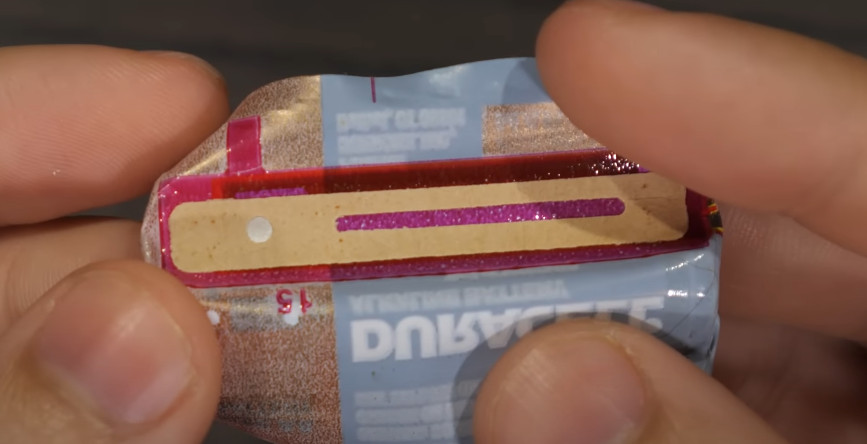 The temperature was important because the secret to the PowerCheck is a liquid crystal that turns color as it gets hot. When you press the dots, the label connects a little resistor, causing the crystals to get warm. The video shows the label taken apart so you can see what’s inside of it. The resistor isn’t linear so that’s how it changes only part of the bar to change color when the battery is weak but not dead.
It is a genius design that is simple enough to print on a label for an extremely low cost and has virtually no components. PowerCheck vanished from batteries almost as suddenly as it appeared. Some of it was due to patent disputes. But the video purports that normal people don’t really test batteries.
Watch out for old batteries in gear. Of course, if you want to really test batteries, you are going to need more equipment.


