2025 One-Hertz Challenge: Pokémon Alarm Clock Tells You It’s Time To Build The Very Best

We’ve all felt the frustration of cheap consumer electronics — especially when they aren’t actually cheap. How many of us have said “Who designed this crap? I could do better with an Arduino!” while resisting the urge to drop that new smart doorbell in the garbage disposal?

It’s an all-too familiar thought, and when it passed through [Mathieu]’s head while he was resetting the time and changing the batteries in his son’s power-hungry Pokémon alarm clock for the umpteenth time, he decided to do something about it.

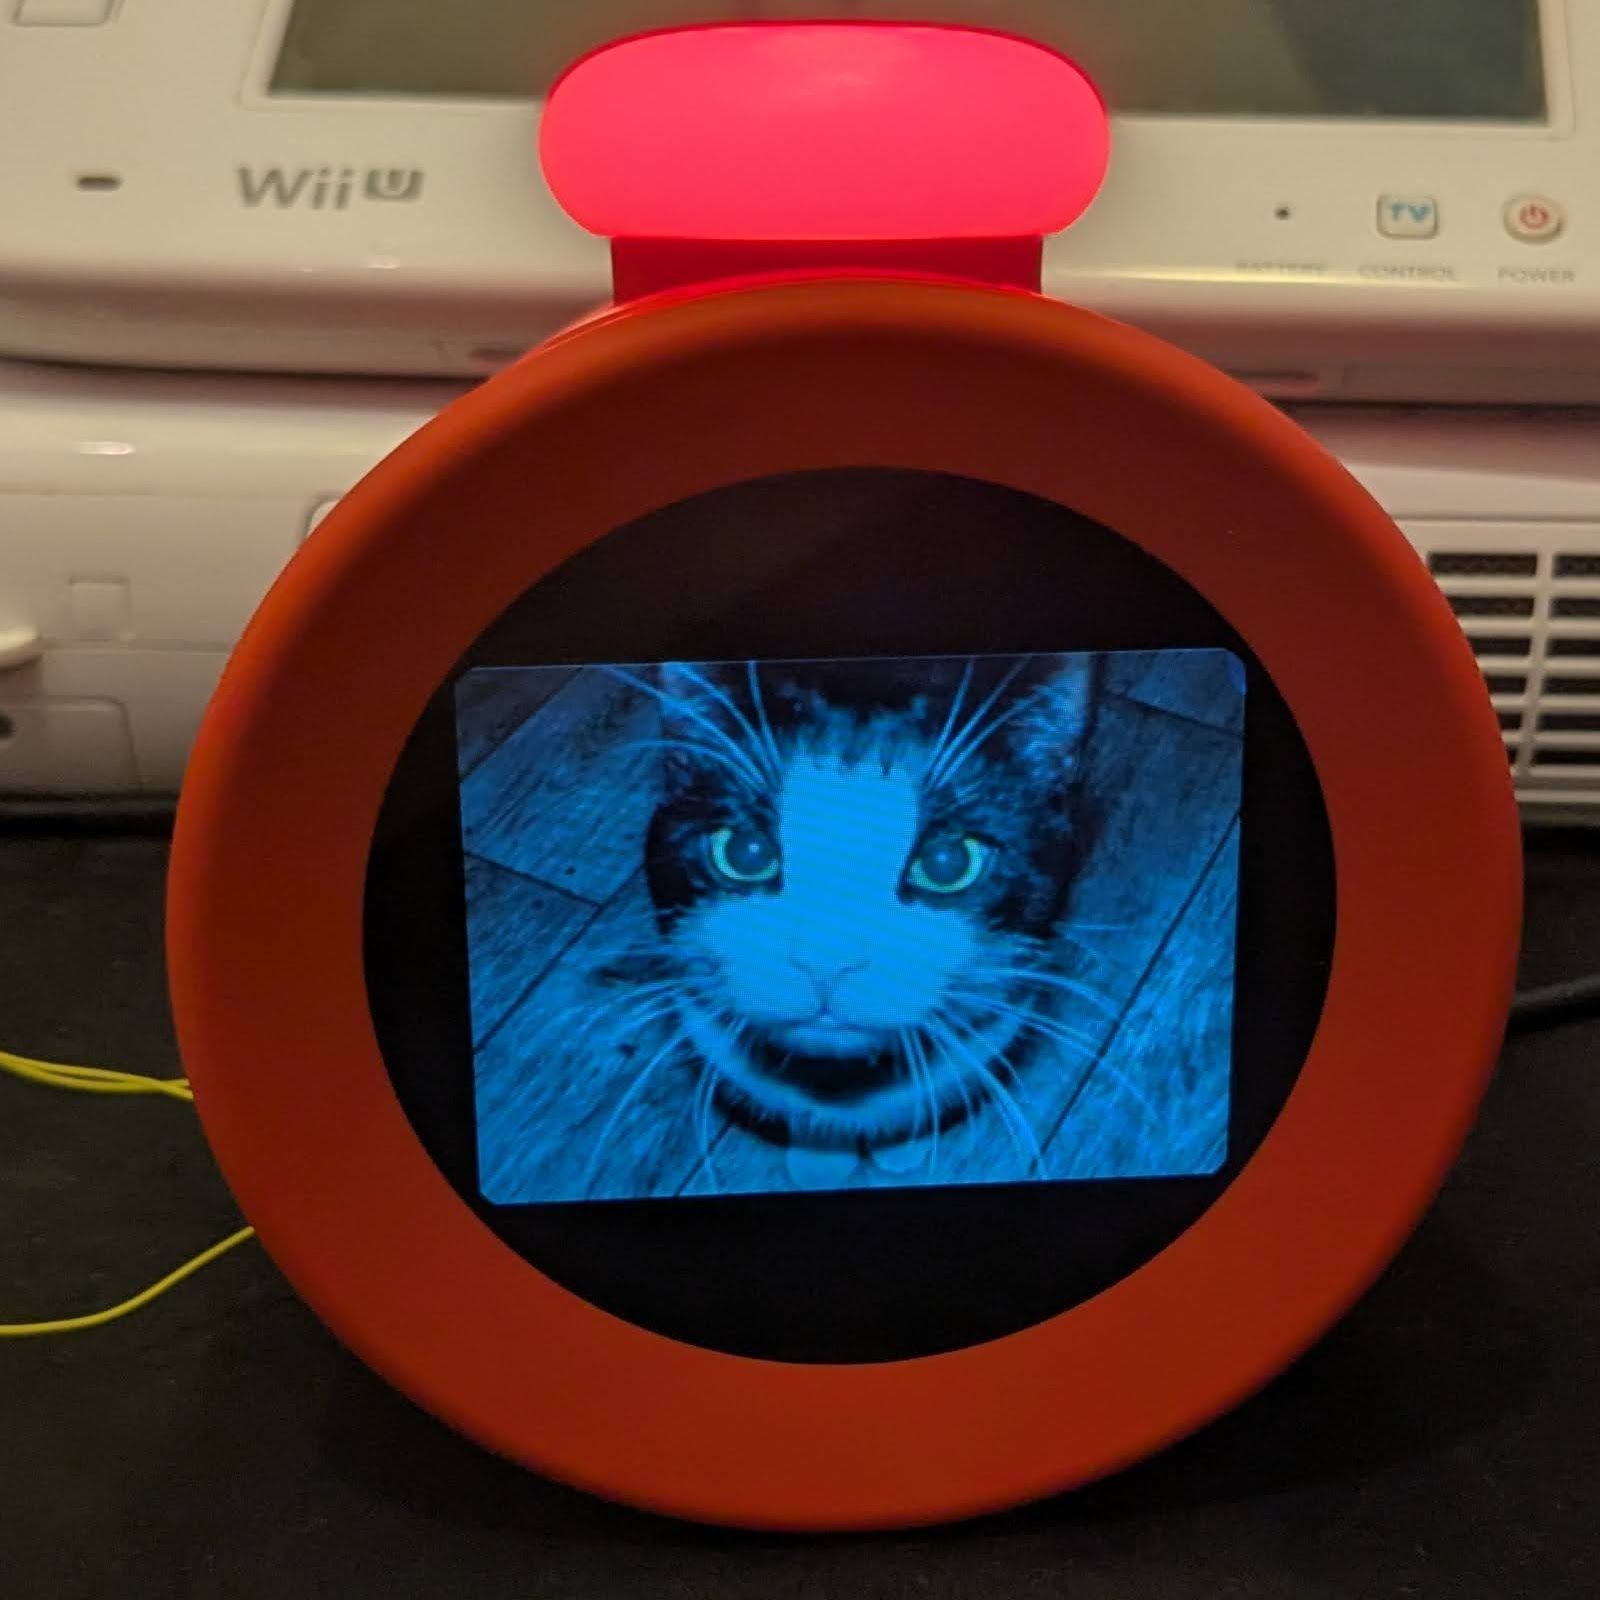
The only real design requirement, imposed by [Mathieu]’s son, was that the clock’s original shell remained. Everything else, including the the controller and “antique” LCD could go. He ripped out the internals and installed an ESP32, allowing the clock to automatically sync to network time in the event of power loss. The old-school LCD was replaced with a modern, full-color TFT LCD which he scored on AliExpress for a couple of Euros.

Rather than just showing the time, the new display sports some beautiful pixel art by Woostarpixels, which [Mathieu] customized to have day and nighttime versions, even including the correct moon phase. He really packed as much into the ESP32 as possible, using 99.6% of its onboard 4 MB of flash. Code is on GitHub for the curious. All in all, the project is a multidisciplinary work of art, and it looks well-built enough to be enjoyed for years to come.

Continue reading “2025 One-Hertz Challenge: Pokémon Alarm Clock Tells You It’s Time To Build The Very Best”

A clock face is shown consisting of two rings of plastic, with backlighting behind one of the rings. There is red light at the one o’clock position, and blue light at the nine-thirty position. A black plastic arm is pointing to the three-thirty position.

A Concentric Clock With Multiple Modes

Most of us spend our lives within reach of a device that provides a clock, stopwatch, and a timer – you’re almost certainly reading this article on such a device – but there are fewer options if you want a screen-free clock. [Michael Suguitan]’s TOKIDOKI rectifies this situation by combining those three functions into a single, physical, analog clock face.

TOKIDOKI displays time by lighting the appropriate segments of two concentric rings of colored LEDs (Adafruit Neopixel rings); the inner ring indicates hours, while the outer ring displays minutes. There is one clock hand, and while it does indicate the passage of time in some situations, its main function is as a dial to control the clock’s different functions. The hand is connected to a Dynamixel XL-330 servo motor, which also serves as a position sensor. Winding the dial clockwise starts a countdown timer, with each successive full rotation switching to a larger unit of time (a fun/unsettling feature is that the largest chronometric unit is the user’s expected lifetime: 84 years). Winding counterclockwise either starts a stopwatch or sets an alarm, depending on how many full rotations you make.

A Raspberry Pi Pico running some MicroPython firmware manages the device and gets the current time from a local network. To soften the light’s quality, the LED rings are pointed backwards to provide back-lighting off of a recessed surface. The entire device is powered by USB-C, and is enclosed in a 3D-printed housing.

This project was designed as an experiment in minimal interfaces, and it certainly achieved that goal, though we imagine that it takes a bit of time to get used to using this clock. We always enjoy seeing innovative clocks here, from digital to analogue, and those that split the difference. Continue reading “A Concentric Clock With Multiple Modes”

Hackaday Podcast Episode 305: Caustic Clocks, Practice Bones, And Brick Layers

This week, Hackaday’s Elliot Williams and Kristina Panos joined forces and Wonder-Twin rings to bring you the latest news, mystery sound, and of course, a big bunch of hacks from the previous week.

The PCB and flexure bit of Trinteract, a small space mouse.First up in the news: Big boo to Bambu Labs, who have tried to clarify their new authentication scheme and probably only dug themselves in deeper with their customers.

On What’s That Sound, Kristina didn’t get close at all, but at least had a guess this time. Do know what it is? Let us know, and if you’re right and your number comes up, you can keep warm in a limited edition Hackaday Podcast t-shirt.

Then it’s on to the hacks and such beginning with a rather nice reverse-engineering of the Yamaha PRS-E433 keyboard, which led to a slice of Bad Apple playing on the tiny screen.

After that, we take a look at an NES musical instrument, how to make wires explode with energy, and a really cool space mouse that uses flexures. Finally, we talk about a piece of forgotten Internet history, and a whole bunch of keyboards.

Check out the links below if you want to follow along, and as always, tell us what you think about this episode in the comments!

Download in DRM-free MP3 and savor at your leisure.

Continue reading “Hackaday Podcast Episode 305: Caustic Clocks, Practice Bones, And Brick Layers”

Hackaday Podcast Episode 304: Glitching The RP2350, Sim Sim Sim, And A Scrunchie Clock

It’s podcast time again, and this week Dan sat down with Elliot for a look back at all the cool hacks we’ve written about. We started off talking about Hackaday Europe, which is coming up in March — seems unlikely that it’s just around the corner, but there it is. There’s also good news: the Hack Chat is back, and we started things off with a bang as Eben Upton stopped by to talk all things Pi. Separately, we talked about fault injection attacks, including how to find the hidden cup of  0xC0FFEE in an RP2350.

We saw a very cool piece of LED jewelry that does a fluid simulation, a direct conversion radio that’s all laid out in front of you, and the scrunchiest mechanical digital clock you’ll ever see. We saw blinkenlights for blinkenlights’ sake, all the ways to put threads in your prints, and how to ditch to coax and wire up your antennas with Cat 6 cable. Plus, it’s an Al Williams twofer in the Can’t-Miss Articles, with a look back at life before GPS and how you can tune into digital ham radio, no radio required.

Download the zero-calorie MP3.

Continue reading “Hackaday Podcast Episode 304: Glitching The RP2350, Sim Sim Sim, And A Scrunchie Clock”

Polarizer clock with rainbow glow clockface

Bending Light, Bending Time: A DIY Polarizer Clock

Imagine a clock where the colors aren’t from LEDs but a physics phenomenon – polarization. That’s just what [Mosivers], a physicist and electronics enthusiast, has done with the Polarizer Clock. It’s not a perfect build, but the concept is intriguing: using polarized light and stress-induced birefringence to generate colors without resorting to RGB LEDs.

The clock uses white LEDs to edge-illuminate a polycarbonate plate. This light passes through two polarizers—one fixed, one rotating—creating constantly shifting colours. Sounds fancy, but the process involves more trial and error than you’d think. [Mosivers] initially wanted to use polarizer-cut numbers but found the contrast was too weak. He experimented with materials like Tesa tape and cellophane, choosing polycarbonate for its stress birefringence.

The final design relies on a mix of materials, including book wrapping foil and 3D printed parts, to make things work. It has its quirks, but it’s certainly clever. For instance, the light dims towards the center, and the second polarizer is delicate and finicky to attach.

This gadget is a splendid blend of art and science, and you can see it in the video below the break. If you’re inspired, you might want to look up polariscope projects, or other birefringence hacks on Hackaday.

Continue reading “Bending Light, Bending Time: A DIY Polarizer Clock”

Pico Pal Puts RP2350 Into Game Boy Color Shell

While modern gaming systems deliver ever more realistic experiences, there’s still something to be said for the consoles and handhelds of the 80s and 90s. For many, the appeal is nostalgic. Others are attracted to the “lo-fi” graphical and sound design of these games, necessitated by the limited hardware of the time.

That said nobody would claim those old systems were perfect. Which is why a hybrid approach like [Peter Khouly] has been working on with the Pico Pal might be the ultimate solution. This replacement motherboard for the Game Boy Color (GBC) is powered by the RP2350, meaning the external hardware will have the same look and feel as it did back in 1998, but you’ll still be able to reap the benefits of modern emulation.

While the origins of the project go a bit farther, [Peter] has been working on this particular variation of the Pico Pal GBC since August, and has kept a fascinating log of his progress. Just getting the RP2350 to emulate Pokémon isn’t really that big of a deal, but getting all the ancillary hardware implemented and fitted inside the case of the GBC is a different story. Especially since [Peter] intends to pack plenty of features into the final product, such as rechargable batteries, Bluetooth audio, real-time clock support, and digital video out.

The most recent status update is from just last week, where [Peter] goes over some of the new features he’s been working on. A major one is the soft power solution, where the physical power switch doesn’t just pull the plug like it did back in the 1990s. Instead, the switch triggers the board to save the game and enter into a low-power mode so that it can come right back on to where you left off. This does impact battery life, but so far, it looks like the Pico Pal GBC will be able to run for at least five hours on a charge, and more than twice that if you don’t mind turning off the audio.

It sounds like there’s still several gremlins to track down in the design, but even in its current state, the Pico Pal GBC looks very interesting. We’re immediately reminded of the phenomenal work [Bucket Mouse] has put in on a similar refit for the original DMG-1 Game Boy.

Tearing Down Nintendo’s Alarmo Alarm Clock

All your Nintendo Alarmo are belong to mew~ (Credit: GaryOderNichts, Blogspot)

Most of us will probably have seen Nintendo’s latest gadget pop up recently. Rather than a Switch 2 announcement, we got greeted with a Nintendo-branded alarm clock. Featuring a 2.8″ color LCD and a range of sensors, it can detect and respond to a user, and even work as an alarm clock for the low, low price of €99. All of which takes the form of Nintendo-themed characters alongside some mini-games. Naturally this has led people like [Gary] to buy one to see just how hackable these alarm clocks are.

As can be expected from a ‘smart’ alarm clock it has 2.4 GHz WiFi connectivity for firmware and content download, as well as a 24 GHz millimeter wave presence sensor. Before [Gary] even had received his Alarmo, others had already torn into their unit, uncovering the main MCU (STM32H730ZBI6) alongside a 4 GB eMMC IC, as well as the MCU’s SWD pads on the PCB. This gave [Gary] a quick start with reverse-engineering, though of course the MCU was protected (readout protection, or RDP) against firmware dumps, but the main firmware could be dumped from the eMMC without issues.

After this [Gary] had a heap of fun decrypting the firmware, which seems to always get loaded into the external octal SPI RAM before execution, as per the boot sequence (see featured image). This boot sequence offers a few possibilities for inserting one’s own (properly signed) contents. As it turns out via the USB route arbitrary firmware binaries can be loaded, which provided a backdoor to defeat RDP. Unfortunately the MCU is further locked down with Secure Access Mode, which prevents dumping the firmware again.

So far firmware updates for the Alarmo have not nailed shut the USB backdoor, making further reverse-engineering quite easy for the time being. If you too wish to hack your Alarmo and maybe add some feline charm, you can check [Gary]’s GitHub project.