The last week of the Citizen Scientist challenge round is drawing a close. Here’s what you need to know to enter your project, and to give it the best chance at making the top twenty. You need to do this by Monday morning, July 11th, to be in the running.
What is Citizen Scientist?
 Citizen Scientist is part of the Hackaday Prize. This round challenges you to make meaningful scientific study more approachable for everyone. Examples include projects that let people build their own lab equipment, sensor modules that can be distributed (or bootstrapped) for widespread data collection like weather stations and pollution monitors, or a new way of studying the world around us. The important thing is your explanation of the project. Show off your idea for making us all Citizen Scientists.
Right now we have a few hundred entries in this challenge round. Twenty of them will be selected to win $1000 and move on to the final round for consideration in the top five prizes: $150,000, $25,000, $10,000, $10,000, and $5,000.
This round ends on Monday morning, so make sure to enter your project now. Starting a new entry is easy but you may also enter a project that you have already document, or one that was submitted to an earlier round of the Hackaday Prize. In all cases, use the “Submit Project to” menu on the left sidebar of your project.
What Your Project Needs to Succeed
 An entry boils down to an idea, a picture, documentation, and four project logs.
You want to show that you are progressing toward a fully working prototype. We suggest that you start with a quick overview of the topic you chose for your entry. How does your project move Citizen Science forward? What led you to the idea, and what kind of impact do you hope it will have.
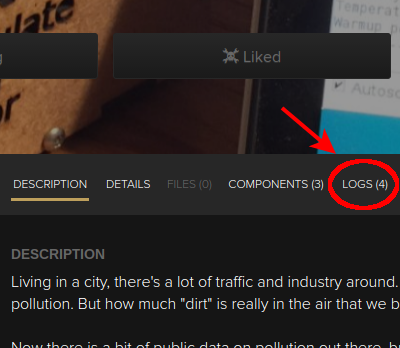
Don’t forget the build logs! One requirement of your entry is to have at least four build logs. At the minimum, pull out four different aspects of your design process and make them logs. To the right you can see a screenshot from the top of a project page. The log count is there and it needs to be at least 4.
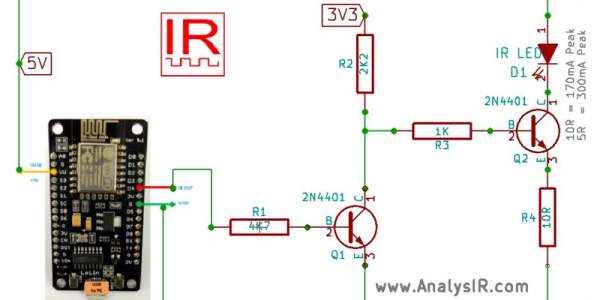
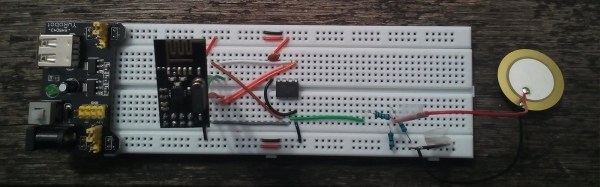
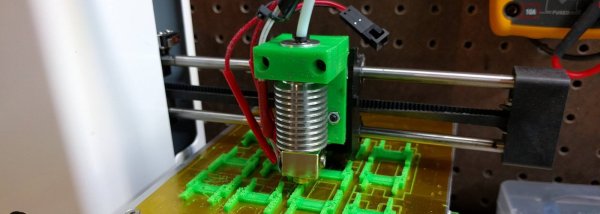
A picture is worth a thousand words. You need at least one image, and we suggest that you put it in the image gallery — use the “Edit Project” button on the top right of your project page for this. It’s best to include some kind of system diagram that shows all parts of the overall project. If you have pictures of an actual prototype make sure to include those, as well as any other schematics, renders, CAD drawings, etc.
Upcoming Challenge Rounds
Don’t have something the fits with Citizen Scientist? Don’t worry, there are still two more rounds coming. On Monday July 11th we will begin the Automation challenge round. The name says it all; any and all automation projects will make great entries. The final challenge round, Assistive Technologies, begins August 22nd and seeks great ideas to make people’s lives better though technology that overcomes difficulties of body and mind.
No need to wait until those dates. Start your project now and you will be able to enter it into those challenges once they officially begin.