[Paul Stoffregen], creator of the Teensy series of microcontroller dev boards, noticed a lot of project driving huge LED arrays recently and decided to look into how fast microcontroller dev boards can receive data from a computer. More bits per second means more glowey LEDs, of course, so his benchmarking efforts are sure to be a hit with anyone planning some large-scale microcontroller projects.
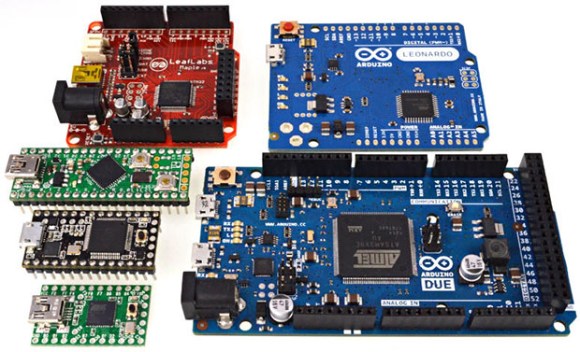
The microcontrollers [Paul] tested included the Teensy 2.0, Teensy 3.0, the Leonardo and Due Arduinos, and the Fubarino Mini and Leaflabs Maple. These were tested in Linux ( Ubuntu 12.04 live CD ), OSX Lion, and Windows 7, all running on a 2012 MacBook Pro. When not considering the Teensy 2.0 and 3.0, the results of the tests were what you would expect: faster devices were able to receive more bytes per second. When the Teensys were thrown into the mix, though, the results changed drastically. The Teensy 2.0, with the same microcontroller as the Arduino Leonardo, was able to outperform every board except for the Teensy 3.0.
[Paul] also took the effort to benchmark the different operating systems he used. Bottom line, if you’re transferring a lot of bytes at once, it really doesn’t matter which OS you’re using. For transferring small amounts of data, you may want to go with OS X. Windows is terrible for transferring single bytes; at one byte per transfer, Windows only manages 4kBps. With the same task, Linux and OS X manage about 53 and 860 (!) kBps, respectively.
So there you go. If you’re building a huge LED array, use a Teensy 3.0 with a MacBook. Of course [Paul] made all the code for his benchmarks open source, so feel free to replicate this experiment.