A CH32V003 Toolchain — If You Can Get One To Try It On

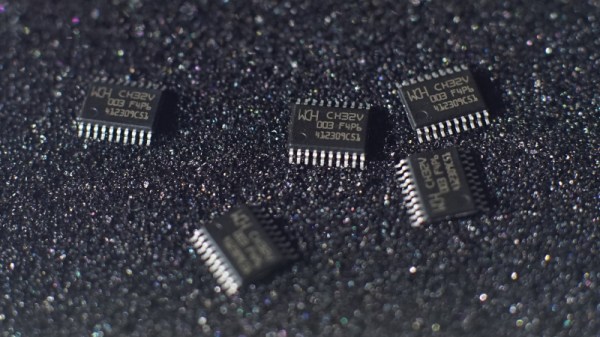
We’re in an exciting time for cheap microcontrollers, as with both the rise of RISC-V and the split between ARM and its Chinese subsidiary, a heap of super-cheap and very capable parts are coming to market. Sometimes these cheap chips come with the catch of being difficult to program though, but for one of them the ever-dependable [CNLohr] has brought together his own open-source toolchain. The part in question is the WCH CH32V003, which is a ten-cent RISC-V part that has an impressive array of capabilities. As always though, there’s a snag, in that we’re also told that while supplies are improving this part can be hard to find. The repository is ready for when you can get them again though, and currently also contains some demo work including addressable LED driver code.

As an alternative there’s a comparable and slightly cheaper ARM-based part, the Puya PY32. It’s reckoned to be the cheapest of the flash-based microcontrollers, and like the WCH part is bearing down on the crop of one-time-programmable chips such as the famous and considerably less powerful 3-cent Padauk. This end of the market is certainly heating up a little, and from our point of view this can only mean some exciting projects ahead.

Streamlining The Toolchain

Sometimes I try to do something magical, and it works. Most of the time this happens because other people have done a good part of the work for me, and shared it. I just cobble a bunch of existing tools into a flow that fits my needs. But the sum of all the parts is often less than the whole, when too many of the steps involve human intervention. Tools made for people simply keep the people in the loop.

For instance, I wanted to take a drawing that my son made into a stamp, by way of a CNC machine and whatever scrap wood we have kicking around in the basement. It’s easy enough, really. Take the photo, maybe use a little tweaking in GIMP to get the levels right, export it into Inkscape for the line detection and maybe even make the GCode right there, or take it off to any convenient SVG-to-GCode tool.

While this works straight out of the box for me, it turns out that’s because I have experience with all of the sub-tools. First, it helps a lot if you get the exposure right in the first place, and that’s not trivial when your camera’s light meter is aiming for grey, but the drawing is on white paper. Knowing this, you could set it up to always overexpose, I guess.

Still, there’s some experience needed in post-processing. If you haven’t played around with both image processing and image editing software, you don’t know how they’re going to interact. And finally, there are more parameters to tweak to get the CNC milling done than a beginner should have to decide.

In short, I had a toolchain up and running in a jiffy, and that’s a success. But in terms of passing it on to my son, it was a failure because he would have to learn way too many sub-tools to make it work for him. Bummer. I’m left wondering if I can streamline all of the parts to work together well enough, or whether I’m simply needed in the loop.

Remoticon Video: Pigweed Brings Embedded Unit Testing, Library Integration To Commandline

When it comes to embedded engineering, toolchains are the worst. Getting a new toolchain up and running correctly is often hard, and often prone to breaking when the IDE or other software is upgraded. A plethora of different toolchains for different hardware makes things even more murky, and if you want to get into time-saving tricks like automated testing, you’re in for a wild ride.

Those pain points led to the creation of the Pigweed project. As Keir Mierle demonstrates in this workshop from the 2020 Hackaday Remoticon, Pigweed is a set of libraries to make working with embedded development more hacker-friendly. The collection is accessed via commandline, and coordinates work with existing libraries to deliver unit testing, linting, static analysis, logging, and handling key-value stores, all alongside more commonly called-for tasks like compiling and flashing.

Demonstrated on a Teensy microcontroller and an STM32 Discovery board, the presentation drives home the utility of Pigweed, a Google project that was released as open source back in March of 2020. Graphical IDEs for these platforms are nowhere in sight, yet test firmware is built and flashed to these devices with relative ease. Unit testing, traditionally a sticky subject for on-chip applications, is demonstrated both emulated on the computer side, and running on the boards themselves. As the capabilities of microcontrollers have ballooned in recent years, writing tests for existing functions and confirming them during new development is becoming a must-have in your skillset.

There’s much more shown off here, so grab the workshop repository to follow along. It’s still considered experimental, and the irony of having to learn the intricacies of the Pigweed toolchain to ease the pain of other toolchains is not lost on us. However, most people reading will have their own affinity for the ability to use unified tools and commandline automation; this is a fascinating way to deliver a number of powerful software development techniques to low-level hardware projects.

Continue reading “Remoticon Video: Pigweed Brings Embedded Unit Testing, Library Integration To Commandline”

How To Get Started With The ESP32

ESP32 is the hottest new wireless chip out there, offering both WiFi and Bluetooth Low Energy radios rolled up with a dual-core 32-bit processor and packed with peripherals of every kind. We got some review sample dev boards, Adafruit and Seeed Studio had them in stock for a while, and AI-Thinker — the company that makes the most popular ESP8266 modules — is starting up full-scale production on October 1st. This means that some of you have the new hotness in your hands right now, and the rest of you aren’t going to have to wait more than a few more weeks.

As we said in our first-look review of the new chip, many things are in a state of flux on the software side, but the basic process of writing, compiling, and flashing code to the chip is going to remain stable. It’s time to start up some tutorials!

Continue reading “How To Get Started With The ESP32”

How To Directly Program An Inexpensive ESP8266 WiFi Module

The ESP8266 is the answer to “I want something with Wifi.” Surprisingly, there are a number of engineers and hobbyists who have not heard of this chip or have heard of it but don’t really understand what it is. It’s basically the answer to everything IoT to so many engineering problems that have plagued the hobbyist and commercial world alike.

The chip is a processor with integrated RAM, some ROM, and a WiFi radio, and the only external components you will need are 4 capacitors, a crystal and an external flash! It’s CHEAP, like $4/ea cheap! Or $5 if you want it on a nice, convenient carrier board that includes all these components. The power consumption is reasonable (~200mA)1, the range is insane ~300m2 without directional equipment, and a PCB trace antenna and ~4km if you want to be ridiculous.

One place thing that more people need to know about is how to program directly for this chip. Too many times projects use it as a crutch via the AT commands. Read on and find out how to hello world with just this chip.

Continue reading “How To Directly Program An Inexpensive ESP8266 WiFi Module”

Explaining The Low Level Stuff You Don’t Know About ARM Programming

Most of us don’t realize how spoiled we are with the different development environments available on the internet. If someone wants to start a blank project on a new [ARM/DSP/…] platform, he usually fires up the dedicated Integrated Development Environment (IDE) and starts coding a C/C++ program. However, there are many initialization routines and scripts required with your program before it can run correctly. In his great article, [Andrew] explains to us what these are by starting a blank project without using any IDE.

As you can see in the above picture, [Andrew]’s project is made around an Atmel SAM4E microcontroller. The chosen toolchain is the arm-none-eabi-gcc from GNU Tools for ARM Embedded Processors. The first part of the article starts with a simplified explanation on how/why your code and variables are split into different memory sections (.bss, .data, .rodata, .text), then [Andrew] details how the linker script will put these sections at different physical addresses depending on your microcontroller’s memory layout. He also shows us how to take care of the stack placement, vector table, variable (non)initialization, and C Runtime. For information, the latter is executed when your processor starts, it is in charge of setting up the stack pointer, initializing the RAM, setting up the standard library and calling the main().

A very nice introduction on the very low level routines running on most processors out there.

A Guide And Helper Script For ARM Cross Compiling Toolchain On A Mac

mac-arm-toolchain-script

[Mitchell Johnson] wanted to develop for the STM32F4 Discovery board on his Mac. There are a few ready-to-use options when it comes to the ARM toolchains, but he couldn’t find one that satisfied all of his needs. After working out all the kinks he wrote a guide and tweaked a script to install the ARM tools on a Mac.

The problem he had with some of the pre-packaged tool chains is that they didn’t support the hardware floating point functionality of STM’s Cortex-M4 chips. To get around this without doing his own ground-up build (which can be quite a challenge) he forked the Summon Arm Toolchain script and modified it to include ST-Link support in the build. One of the things that we like about that script is it installs the tools in a sub-directory of your home directory. This way if you already have another ARM toolchain you can switch between the two by tweaking your PATH variable.