Laser-powered DSLR Auto Focus Assist Light

laser_af_assist

[Adrian] uses his Canon 40D quite often in dark or low-light situations, and found the onboard auto focus assist functionality to be a bit frustrating. In certain focus modes, the auto focus assist light is programmed to turn off once focus has been achieved. He noticed that if his subject moves or the focus point changes before he snaps the picture, the AF light does not come back on to assist in refocusing the image.

To work around this problem, he decided to build a supplemental auto focus assist light that could be triggered at will. He purchased a cheap laser pointer with an adjustable lens, then cut it open to get at the good parts. He mounted it on top of his camera and tweaked the lens to produce an unfocused beam of light that measures about 6” x 12” at five feet.

The laser pointer did the trick – his images are coming out much nicer now that he can easily recompose his shots in low light. While it works great, he’s not completely satisfied with the build, especially with the fact that he has to manually trigger the laser pointer.

Version 2 is in the works however, which employs an old hot shoe to trigger the laser whenever he pushes the shutter release halfway down. According to his blog he is having some timing issues, causing him to capture the laser in most of the pictures he takes. [Adrian] is working hard to correct the problem, and we’re sure he’d appreciate any tips you might have.
Guitar Pickup 101

[Dino Segovis] is at it again!  For this week’s installment of his “Hack A Week” series [Dino] is holding a guitar pickup winding 101.  Professional guitar pickups can cost hundreds of dollars, but are all essentially a permanent magnet wrapped in a bunch of wire. Using some cheap headphones, magnet wire, and a spare bolt [Dino] produces his own pickup and throws it in a one string blues guitar. This is a great beginner’s project as it involves only a few very easy to find parts and touches on some interesting concepts such as inductance and magnetic flux.

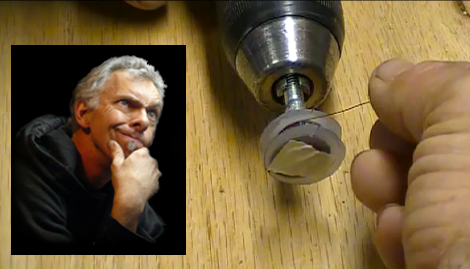
The premise is really simple:  Sandwich the headphone magnet between two plastic discs to make a spindle, hot glue a 1/4″ bolt to the spindle, connect to a power drill, and wind a few thousand loops of magnet wire onto the thing.  Hook your coil up to an amp and lay down a jam.

We might be tempted to add a counter to the rig using a reed switch connected to the “=” key of a cheap pocket calculator, and a magnet glued to the bolt.  We have also seen a more complicated automated spool winder but [Dino] is keeping it nice and simple.

Check out the video after the jump to hear [Dino] go all Seasick Steve on us.

Continue reading “Guitar Pickup 101”

VGA Testers For The Children

Recently on our Hack A Day forums a member asked about getting some VGA testers made in our “Request and Commissions” forum for a charity called the World Computer Exchange, who take old office PC’s and freshens them up to be used by children in developing countries for their education.

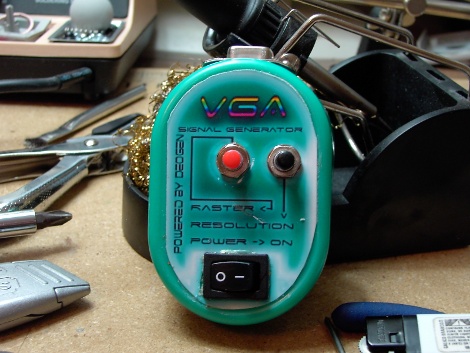
I sort of wanted to do a no brainier electronics build as I had been working on that Apple II weather display for quite a while at that point. I say no brainier because I decided to use one of the many already designed vga testers out there and all I really had to do was get it to fit in whatever box we ended up with.

I choose the deogen because it was already featured on Hack A Day, supports multiple raster patterns and resolutions (640×480 through 1280×1024), is already pretty darn small, and uses an ATTiny 2313 which is good because I am already set up for AVR micro controllers. For a case I choose to use some plastic “Ice Breakers” mint boxes, which due to their oval shape makes it quite a bit smaller than an altoids tin. The challenge is on to shove a PCB, switch, 9V battery, 2 buttons and a vga connector in the cramped space.

Join us after the break for a pile of pictures and some build notes.

Continue reading “VGA Testers For The Children”

LCD: Replacing CCFL With LEDs

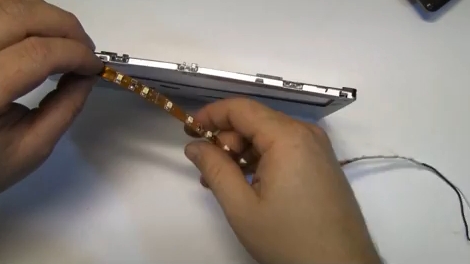
[Fileark] had the backlight on his digital picture frame go out one day. These are generally Cold Cathode Fluorescent Lamps which require an inverter to source the voltage necessary for proper operation. When they stop working, the inverter is usually to blame. Since that circuit is made up of pretty small surface mount circuitry, he decided to replace the backlight with LEDs rather than repair the inverter.

In the video after the break [Fileark] will walk through the entire project. After snooping around inside the picture frame he sizes up a strip of LEDs on a flexible substrate. The metal retaining bracket that hosts the LCD must be altered to fit the new light source and for that, he’s included a hacking montage in his video. The final result looks stock and he estimates the screen is around 97% as bright as with the original backlight.

This isn’t the first time we’ve seen an LED edge-lit upgrade. The last one we saw even used a custom PCB to host the LEDs.

Continue reading “LCD: Replacing CCFL With LEDs”

Solar-powered Bird House Tweets Using B-Squares

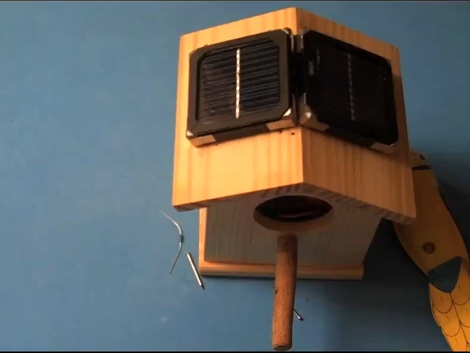
This bird house will tweet to let you know when the occupants pass through the door… err… hole. It uses solar panels to keep a battery topped off, and an Arduino along with an optical sensor which monitors the doorway to pass along an alert via an XBee module.

Admittedly, the video after the break is a bit tongue-in-cheek and doesn’t safeguard against the elements, or even against bird poop. AND it’s basically an advertisement for B-Squares. But we still like it.

These squares use magnetic corners to connect the solar squares together, as well as the squares that house the Arduino and the battery. These magnetic corners also act as the power and ground rails. Two nails have been pounded through the roof of the bird house, acting as a surface to magnetically attach the solar panels to, as well as a conductor to pass the power rails through the wood. It’s no wonder that B-Squares are closing in on  raising five-times their Kickstarter goal.

Continue reading “Solar-powered Bird House Tweets Using B-Squares”

A Bright Idea

[Jeri Ellsworth] had a bright idea – a brain-activated light bulb that floats above your head. While out and about, she saw some guy with a video game icon attached to metal rod sticking out of his backpack. The rod made the icon appear to be floating above his head (think The Sims), which was the inspiration for this LED powered light bulb. The bulb is connected to a metal rod, as well as a metal hoop which is springy enough to keep a pair of electrodes snugly attached to your head.

Those electrodes, along with a third probe used for noise reference, are hooked up to a AD620 instrumentation amplifier. With the help of op amps, it modulates the red or green LEDs that are attached to the back side of the light bulb. The end result is an amusing way to show brain activity while being grilled on a Q/A panel, or while just wandering around taking in all the amazing sights presented at Maker Faire.

Join us after the break for a video demonstration.

Continue reading “A Bright Idea”

Tree Climber Takes A Page From The Inchworm Book

Sharp talons and a strong torso let this robot climb trees, even while carrying a heavy payload. It uses a simple principle, two gripping units allow it to grab onto the tree. These modules alternate, one grips while the torso moves the other up the tree.

You can make out the trio of rods which connect the front and back half of the robot in the image above. Watch the video after the break to see how the motors move these rods with the dexterity of an inchworm, allowing it not only to climb upwards, but to bend and flex to match the contours encountered in the wild.

This was presented at International Conference on Robotics and Automation a few weeks ago. Unfortunately we can only find an abstract for the paper so please leave a link in the comments if you know where to find the full monty.

Continue reading “Tree Climber Takes A Page From The Inchworm Book”