[Skyentific] is looking to push the hobbyist robotics state of the art. Motors and their gears, the actuators, are typically the most expensive part. For his build, he realised he needed big servos capable of delivering plenty of torque. Thus, he set about creating a 3D-printed design to get the job done on a budget. (Video, embedded below.)
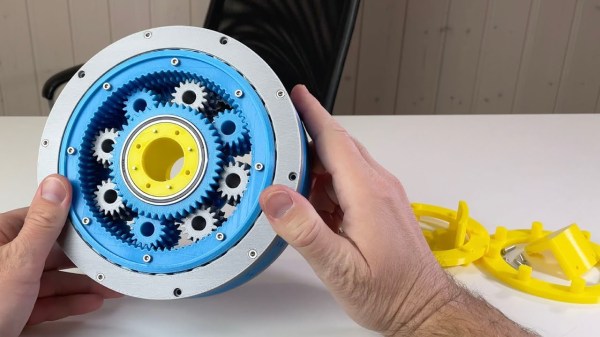
Stepper motors are the order of the day here, chosen for their low cost compared to brushless solutions, particularly when taking control hardware into account. In this design, the stepper motor drives a sun gear as part of a bigger planetary gearbox with a high gear ratio. Cross-roller bearings are used to allow the servo to effectively handle both radial and axial loads. The servo as a whole is designed to fit neatly into the joints of the robot arm itself, and has external mounting points provisioned as such.
It’s a neat servo that somewhat apes those used on full-sized industrial designs, at least in the sense of being an integrated part of the joints of a robot arm. It also comes in at a relatively-cheap $32 based on the materials used by [Skyentific].
We’ve seen some related work from [Skyentific] before, too – like this interesting cable-driven joint. Video after the break.