8X8X8 Cube Invaders

F98YM6YHQQLNHN7.LARGE

Believe it or not, [Anred Zynch] had no soldering skills before starting this project! What we’re looking at here is an 8x8x8 LED cube set up as a Space Invaders style game with a Playstation 1 controller.

He was inspired by several other cubes like [Chr’s], and the Borg cube by [Das-Labour]. The project makes use of an Arduino Mega 2560 R3 to drive the 512-LED array, and an Arduino Uno to take care of the sound effects during game play. It’s kind of like Space Invaders — but in 3D!

Complexity of building and wiring it aside, [Anred] has provided great instructions and the code for the entire project, so if you’re looking to recreate it or something like it, you can! It’s also entered in an Instructable’s contest right now, so if you like it, we’re sure he’d appreciate the votes.

Continue reading “8X8X8 Cube Invaders”

Two-Wheel Balancing Robot Revived From The Dead

Capture

[Jouni] built a pretty nice little two-wheeled robot a while back — but he never got it working quite right. Taking inspiration and a bit of opensource code from another hacker featured here, he’s finished the bot, and it works great!

After seeing [Jose’s] 3D printed Air Hockey bot, he poked around the creator’s blog and discovered the B-Robot, a 3D printed, two-wheeled, stepper driven, balancing robot. As it turned out, it was incredibly similar to a robot [Jouni] had made himself previously!

[Jouni’s] robot features two NEMA-17 steppers, a 12v 2200mAh battery pack, an Arduino Pro Mini, a MPU6050 gyro and a FrSky receiver. Lucky for him, [Jose’s] B-Robot made use of the same steppers and gyro! Using some of [Jose’s] code from his GitHub, [Jouni] was able to bring new life into his little robot!

We’ve included videos of both the original project, and [Jouni’s] version. Aren’t opensource projects awesome?

Continue reading “Two-Wheel Balancing Robot Revived From The Dead”

Robot Chameleon Teaches Little Girl About Camouflage

IMG_8407

[Markus] has been teaching his daughter about animals using a big old animal encyclopedia. A few days ago, they stumbled upon the chameleon, and when he tried to explain its camouflage abilities, she didn’t quite understand. So he decided to make her a pet color-changing chameleon robot. The best part is he built it during her nap!

It’s a fairly simple circuit consisting of an Arduino Uno, a TCS3200 color sensor with breakout board, a ping pong ball, some resistors, and an RGB LED. He plans on adding temperature sensing as well as a capacitive sensor for touch later on. So far, his daughter loves it and plays with it all the time. She’s starting to learn how some chameleons can change their skin color in order to camouflage — and she’s learning the names of some new colors too!

As always, there’s a demonstration video following the break.

Continue reading “Robot Chameleon Teaches Little Girl About Camouflage”

Decascrap: A Three Servo Decapod

IMG_2718

[Drewtoby] loves making robots. His latest project is a 10-legged bot called the Decascrap, which makes use of only 3 servos!

What we like most about this project is the leg mechanism [Drew] has cooked up. The legs are made of guitar picks hinged to what look like popsicle sticks. Each guitar pick has a hole punched in it which allows the servo rod to go through the legs. Strategically placed globs of hot glue on either side of each leg on the servo rod allows for the parallel motion during the actuation of the legs. A third servo tilts the bot back and forth as the legs are moved, allowing the bot to scuttle about.

Stick around after the break to see it tackle some rough terrain — well, actually it’s just a piece of uneven foam, but hey!

Continue reading “Decascrap: A Three Servo Decapod”

Autonomous Lighting With Intelligence

myra_light_01_29

Getting into home automation usually starts with lighting, like hacking your lights to automatically turn on when motion is detected, timer controls, or even tying everything into an app on your smart phone. [Ken] took things to a completely different level, by giving his lighting intelligence.

The system is called ‘Myra’, and it works by detecting what you’re doing in the room, and based on this, robotic lights will optimally adjust to the activity. For example, if you’re walking through the room, the system will attempt to illuminate your path as you walk. Other activities are detected as well, like reading a book, watching TV, or just standing still.

At the heart of the ‘Myra’ system is an RGBD Sensor (Microsoft Kinect/Asus Xtion). The space in the room is processed by a PC running an application to determine the current ‘activity’. Wireless robotic lights are strategically placed around the room; each with a 2-servo system and standalone Arduino. The PC sends out commands to each light with an angle for the two axis and the intensity of the light. The lights receive this command wirelessly via a 315MHz receiver, and the Arduino then ‘aims’ the beam according to the command.

This isn’t the first time we’ve seen [Ken’s] work; a couple of years ago we saw his extremely unique ‘real life’ weather display.  The ‘Myra’ system is still a work in progress, so we can’t wait to see how it all ends up.  Be sure to check out the video after the break for a demo of the system.

Continue reading “Autonomous Lighting With Intelligence”

The K9 Curfew Door

[Kenbob] is an awesome pet owner. He has two small dogs that have free access to the backyard through a doggy door. It’s great during the day, but they have to close it at night to stop the dogs from bothering the neighbors. So he decided to make an automatic curfew based doggy door!

Before setting out on his project, he determined some design goals that had to be met. Namely, he couldn’t have it lock the dogs outside by accident! The hack makes use of an old large format flat-bed scanner that had stopped working a while ago. As it so happened, this scanner had just enough carriage travel to be able to actuate a cover for the doggy door. After reinforcing the sliding cover, he hooked it up to an Arduino Nano, a RTC and a H-Bridge motor driver in order to control it.

In order to add scheduling ability and to program the door remotely, he has also hooked it into his existing x10 control infrastructure in his house — not too shabby! It also features a manual 3-position switch to lock it open, closed, or to leave it on automatic. The question is, can a raccoon get in?

He’s been testing it for a few weeks and it works quite well, although he admits it is not the most rugged solution — lucky for him, his dogs aren’t the type to run headfirst into things. Stick around after the break to see it in action.

Continue reading “The K9 Curfew Door”

Are We Not Indestructible? We Are Quiz Buttons!

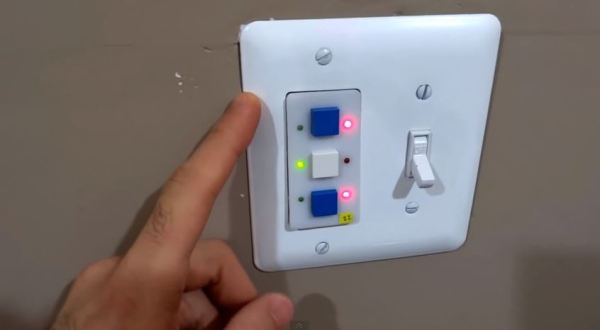
In what we hope is a new trend in interviewing, some of the people at [Anthony]’s place of work asked him to make some wireless quiz buttons. He took the task quite seriously, making them extremely robust and low-power.

[Anthony] is experienced in the button arts, having made this party push button for a wedding reception. His design for the quiz buttons is a little different. Each button has an Arduino Pro mini and an nRF24L01 wireless RF module. On the receiver side is an Arduino Pro micro and an another RF module. A connected PC captures the serial data and  displays the pressed button’s ID. It also shows the order in which subsequent buttons were pressed and the time elapsed between them.

The really notable part of this build aside from the awesome laser-cut MDF Devo energy dome button housings is the extremely low power consumption of the transmitting Arduinos. [Anthony] has designed them to go into sleep mode which disables all on-board circuitry and only wakes on interrupt. He removed the power LED and the voltage regulator since they run on 2-AA batteries. The voltage regulator was drawing more than 25mA in sleep mode. Because of these mods, each button consumes < 1μA, which is less power than the batteries can self discharge over their lifetime.

[Thanks Jef]