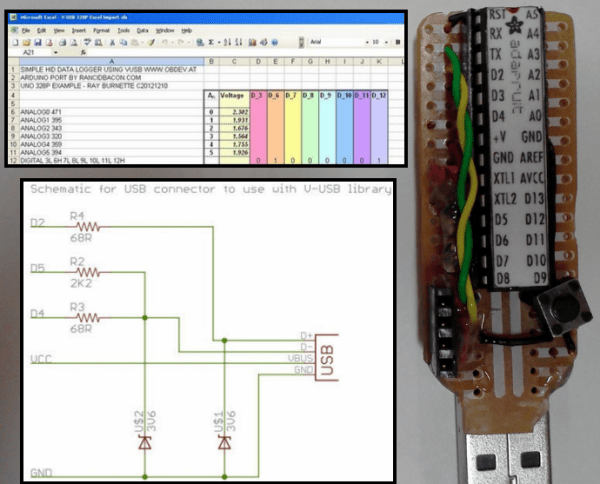
Adding USB functionality to your Arduino projects used to be a pain, but thankfully, the V-USB project came along and gave your ATMEGA328 the ability to control the USB lines directly and mimic simple (low-speed) USB peripherals. [Ray] shows an implementation of the V-USB project by logging the status of the Arduino’s I/O pins to an open Excel spreadsheet
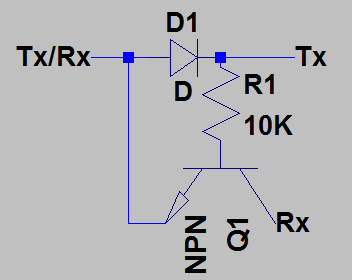
V-USB (Virtual USB) is especially useful for those of us who build standalone Arduino projects with the ATMEGA328. Unlike the Arduino Leonardo and its ATMEGA32U4, the ATMEGA328 does not have a built-in USB controller. The circuit required to tie into the USB lines is made up of just a few basic components, and [Ray] provides a reference schematic and BOM to get you started. The Arduino is programmed to mimic a keyboard, so the datalogging is achieved by allowing the Arduino to ‘type’ the data into an open Excel spreadsheet. In this example, the status of 8 digital pins and all 6 Analog Input pins are logged.
For those of you who prefer the PIC microcontroller and are in a similar position of not having a built-in USB controller, there is the 16FUSB project to help you out.