Android Phone Serves As Arduino Terminal

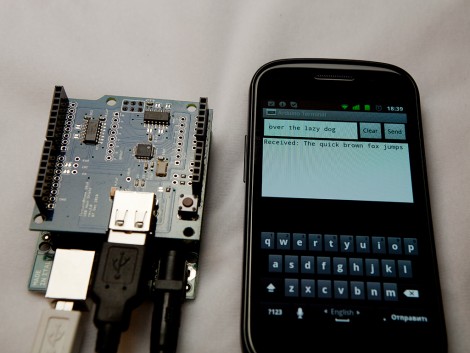
Looking to use his Arduino when on-the-go, [Oleg] has been working on a way to use the Android ADK terminal emulator with the Arduino. The Android side uses ADK features along with a custom application. [Oleg] received help from his friend [Victor] when developing the program for Android (you can check out our own Android Development tutorials if you’re interested in learning how this is done). The .apk file is available for download, but they’re waiting to release the source code until they can clean it up and get some of the gnarly bugs out of the beta version.

A USB host shield for the Arduino is needed to connect to an Android hand set. You’ll be able to send and receive strings via the terminal, with support for carriage return and life feed characters. Unfortunately this doesn’t allow you to change, compile, or write sketches to the Arduino. But it might come in very handy when trouble shooting a project when a computer is not around, or just for using an Android phone as an output.

Upload Firmware Over Ethernet

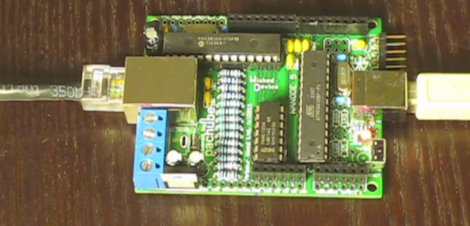
The team at Wicked Device has been working on working on a way to upload Arduino sketches over Ethernet for the Nanode and Arduino Ethernet boards. The team has gotten far enough along to show the world, and the new boot loader shows a lot of promise.

A new boot loader was needed to perform this magic. The boot loader sets up a TFTP with a server over DHCP or a static IP. An unmodified .hex file is downloaded from the server and the sketch starts up. The team is still working on a way to push new apps to the board over Ethernet, but that feature is expected to be completed sometime soon.

Booting over Ethernet isn’t a new idea – TFTP was proposed for this very purpose. Because Wicked Device’s Ethernet-enabled boot loader only works over a local connection and requires a press of the reset button, it should be considered an alpha build. That being said, the boot loader works as advertised, so check out the demo video after the break.

Continue reading “Upload Firmware Over Ethernet”

Portable Power Strip Control Lights And Appliances Using SMS

sms_triggered_appliance_control

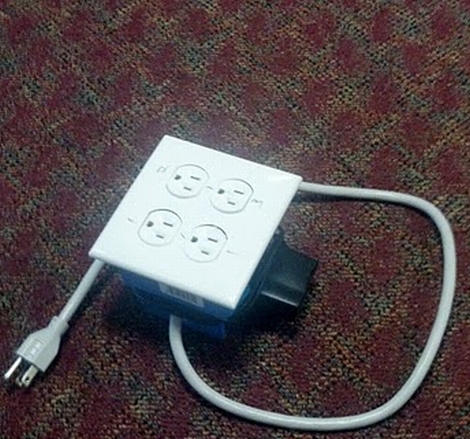
[Julian] wanted a way to remotely control various appliances and lights around his house without spending an arm and a leg on home automation. He also desired the ability to easily switch what items he was controlling without a ton of hassle. Since he couldn’t find anything reasonably priced to do what he desired, he built his own SMS-triggered remote control system.

He designed his system to be used like an extension cord, hence the portable junction box enclosure. This enables him to regulate up to four different items at a time, with the ability to swap out components or relocate his controller at will.

The power strip is controlled by an Arduino which receives commands from his PC via an Xbee module. Any text messages sent to his Gmail account are retrieved by his computer and then transmitted to the Arduino. The Arduino in turn triggers relays as designated by [Julain’s] text messages, utilizing H-bridges to provide the required current.

Check out his schematics and code if you’re interested in implementing something similar in your home.

ATTiny Hacks: Run Your Arduino Project On An ATTiny!

Yup. We have all been there. You throw together a really elaborate Arduino project that only really needs a couple pins, far fewer than the Arduino’s native microcontrollers have to offer. Well fear not, [Thatcher] has solved just this problem by adding some ATTtiny cores to the Arduino IDE. His blog details the process from grabbing the MIT developed core files and loading them up in your Arduino software directories. The modification looks simple and although [Thatcher] shows the whole process on a Mac it only involves unzipping and tossing files into a folder. With ATTiny chips only a few bucks each this is perfect for those simple software driven hacks that don’t require an entire Uno duct taped to the outside of an enclosure.  Nice work [Thatcher]!

Inkjet Print Head Driver Shield

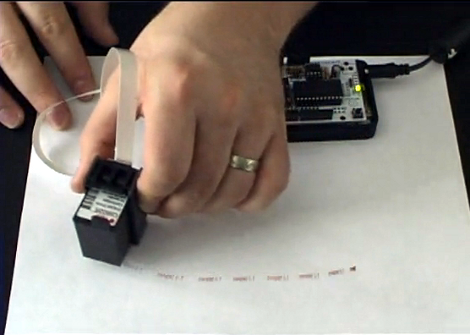
[Nicolas C Lewis] is churning out inkjet print head shield kits for Arduino. If you’ve always wanted to label or brand objects as part of a project this greatly simplifies the process. Using his all through-hole design, an Arduino can print at 96 dpi. At first we had trouble figuring out what we could use this concept for, but [Nicolas] has the answer. In is FAQ he links to a couple of his own flat-bed inkjet printer builds based on earlier prototypes, but he also links to other projects using the same concepts like the Nickel-O-Matic, or the ping-pong ball printer (we’ve embedded video of that one after the break).

The shield only requires five connections with a microcontroller. We love the jumper-based connection system that [Nicolas] chose which lets you use several print heads at once by selecting different drive pins. The project is still in the funding stage but is already over funded. Schematic and code will be posted as soon as the first production run is complete.

Continue reading “Inkjet Print Head Driver Shield”

Program An Arduino Using Your Sound Card

audioino_programming_arduino_with_sound

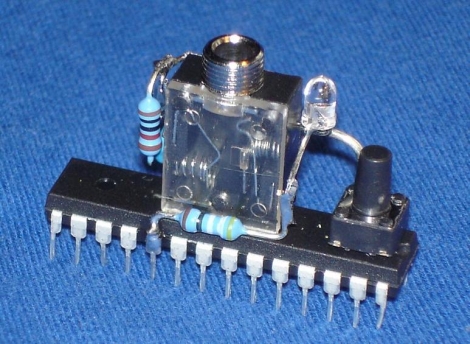
[Chris] wrote us to share a neat technique he has been using to program the Arduinos he uses in his projects. He likes to build bare bones Arduino clones rather than sacrifice full dev boards, and instead of programming them via traditional means, he is using his computer’s sound card.

He builds a simple dead bug Arduino (which he calls an Audioino) using a handful of resistors, a pair of caps, an LED, a reset switch, and most importantly – an audio jack. After burning a special audio bootloader to the chip, he can connect the Arduino directly into his computer’s speaker port for programming.

Once the microcontroller is connected to his computer, he runs the IDE-generated hex file through a Java app he created, which converts the data into a WAV file. With the Arduino put into programming mode, he simply plays the WAV file with an audio player, and the code is uploaded.

He says that this method of programming comes in handy in certain cases where he builds things for friends, because they can easily update the software on their own without a lot of fuss.

No Quarters Required For This Sidescrolling Game In A Box

teagduino_game_in_a_box

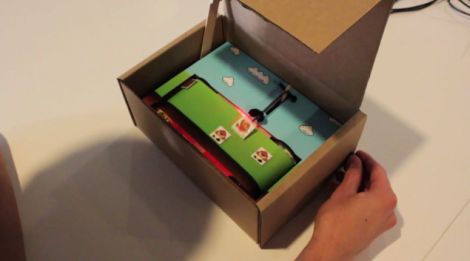
[Adam] from Teague Labs wrote in to share a new gadget they built to help demonstrate the capabilities of the Teagueduino. Their table top video game in a box was made with a bunch of electronic components they had sitting around, as well as soda straws, plenty of painter’s tape, and some popscicle sticks.

When someone pulls the string on the front of the box, a servo opens it automatically, and a second servo starts spinning the game reel. As the reel moves, the player is presented with a set of obstacles to dodge, guiding the “hero” via a knob-controlled servo. A hall sensor attached to the back of the character is tripped when passing over any of the obstacles, which are attached to the reel with magnetic tape. When the hero collides with an obstacle, the game ends and proceeds to close itself, much to the chagrin of the player.

As you can see in the video below, it’s a pretty entertaining and challenging game.

Looking to make one of your own? Swing by the Teagueduino site to grab the game’s code and be sure to share your creations with us in the comments.

Continue reading “No Quarters Required For This Sidescrolling Game In A Box”