turbografx_clone

FPGA-based Turbografx 16 Clone

[Gregory] wrote in to share his most recent project, an FPGA clone of the PC Engine/Turbografx 16 console. You may remember him from last year, when we talked about his SEGA Genesis FPGA clone. He just couldn’t leave well enough alone, and decided to resurrect yet another 16-bit machine in FPGA form.

He has been working on the project for about three months now, but he has been making very quick work of getting everything up and running. As of a few weeks ago, the project was in a pretty unstable alpha stage, but after pounding away at some bugs, he is now able to render any game he pleases.

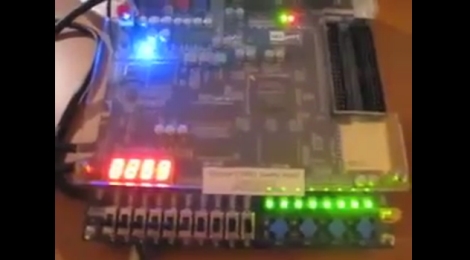
The clone uses an Altera DE1 board just like his previous builds, and he has been able to emulate all three if the main chips that make up the Turbografx logic board. He has yet to work on the Programmable Sound Generator, but that is slated for the near future. While the FPGA currently stores ROMS in its flash memory, he has plans to add the ability to load games from an SD card.

Keep reading to see a pair of videos showing his console clone in action, it’s impressive.

Continue reading “FPGA-based Turbografx 16 Clone”

Homebrew Z80 Computer Inspires Awe

How this one missed us, we’ll never know.

[GG] built himself a retro-styled Z80 nanocomputer over two years using all 1980’s tech. Laid out on one of the largest pieces of perfboard we’ve ever seen on a project, the computer uses a vintage Z80 CPU running at 2.5MHz, 8K ROM, 16K RAM, RS-232 and Parallel ports, an EPROM burner, and an AM95 math coprocessor for 32-bit floating point arithmetic.

We’ve seen a few homebrew computers before, including a Z80 laptop, but this blows them away. For his computer, [GG] created 8BASIC, A Basic interpreter that makes best use of the six 7-segment displays and eight 16-segment displays. The display isn’t really a limitation because [GG] also put together something in Visual Basic so his PC can communicate with his nanocomputer.

[GG] even went so far as to include error detection on the ROM and RAM, as well as an on-board power supply. If you can’t admire the dedication that went into this, at least admire the great wire porn. We’re just sad [GG] never did a proper write-up of his project. He could certainly teach us all something.

Video of [GG]’s work after the jump.

Continue reading “Homebrew Z80 Computer Inspires Awe”

Circuit Building With A Hammer And Nails

real_breadboarding

[Collin Cunningham] over at Make recently wrapped up another edition of “Collin’s Lab” – this time around, the subject is breadboards. He starts off by discussing a common solderless breadboard, something you are no doubt familiar with. What you might not know however is how breadboards got their name.

Way back when, before there was a RadioShack in every strip mall across the country, fancy prototyping supplies like your solderless breadboard did not exist. Amateur radio operators would prototype circuits on wooden boards, often using whatever was around as a substrate. Many times, this meant that the family’s cutting board ended up as a makeshift prototyping station.

One popular method of building circuits was to drive small nails into the breadboard, using wire wrapping to connect things together. [Collin] demonstrates this technique in the video, constructing a simple LED flasher circuit.

He says that the process works decently enough, and was kind of fun to do. He does mention however that building any sort of circuit requiring an IC would likely be out of the question.

If you have a few minutes to spare, check out the video embedded below – [Collin’s] take on technology is quirky and entertaining as always.

Continue reading “Circuit Building With A Hammer And Nails”

Building An Augmented Reality Display Using Obsolete Technology

slideprojector_augmented_reality

Augmented reality might be all the rage these days, but when you take a closer look at the technology, you will find that these sorts of optical illusions are not new at all.

Artist [Sebastian Schmieg] was pondering augmented reality for a bit and decided he could replicate the effect using old and obsolete technology. His creation, called “81 Points of View”, uses an old Kodak slide projector and an elaborate mechanical setup to simulate the effect.

The slide projector resides on a platform that can be rotated around its center in 81 steps. After each movement, the mechanism swaps out the current slide, selecting the next image depending on which direction the user turns. The resulting effect is similar to the implementations of augmented reality you might see today, with a 3d visualization superimposed on the surrounding room.

The concept dates back all the way to the 1860’s, when [John Pepper] first demonstrated the technique. Using mirrors and panes of glass, he was able to project translucent images in front of his audience, which is the same idea [Sebastian] uses in his project. You are likely quite familiar with the effect, if you have ever visited the Haunted Mansion at a Disney theme park.

It’s a neat project, though the resultant augmented reality display is obviously not quite as smooth as you would see from a smartphone. Either way, it is definitely worth checking out. Keep reading to see a video of the project in action.

Continue reading “Building An Augmented Reality Display Using Obsolete Technology”

Mechanical Turing Machine Can Compute Anything…slowly

mechanical_turing_machine

For several years, [Jim] has wanted to construct a fully-mechanical universal Turing machine. Without the help of any electronic circuits or electrical input, his goal was to build the machine using simple hand tools and scrap materials.

If you are not familiar with the concept of a Turing machine, they are devices that manipulate symbols or input from a strip of tape, according to a set table of rules. By definition, a Turing machine should be adaptable to simulate the logic of any computer algorithm, albeit in a much slower fashion than you would see from a computer.

He has replaced the strip of tape with a wire grid, and the symbols have been implemented in the form of ball bearings placed on the aforementioned grid. His hand-cranked machine uses magnets to lift the input symbols from the grid, processing them according to the rules table he routed out of a wood block.

The implementation is definitely clever, though [Jim] admits it is not without its problems. He took it to Maker Faire UK, and most people didn’t quite understand what they were seeing without a full explanation.  The machine is not quite as reliable as he would like it to be, and he would like to make it a bit more powerful as it currently would take months to add two numbers together.

Keep reading to see a brief video demo of his Turing machine in action, and check out his blog if you want to see more information on how the machine was built.

Interested in seeing more Turing machines? Check out these two machines we featured a while back.

Continue reading “Mechanical Turing Machine Can Compute Anything…slowly”

CD Phonograph Brings Old-time Charm To Modern Music

phonograph

[Jozerworx] had always wanted to build a CD player that looked like an old-time Victrola Phonograph player, though he never seemed to be able to find the time to do it. With all of his other projects out of the way, he decided to finally get started on building his phonograph.

He went garage sale hunting and found the perfect base for his project – an old wooden box adorned with tarnished brass hardware. He started in on the project immediately, dismantling a cheap CD player and mounting the motor/laser assembly on the top of the box. The CD player internals were installed inside the wooden box, along with a small audio amplifier stripped from a portable iPod speaker.

A brass horn was fashioned out of an ornament, in order to complete the phonograph feel, but also to act as a passive amplifier. He then mounted a series of switches on the top of the box to allow him to control the CD player’s basic functions.

[Jozerworx] says that it sounds decent, though there are some things he would change. He plans on switching out the audio amplifier and possibly the speakers at some point in the future. He is also still keeping his eye out for a larger, and more effective horn.

A 555 Synthesizer

Inspired by the memory of a childhood electronics kit, [Frank] decided to make a new 555 Synthesizer and enter it into the 555 contest. [Frank’s] remake is played with a stylus, and sports an attack and release envelope circuit, housed in a quick but effective acrylic case.

Using a single 555 timer, a hand full of capacitors, two transistors, and a healthy dose of resistors and potentiometers, the sound is quite impressive thanks to optional filtering, enveloping, and a lot of fine tuning. Full schematics, bill of materials, formulas, and board files are all available along with sources for some of the more specialized potentiometers.

Join us after the break for a ~13 minute long video, which is pretty cool, as it shows the device from prototype, and does some fast forward action though to the final product pictured above, though if you just want a demo of the 555 synth fast forward to 10:44

Continue reading “A 555 Synthesizer”