A Binary Clock That Uses Bulbs

Based on his username, [Horatius.Steam], it’s not a surprise that he calls this project a “SteamPunk” style binary clock. But we think using neon  glow lamps in this binary clock is more of mid-century modern proposition. Either way, the finished look is sure to make it a conversation piece for your home.

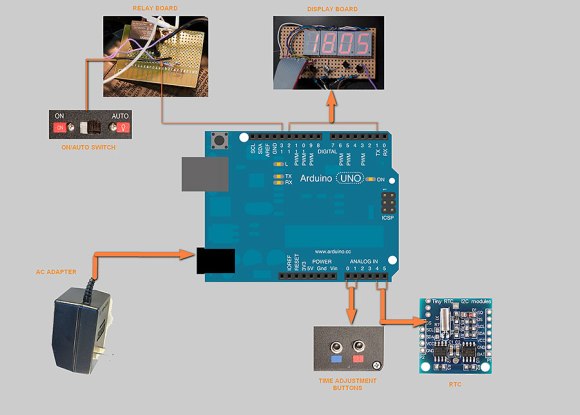
He doesn’t give all that much information on the bulbs themselves. They seem to be neon glow lamps along the lines of a Nixie tubes. It sounds like they just need mains power (based on the image annotations for the relay board). The high voltage is switched by that collection of solid state relays. The controller board includes a DCF radio whose antennae is seen just below the controller. This picks up an atomic clock signal from Frankfurt, Germany. We think it’s a nice touch that he included a mechanical relay to simulate a ticking sound. That and the bulbs themselves can be turned off using the two switches in the base of the clock.

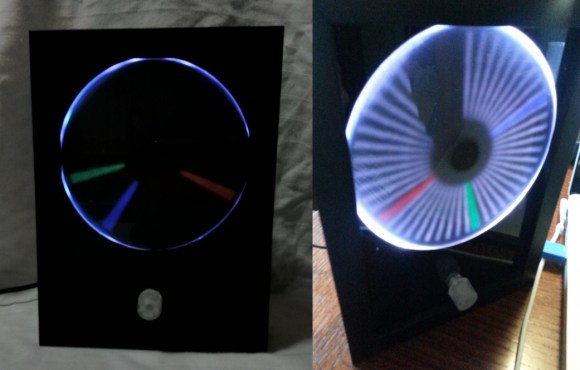
This seems like a good time to direct your attention to an artistic take on a Nixie clock.


Alarm Clock Uses Raspberry Pi To Poll Google Calendar

rpi-google-calendar-alarm-clock

We know a lot of people love using their smart phone as a bedside alarm clock. The problem is that a mobile phone is mobile by nature and eventually you’ll forget to put it in the bedroom one night. That’s why we like the solution that [Devon Bray] has chosen. He set up his Raspberry Pi as an alarm clock that is set using Google Calendar.

The setup which he shows off in his video is quite simple. The Raspberry Pi is connected to a set of powered computer speakers. It plays a song whenever an appointment called “wake” comes up on his Google Calendar. This is accomplished by using the Google Data APIs Python Client Library (isn’t that a mouthful?).

This only scratches the surface of what is possible. With this in place you could easily add LEDs to the room for a sunrise alarm. But if you’d prefer a more bare-bones hardware side of things that’s possible too.

Continue reading “Alarm Clock Uses Raspberry Pi To Poll Google Calendar”

Dermal Implants Means Strapless Watch

dermal

Google Glass is a year or so out, and even after that we’re still looking at about five years until we’re all upgraded at the behest of our robotic overlords. [justurn] simply can’t wait, so he decided to submit to the cybermen early with his Android-controlled wristwatch attached with dermal implants.

[justurn]’s got the inspiration for his project from this earlier Hackaday post involving dermal implants and an iPod nano. The iPod nano doesn’t have a whole lot of functionality, though, but the Sony SmartWatch does, and without the inevitable accusations of fanboyism.

To prep his arm for the hardware upgrade, [justurn] had four titanium dermal anchors placed in his wrist. After letting his anchors heal for a few months, [justurn] installed very strong neo magnets in the bases for his anchors and the clip for the SmartWatch’s strap.

The result is a magnetically mounted, Android-controlled watch semi-permanently attached to [justurn] at the wrist. We love it too.

Fabricating A Mechanical Wristwatch At Home

diy-mechanical-wristwatch

Our mouth is still agape after digging through [Tom’s] watchmaking blog. This gentleman spent several years designing and machining his own mechanical wristwatch. A dozen years ago or so [Tom] answered an ad for an apprentice watchmaker. He worked on watches and came across a book that detailed how timepieces are made. He was told that no-one does it like that anymore, which only fed his curiosity. What he came up with is, to his knowledge, the first timepiece every made in Australia.

It’s no secret that we have a thing for clocks. But we feature digital timepieces almost exclusively. We’ve love mechanical watches too but don’t see them as hobby projects very frequently. After looking at what goes into the mechanism it’s not hard to see why.

[Tom] was faced with a variety of challenges along the way. One of the biggest was having to come up with tools that would let him perform the precise milling work necessary to achieve success. You’ll want to read through his movement design and manufacture posts. He laid out the plan in CAD, but ended up using some hacked together milling tools to get the job done.

[Thanks Amit]

DVD Laser Diode Used To Build A Laser Engraver

[Johannes] has been reading Hackaday for years but this is the first project he’s tipped us off about. It’s a laser engraver built from a DVD burner diode (translated). It turned out so well we wonder what other projects he’s forgotten to tip us off about?

This is the second CNC machine he’s seen through from start to finish. It improves upon the knowledge he acquired when building his CNC mill. The frame is built from pine but also uses bits of plywood and MDF. It can move on the X and Y axes, using drawer sliders as bearings. The pair of blue stepper motors drive the threaded rods which move the platform and the laser mount. Just above the laser he included a small DC fan to keep it from burning up. The control circuitry is made up of an Arduino Nano and a stepper motor driver board. Catch a glimpse of the engraver cutting out some stencil material after the break.

There must be something about Spring that brings out the urge to work with laser diodes. We just saw a similar 1W cutter last week.

Continue reading “DVD Laser Diode Used To Build A Laser Engraver”

Wristwatch Made Of Sandwiched PCBs

wristwatch-from-sandwitched-pcbs

Here’s a wristwatch concept we haven’t seen before. Instead of trying to sandwich everything inside of a case it uses a stack of PCBs as the body of the watch.

[Mats Engstrom] wrote in to tip us off about his build. The design goes with LEDs which is nothing new. But unlike previous offerings [Mats] didn’t go with one LED for each minute. When the touch sensor in the middle of the watch is activated the twelve LEDs on the face will let you know the hour and the nearest five minutes. A video of this is embedded after the break.

The design uses three different circuit boards. The bottom board is the largest and provides slots through which the wrist bands can connect. It also serves as one of the two battery connectors. The second PCB is a spacer with a cutout for the coin cell that powers the device. The top board is where all the magic happens. It’s dual sided to host the LEDs and touch senor, with the PIC microcontroller and support circuitry on the other side.

Continue reading “Wristwatch Made Of Sandwiched PCBs”

OTM-02 Is A 3D Printed Wristwatch

3d-printed-wristwatch

We love looking at roll-your-own wristwatch projects. Getting a project small enough to carry around on your wrist is a real challenge. But we think the OTM-02 wristwatch really hit the form factor right on the mark.

OTM stands for Open source Time Machine. It’s the work of [Hairy Kiwi] and he managed to bring the guts of the watch in at a thickness between 6.5 and 7mm. That includes the LCD, PCB, piezo diaphragm, and the battery. The PCB itself is a four-layer board built on 1mm thick substrate. It’s running an EFM32 (ARM) microcontroller which comes with hardware USB support. The little door sitting open on the side of the 3D printed enclosure provides access to the micro USB connector which can be used to charge the 150 mAh battery inside. That may not sound like much juice, but if you set the display to show minutes only [Hairy] calculates a battery life approaching 175 days. If you just have to have the seconds displayed you can expect about two weeks between charges.

Like the name says, this project is Open Source.

[Thanks Liam]