LEGO Mill Produces Sculpted Models With Fantastic Resolution

[Arthur Sacek] has really got something with the 3D Mill he built entirely from LEGO pieces. As you can see, it uses NXT parts to control the cutter head along three axes. The drill bit that acts as the mill’s cutting head is not a LEGO part, but that’s [Arthur’s] only transgression.

The demo sculpture seen above was cut into a block of floral foam. The model was processed by Autodesk Softimage before being fed into the mill, where it took about two and half hours to complete the job. The foam comes out still in block form looking like a piece of outdoor carpeting. That’s because there’s no debris removal during the milling process. But hit it with the shopvac and you’ll reveal a physical model with surprising detail. We don’t think it comes close to the light-cured resin printing we’ve seen, but it would be a great asset if you’re doing some mold making.

Don’t miss [Arthur’s] video of the milling process after the break.

Continue reading “LEGO Mill Produces Sculpted Models With Fantastic Resolution”

Robotic Artist Listens To Your Criticism

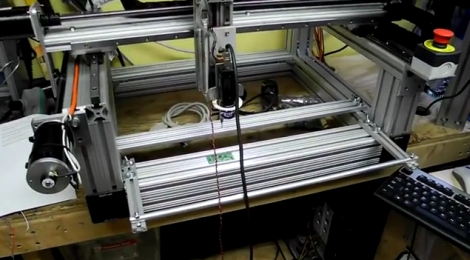
[Ben Grosser] built an interactive painting robot that’s pretty far removed from the LED and Arduino builds we usually see. The robot is adapted from one of the many CNC routers we’ve featured over the years. The control system is written in Python and uses genetic algorithms and a microphone to decide what to paint next.

Robot artists have been around for decades now. When [Harold Cohen] exhibited his robotic artist AARON, gallery patrons lined up to watch a robot paint. The paintings were originally just a monochrome line drawing that was later colored in by [Cohen]. [Ben] made his robot paint directly onto canvas with oil paints, so there’s no question of what the computer intends the final product to be.

[Ben] came up with a really neat build, but we’re wondering about having this robot artist on display inside a cavernous exhibition hall. Surely the echos from the servos and stepper motors would be picked up by the mic and interpreted by the painting algorithm. Barring some control systems, it would probably be the robot’s commentary on its own decent into madness.

Check out a video of the robot in action after the break, followed by a violin/robot duet the shows how the audio is interpreted.

Continue reading “Robotic Artist Listens To Your Criticism”

Etch-a-Sketch Automatically Draws A Tribute To Hack A Day

automated_etch_a_sketch_hack_a_day_logo

We have seen quite a few automated Etch-a-Sketch machines in our time, but when [Jason] wrote in to share his take on the subject, it came with a nice bribe attached. We are vain. It’s not something we are proud of, but when it comes to seeing the Hack a Day logo drawn out by a robot, consider us sold.

[Jason] has several CNC router builds under his belt, and thought it would be fun to automate his Etch-a-Sketch, a toy he loved as a child. He cut some gears and a face plate for the toy with his new CNC machine, then got busy programming his Propeller microcontroller to do his bidding.

A piece CNC software handles the conversion of a bitmap image to an outline, which is then converted to a CNC cutting path. The cutting path is translated into x/y coordinates by a bit of C++ code, before being fed into the microcontroller, which is running a small SPIN application he calls RoboSketch. The Propeller takes care of the rest, quickly drawing the image or pattern to the Etch-a-Sketch.

Continue reading if you would like to see a video of [Jason’s] tribute to Hack a Day, and don’t miss some of our previous automated Etch-a-Sketch coverage if this is something on your to-do list.

Continue reading “Etch-a-Sketch Automatically Draws A Tribute To Hack A Day”

RepRap Voyeurism

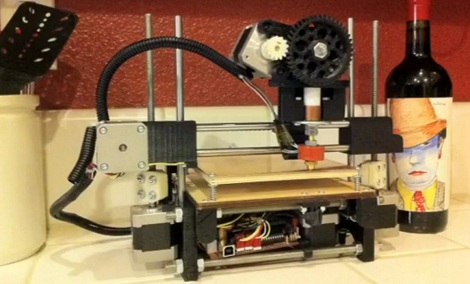
Hey everybody, [Nbitwonder] is building his own RepRap 3D printer. What’s special about that? Well, not much and and lot all at the same time. The art of building a self-replicating 3d printer still has a lot to do with luck and forum-crawling to make all of the decisions that go into this complicated project.

Back in March [Nbitwonder] did a collaborative project over at Thingiverse and scored himself a set of printed parts from a guy who already has one of these printers. He then order a set of the non-printable hardware and has since been assembling it. If you’re interested but haven’t already taken the plunge, there’s enough pictures and information in this set of posts to satisfy your craving… for now.

We say this build is an art because it goes beyond just plunking the pieces together. Take the print head, for instance. Instead of going with the extruder that is considered the default for a Mendel build, [Nbitwonder] is working on a variation called Greg’s Hinged Accessible Extruder. We can’t wait until the hardware assembly is done, because it’s the calibration that really interests us.

Incredibly Fast 3D Printing With The Ultimaker

ultimaker_3d_printer

There’s a new 3d printer on the block, and hot damn is it fast!

Hailing from the Netherlands, the Ultimaker 3D Printer has finally hit US shores, and aims to give the MakerBot a run for its money. The Ultimaker was designed by Utrecht Fab Lab manager [Siert Wijnia] along with two frequent lab patrons, [Erik DeBruijn and Martijn Elserman]. The trio were big fans of the MakerBot, but they wanted to make a better 3D printer.

And make a better printer, they did.

The Ultimaker can print using Either ABS or PLA plastic just like the MakerBot, but it is several magnitudes faster than its predecessor. While the MakerBot utilizes a moving build platform, the Ultimaker has a print head that can move along three axes. The moving print head, along with offset motors which are mounted on the printer’s frame allow the Ultimaker to build taller object than the MakerBot, at higher speeds.

That’s not to say that the MakerBot is bad in any way – rather, the presence of a new kid on the block shows how the evolution and progression of open source design benefits us all.

Keep reading to see a video of the Ultimaker in action, you won’t regret it!

Continue reading “Incredibly Fast 3D Printing With The Ultimaker”

Parametric Script Makes Laser Cutter Designs A Snap

[Tinkerer] bought a small cupboard from an antique store to fit nicely into his kitchen decor. After getting it home, he realized that some of the cubbyholes had originally housed drawers. The originals were long gone but this provided an opportunity for him to make the replacements seen above.

The first design approach that popped into [Tinkerer’s] mind was to draw the pieces in an editor like Inkscape. Some consultation with others at the local Hackerspace led him to this script-based parametric SVG design tool. We jumped right in to give it a whirl, clicking on Load –> Construction (category) –> Better Box. Once you’ve chosen the script, click on ‘Parameters’ on the left column and enter the sizing you want for your box. When all values are correct, click the renter tab, then export it as a Scalable Vector Graphic.

We’ve lamented time and again about our lack of a laser cutter, so we were unable to test this out. But we can’t see why it wouldn’t reproduce the same results that [Tinkerer] achieved.

Creating Halftone Pictures With A CNC Machine

cnc_halftone_images

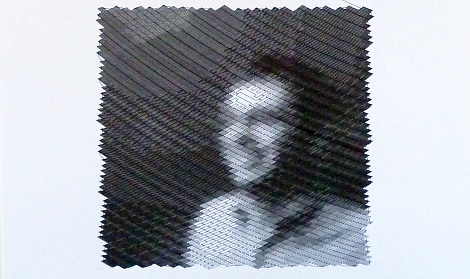
[Metalfusion], built himself a nice looking CNC machine and has been experimenting with some out of the box uses for his new tool. One novel use he is particularly fond of is creating pictures with his machine (Google Translation). While you might imagine that he is simply using the CNC as an engraver, literally drawing images on the surface of his workpiece, what he is doing is far more interesting.

He developed a small application that takes an image (jpeg, gif, or png) and converts it to a set of pixels, which can then be tweaked and skewed to his liking. The application exports the halftone image to a DXF file which can be fed into the CAD application that he uses to control his CNC machine. The CNC does the rest, using a v-shaped router bit to cut holes into his workpiece, generating a physical halftone picture from his digital image.

Thought the process does take some time to complete, the resulting images are well worth it. If you are interested in trying this at home using your own CNC machine, the DXF Halftone application is available on his site for free.

Continue reading to see his halftone generating CNC in action.

[via HackedGadgets]

Continue reading “Creating Halftone Pictures With A CNC Machine”