Portable Audio Rig That Turned Out Great

portable-audio-rig

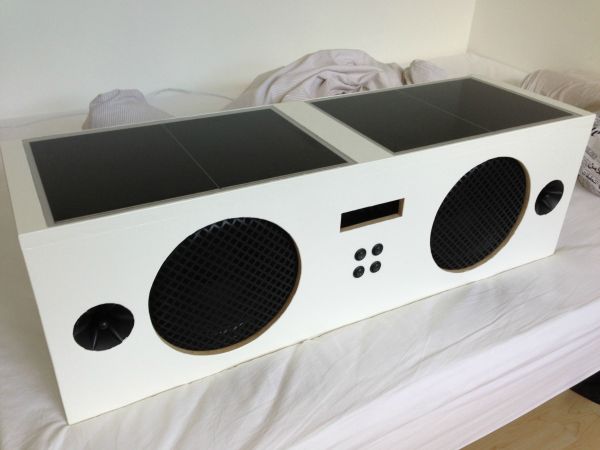
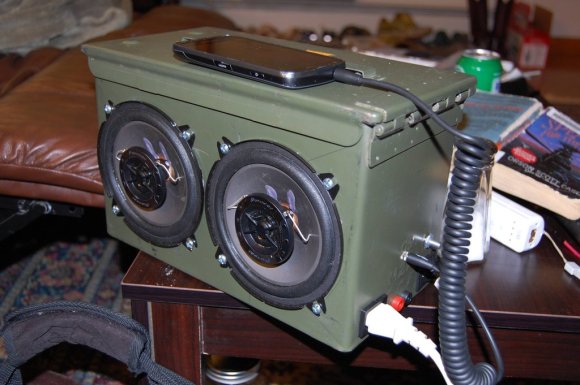
[Michael] wanted a stereo that he could use outside, be it at the beach, beside the pool, or while tailgating. He decided to build this boom box himself, and didn’t cut any corners when it came to a professional looking finish.

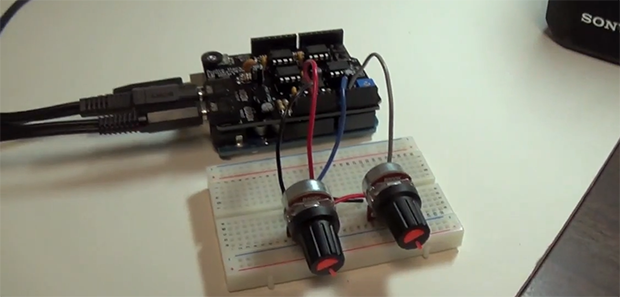
Because of the locale in which he plans to use the stereo he went with a set of marine speakers. They’ll have no problem standing up to water, and since they’re used in boats they should also be able to take a beating during transport. To feed it he uses a Lepai T amp which is seen above.

After cutting each piece of the case out of MDF he started working on the openings to receive the components. This involved quite a number of layout lines and some work with a compass to map out the circular openings. He built a recessed panel on the back to interface the power cord for charging. Inside is an 18 Ah battery. A set of switches lets him turn on the charger and choose between powering the amp from battery or from the power cord.

[via Reddit]

Color LED Matrix VU Meter Shows How To Use FFT With Arduino

If you’ve ever wanted to make your own VU meter but were scared off by the signal process you need to study this tutorial.

Hackaday Alum [Phil Burgess] developed the device using an RGB LED matrix, microphone, and an Arduino. You’ll notice that is doesn’t include an MSGEQ7 chip which we see in most of these types of projects. We have seen a few that use the Fast Fourier Transform to map the audio signal on the display as this one does. But [Phil’s] choice of an assembly language Library for ATmega chips makes this really simple to roll into your own projects.

The one drawback to the hardware choices made here is that there are only eight bits of vertical resolution. It takes a little creative interpretation to make this look good, but the use of color mixing really makes a difference. See for yourself in the demo after the break.

Continue reading “Color LED Matrix VU Meter Shows How To Use FFT With Arduino”

MOD Player For The Stellaris Launchpad

[Ronen K.] wrote in to tell us about the MOD playing Stellaris Launchpad project he recently completed. A MOD is a sound file for the computers of days long gone. But you’ll certainly recognize the sound of the 8-bit goodness that is coming out of this device.

To understand how a MOD file stores samples you might want to glance at the Wikipedia page. There are a ton of these files out there, but this implementation is meant for files with only four channels. For now the only external hardware used is an audio jack which needs a ground connection and a PWM signal on each of the two audio channels. [Ronen] is storing the files in flash memory rather than using an SD card or other external storage. This leaves 213k of space for up to six files that can be selected by the user buttons which cycle forward or backward through the list. See this demonstrated after the break.

The project ports existing code from an STM32 application. Since that is also an ARM microcontroller there’s not a ton of work that needed to be done. But he did have to write all of the PWM functionality for this chip. This PWM tutorial turned out to be very helpful during that process.

Continue reading “MOD Player For The Stellaris Launchpad”

Internet Radio Occupies An 80-year-old Radio Case

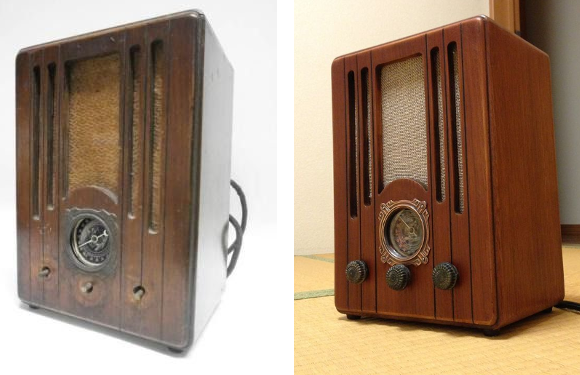
[Florian Amrhein] made use of some old hardware to build his own internet radio in a 1930’s radio case.

The original hardware is a tube-amplified radio which he picked up on eBay. There’s tons of room in there once he removed the original electronics and that’s a good thing because he crammed a lot of new parts into the build. The main one being an old laptop he had on hand. It’s got a 10″ screen which is too large for the opening, but that ended up being okay. He coded an interface with C and SDL which give him a visual representation of his favorite online streams. The knob to the right moves the red line when turned and causes the Debian box to change to the new stream using the Music Player Daemon. Two potentiometers control the tuning and volume, and there is also a rotary encoder which is not yet in use. All three are connected to the laptop via an Arduino.

Check out the finished product in the video after the break. It sounds quite good thanks to the small automotive speaker and amplifier also crammed into the old case.

If you don’t have a laptop lying around to use in a project like this consider a microcontroller and character LCD based system.

Continue reading “Internet Radio Occupies An 80-year-old Radio Case”

Headphone Light Show

Seriously, nothing says ‘Look at me!’ like these headphones. [Yardley Dobon] added a rainbow of colored electroluminescent wire to his headphones and made them pulse to the music. The video after the break shows the headphones bumping to the tunes. This is one of two versions of the project, the other runs the EL wire along the headphone wire itself. We’re a bit surprised that the high frequency from that parallel run doesn’t inject noise into the signal. We do enjoy seeing these in action, but in practice observers unfortunately won’t be able to hear the tunes to which the lights are pulsing.

It took us a little while to figure out that [Yardley] didn’t roll his own VU hardware. The inverter driving the EL wire is designed to bump to the music. But he did hack it to use an audio line rather than a microphone. He mentions that this has other uses, like allowing carefully crafted sound clips to precisely control the inverter.

Continue reading “Headphone Light Show”

A Pair Of Briefcase Boombox Builds

Here are two different briefcase speaker projects. [Dale] built the offering on the right back in high school and the upgraded version 2.0 more recently. He was inspired to send in a tip for the projects after seeing yesterday’s suitcase full of tunes.

The first version uses a pair of speakers pulled out of a car at the junkyard. They’re mounted on some particle board which beefs up the side of the plastic briefcase. The amplifier that drives it is mounted inside the case along with a battery to power the system. [Dale] included a crude storage bracket for the input cable and since the amp can drive four speakers there are connectors on the outside for two more.

Version two has quite a bit more polish. He doesn’t show that one off quite as much, but you can see there is a LED strip on the case that serves as a VU meter, as well as a numeric display which might be battery voltage? He mentions that this blows away any commercially available systems his coworkers have brought to the job site.

Video of both rigs can be found after the break.

Continue reading “A Pair Of Briefcase Boombox Builds”

Wireless Speaker Made Using Arduinos And 2.4 GHz Tranceivers

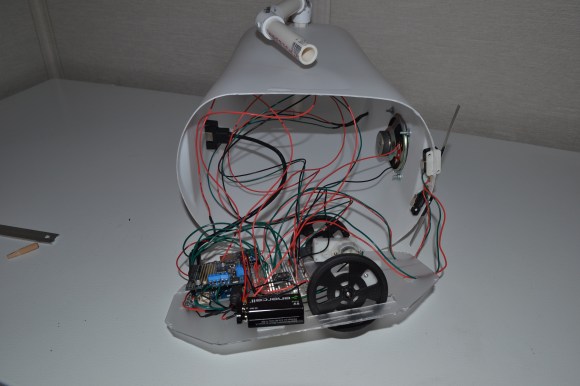
[Texane] picked up a 2.4 GHz transmitter/receiver pair for transmitting sensor data wirelessly. After using them in a project he wanted to try pushing them a bit to see what the limits are when it comes to higher bandwidths. He ended up building a wireless speaker that transmits audio at about 90 KB/s. That link leads to a subfolder of his git repository. The code for this project is in the RX and TX folders, with images and video in the DOC folder.

The radio hardware that he’s using is a Nordic nRF24L01P chip which is available on a breakout board from Sparkfun. [Texane] mentioned to us that the chip includes error checking, packet ACK, and automatic retransmission. But these add overhead that can slow things down. The chip does offer the option to disable these features to get lower level access to the hardware. That’s exactly what he did and he mentions that the example code he wrote for the transmitter and receiver make every cycle count. This makes us wonder if it’s the speed of the ATmega328 chip that is the bottleneck, or the transceivers themselves?